
Last Updated: October 24, 2026
Quick Summary
To fix an uneven patio, lift the affected pavers, excavate the failed bedding and base material, then rebuild the base in compacted layers of around 50mm before resetting the pavers on a consistent 20-30mm bedding sand layer. An uneven patio is almost always a base problem, so fixing the surface without correcting the cause means the dip returns.
An uneven patio is almost always a base problem, not a surface problem. The pavers or slab did nothing wrong, the material underneath moved, washed out or settled, and the surface followed.
A low spot appears after winter. A paver lifts at the corner. Water pools where it never used to.
Fixing the surface without fixing the cause is the most common mistake we see. It looks fine for a season. Then the same dip returns.
Settlement is the downward movement of ground under a patio. Heave is the opposite: soil pushing up, usually after it swells with water or dries and shrinks.
In practice, most uneven patios come down to a handful of causes:
Understanding which one applies to your patio decides everything that follows.
Before you lift a single paver, work out what you are dealing with. A repair aimed at the wrong cause fails within months.
Start with a simple walkover. Look for these signs:
Next, check the drainage. Watch where water runs during heavy rain. If it heads toward the patio instead of away, you have found your likely culprit.
Then look up. Overhanging trees mean roots below. New mulch beds where a tree once stood mean rotting roots and voids.
For concrete slabs, the check is different. Hairline cracks are cosmetic. Wider cracks with height difference across them, or slabs that rock, point to base failure or tree root pressure.
You do not need a full contractor setup for a small repair, but material choices matter as much as tools. Most failed DIY repairs come down to the wrong base material, the wrong bedding layer, or skipped compaction, not a missing gadget.
Here is a practical kit for paver repairs:
The base does the structural work; the bedding layer only provides a even bed for the pavers. Confusing the two is a common cause of repeat settlement.
A common pattern is to use too much bedding sand to make up height. Bedding sand should be a consistent thin layer, not a levelling filler. If you need more than about 30mm of sand to reach the right height, the base beneath is too low and should be rebuilt.
A plate compactor is worth hiring for anything beyond a couple of pavers. Hand tamping works for small spot repairs but rarely achieves the same density, and density is what stops the problem returning.
Compact base material in layers of around 50mm, not one thick layer, compaction effort only reaches the top portion of each lift. A hand tamper used thoroughly in thin layers suits small repairs; for anything larger, hire a plate compactor for the day.
Re-levelling pavers means lifting the affected units, correcting the base beneath them, and resetting them at the right height and fall. Done properly, it lasts. Done quickly, it fails.
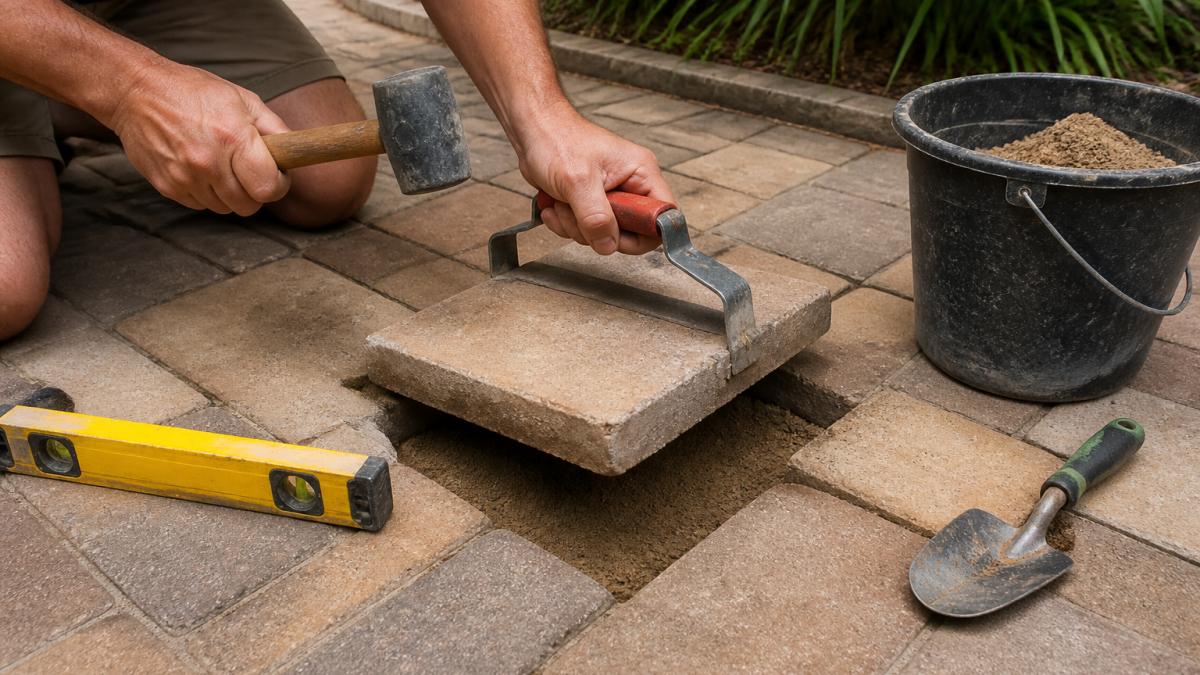
Follow these steps:
Compaction is the step most people rush and the one that matters most. Uncompacted base will settle again the first time it gets wet.
Compact in thin layers, not one thick one, several 50mm layers beat a single 150mm layer every time.
For concrete slab patios, the approach differs. You cannot lift a slab the way you lift a paver.
You can fix sunken pavers without touching the rest of the patio. Isolate the low area, lift only those units, and rebuild the base beneath them.
The key is matching the repaired pavers to the surrounding height exactly. Use a straight edge across the repair and the neighbouring course as you go.
Replacing the whole patio makes sense only when the failure is widespread. If more than a third of the surface is moving, patching becomes a losing game.
An uneven concrete patio is a different job from uneven pavers. You cannot lift and reset a slab, so first work out what kind of movement you have and whether the slab is still structurally sound.
Start by mapping the unevenness. Walk the slab and note where it dips, where it rises, and whether the movement is localised or across the whole patio.
Check the drainage at the same time. If water pools against the slab or runs toward the building, the fall is wrong and any repair will be under pressure from the start.
For slabs that have settled but are otherwise sound, slab lifting injects material beneath the slab to fill voids and raise it back into position.
For slabs with surface damage, cracks or staining but no ongoing movement, resurfacing gives you a fresh, level surface on top.
For slabs with widespread cracking, rocking, or movement across most of the area, replacement is usually the more reliable path.
If you are weighing up resurfacing an uneven concrete patio, it helps to know why concrete resurfacing fails so you can spot the warning signs before you commit.
Water is behind most uneven patios. Fix the drainage and the repair holds. Ignore it and you will be back here next winter.
A patio needs a fall of roughly 1 in 60 to 1 in 80 away from the building, so water runs off rather than sitting. Check yours with a spirit level after any repair.
Then check the wider drainage:
Repair suits isolated sunken or raised pavers with a sound base elsewhere. Resurfacing suits a structurally sound slab with surface wear, cracks or staining.
Here is how the three compare:
| Option | Best For | Typical Scope | Longevity |
|---|---|---|---|
| Repair | A few sunken or raised pavers | Lift, re-base, reset | Good if the cause is fixed |
| Resurface | Sound slab with surface damage | Clean, prep, coat | Good with correct prep |
| Replace | Widespread movement or failed base | Full removal and rebuild | Longest |
If you are leaning toward resurfacing, see patio concrete resurfacing ideas to picture the finished result. If you bring in a contractor, read how to choose a concrete resurfacing company before you get quotes.
If you want to compare resurfacing against a full rebuild, our step-by-step resurfacing guide walks through the process.
For larger or structural jobs, professional resurfacing is often the smarter path. Spray Pave Pro offers spray-on concrete, high-pressure cleaning, epoxy flooring and sealing solutions.
Most sinking comes from the base, not the pavers themselves. Water that pools in a low spot seeps into the bedding layer and washes fine particles away, so the paver loses support and drops. Tree roots lifting from below, poorly compacted road base at installation, and heavy loads on a thin base all speed this up. Before fixing an uneven patio, check where water sits after rain, because that usually points to the cause rather than just the symptom.
Small areas of sunken pavers are a reasonable DIY job. You need a paver puller or flathead screwdriver, a rubber mallet, a hand tamper, a spirit level, and fresh bedding sand or stone screenings. Lifting and re-laying a handful of pavers takes an afternoon. Larger areas, widespread settlement, or an uneven concrete patio with structural cracking are better handled by a specialist, since the fix depends on what is happening under the surface.
Get the drainage right first. The patio needs a slight fall away from the house so water runs off rather than pooling in the joint gaps. Compact the base material properly in layers, use a bedding layer of consistent depth, and refill joints with polymeric sand rather than loose sand. If the same low spot keeps returning, the base beneath it needs rebuilding, not just re-levelling on top.
Repair if the pavers themselves are sound and the problem is isolated to a few units or one low spot. Replace when pavers are cracked, crumbling or losing their surface, when more than about a third of the patio has moved, or when the base has failed across the whole area. If the patio is old and the jointing is failing everywhere, a full re-lay usually costs less over time than repeated patch repairs.
An uneven patio will not fix itself, and patching the surface without correcting the base or the drainage just delays the same problem. Whether you repair, resurface or replace, the decision should follow the diagnosis, not the other way around.
If you would rather hand the job to a team that has spent 23 years getting this right, Spray Pave Pro can assess your patio and recommend the option that actually suits it. Get a free quote and we will show you what a durable, level surface looks like.

