
Last Updated: September 7, 2026
Choosing to resurface old patio surfaces is the most cost-effective way to restore a tired outdoor area without the expense and disruption of a full replacement. The process to resurface old patio concrete involves cleaning the surface, repairing damage, and applying a thin cement-based overlay that bonds to the existing slab. Done properly, a resurfaced patio can look brand new for years; done carelessly, the finish will crack and peel within months. At Spray Pave Pro, we have over 23 years of experience in concrete resurfacing across Perth, and this guide walks you through every stage so you can decide whether to tackle it yourself or call in professionals.
The key to a lasting result is understanding that resurfacing is a system, not a single product application. Surface preparation, material selection, and curing conditions all determine whether your new surface survives its first summer.
Before starting, gather everything you need to avoid mid-job delays that can ruin a wet application. A concrete resurfacer sets quickly, so having tools within reach matters as much as having the right ones.
Essential tools:
Materials note: Choose a polymer-modified resurfacer designed for outdoor use. Standard concrete mix is too coarse and will not bond thinly enough for a smooth overlay.
Cleaning is the single most important step in the entire process. A concrete surface that looks clean often still contains oils, moss, or old sealers that will prevent the resurfacer from bonding correctly.
Start with a thorough pressure wash using a wide fan tip. Remove all dirt, moss, and loose paint. For stubborn oil stains, apply a degreaser and scrub before rinsing. Allow the surface to dry completely, then check the moisture content using the plastic sheet test: tape a square of plastic to the slab overnight. If condensation forms underneath, the slab is too damp to coat.
The surface must be in a saturated surface dry (SSD) condition before applying the resurfacer. This means the concrete is damp but has no standing water. Most DIY failures trace back to either a bone-dry slab that sucks moisture from the new layer too quickly, or a wet slab that prevents adhesion.
Not every imperfection needs to be fixed before resurfacing, but structural cracks and deep spalling do. The resurfacer is a thin overlay, typically 3-6 mm thick, so it cannot bridge significant movement or fill large voids (cement.org).
For cracks wider than 3 mm, open them with an angle grinder, clean out debris, and fill with a flexible crack filler designed for concrete movement (concretenetwork.com). For spalled areas where the surface has flaked away, use a patching compound and feather the edges smooth. Any repair must be fully cured before the resurfacer goes on, usually 24 hours.
Small hairline cracks and surface imperfections under 3 mm will be covered by the overlay itself. Trying to fill every tiny mark wastes time and can create uneven patches that show through the final finish.
Selecting the correct resurfacer is not just about grabbing the first bag labelled 'concrete resurfacer' from the hardware store. The product must be compatible with your slab's condition, your desired finish, and your local climate.
Understanding the Product Types
All concrete resurfacers are cement-based, but polymer modifiers and aggregate blends differentiate them.
Climate-Specific Selection Criteria
The 'one-size-fits-all' approach does not work in a country with climates as diverse as Australia's.
A Decision-Making Framework
Ask yourself these three questions:
| Patio Condition | Recommended Material | Best Finish | Climate Consideration |
|---|---|---|---|
| Sound slab, light wear | Standard polymer resurfacer | Broom or trowel finish | Use a light colour in high-UV areas |
| Heavy staining, pitting | High-build resurfacer with aggregate | Slip-resistant texture | Ensure proper drainage to prevent pooling |
| Frequent wet conditions (pool, coastal) | Resurfacer with waterproofing & salt-resistant additives | Broom finish for grip | Non-negotiable slip resistance |
| Decorative upgrade | Decorative overlay system with integral colour | Stamped, textured, or coloured | Test colour fastness in a discreet area first |
By considering your specific environmental conditions, you ensure the material you choose is optimal for a long-lasting, problem-free installation.
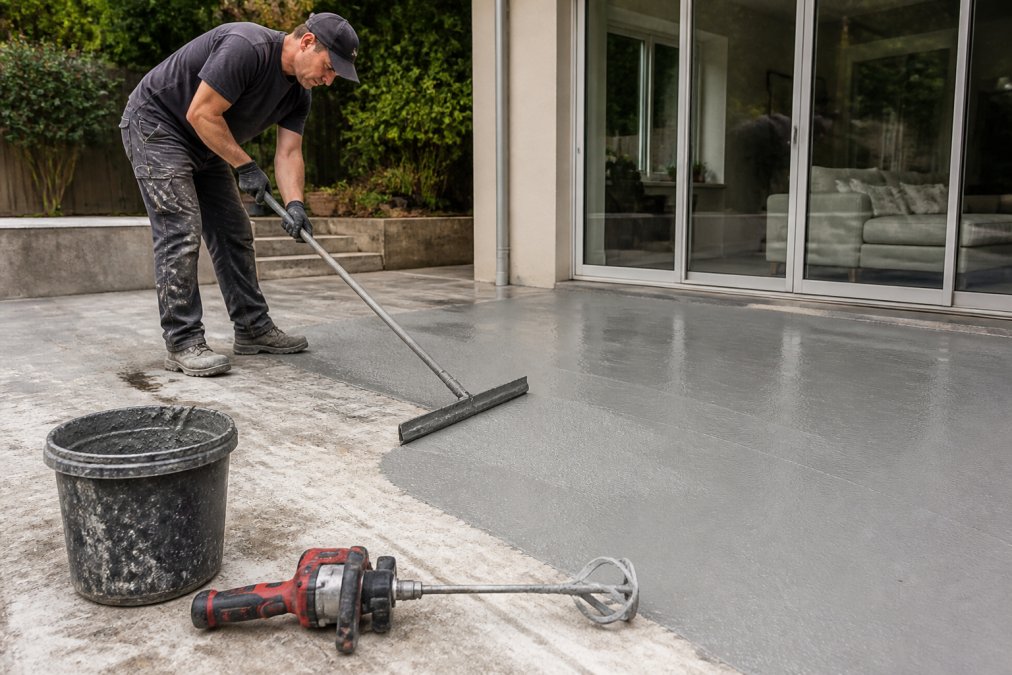
Mix the resurfacer to a pancake batter consistency: thick enough to hold its shape but fluid enough to spread easily. Use a drill-mounted paddle and mix for the full time specified on the bag, usually 3-5 minutes, scraping the sides to ensure no dry powder remains.
Work in sections you can complete before the material starts to set, typically 20-30 minutes in mild weather. Pour the mix onto the damp slab and spread it with a squeegee, then smooth with a long-handled trowel. For a non-slip finish, drag a broom across the surface while it is still wet, moving in one direction for a consistent texture.
The curing time is critical. Keep the new surface moist for the first 24-48 hours by misting it with water, especially in direct sun. Rapid drying causes shrinkage cracks that ruin the finish before it ever gets sealed.
Concrete sealer peeling off is the most common complaint we hear, and it almost always traces back to preparation rather than the sealer itself.
The primary causes are moisture trapped in the slab, a dirty or dusty surface, and applying sealer before the resurfacer has fully cured. Each creates a weak bond that lets the sealer lift in sheets. A secondary cause is using the wrong sealer type, such as a film-forming sealer on a surface that still releases moisture vapour.
Allow the resurfaced patio to cure for the full recommended period, usually 28 days for complete moisture release, before sealing. Clean the surface with a dedicated outdoor cleaner to remove dust, and apply the sealer in thin, even coats on a dry day. Two thin coats outperform one thick coat every time.
Concrete resurfacing cost per square metre varies significantly based on surface condition, chosen materials, and whether you work DIY or hire a contractor. Material costs are modest, but the real expense lies in labour and the equipment needed for proper surface preparation.
For a standard patio, a DIY approach saves on labour but risks costly failures if preparation is rushed. Hiring professionals removes that risk but adds a premium. The deciding question is scale: for small patios under 20 square metres, DIY is manageable; for large driveways or areas with structural damage, professional equipment and experience deliver a more durable result.
The Spray Pave Pro team handles projects of all sizes with a 100% satisfaction guarantee and quick installation. For homes preparing to sell, a professionally resurfaced patio enhances curb appeal and signals to buyers that the property has been maintained.
A resurfaced patio is an investment that requires a maintenance schedule to protect its value. The real difference between a patio that lasts a decade and one that fails in two years is what happens after the sealer dries. Here is a practical, year-by-year maintenance plan.
Year 1: The Critical Establishment Phase
Your primary job in the first year is to protect the surface as it fully cures and matures. Even after the initial 28-day cure, the overlay is still strengthening.
Years 2-5: The Protection and Prevention Phase
The sealer is your patio's primary defence against moisture ingress and UV damage. This is when it will start to show wear.
The Golden Rules of Maintenance
By following this schedule, you are protecting the structural investment you made in your home. A well-maintained, resurfaced patio can easily last 10 to 15 years, making it one of the most cost-effective home improvements you can undertake. If you ever feel the maintenance is beyond your time or skill, the team at Spray Pave Pro is available for professional sealing solutions.
Yes, you can resurface an old patio by applying a thin layer of concrete resurfacer, typically 3-6 mm thick. The existing slab must be structurally sound, clean, and properly prepared. Surface preparation is critical: any oil, grease, or moss must be removed with a pressure washer and suitable outdoor cleaner. Deep cracks and spalling need patching with a bonding agent and crack filler first. If the old concrete has significant structural damage or heaving, a resurfacer will not fix the underlying issue.
Concrete sealer peels off when the surface was not cleaned properly before application, when moisture is trapped in the slab, or when the sealer is incompatible with the substrate. Applying sealer to a patio with high moisture content prevents proper adhesion. To avoid peeling, ensure the concrete is fully cured and dry, test for moisture, and apply the sealer in the recommended temperature range. If sealer has failed, remove it completely with a chemical stripper before recoating.
The most budget-friendly way to resurface an old patio is to do it yourself using a concrete resurfacer. You will need a pressure washer, outdoor cleaner, crack filler, bonding agent, a squeegee, and a trowel. The material cost is relatively low, but the labour is intensive. However, a poor DIY job can fail quickly. For a durable, professional finish, concrete resurfacing cost per square metre varies based on preparation, materials, and labour, so getting a quote from a specialist is a sensible step.
Resurfacing is better when the existing concrete slab is structurally sound, with only surface damage like cracks, stains, or spalling. It is faster and far less disruptive than demolition and replacement, often taking just a few days. Replacement is necessary when the slab has severe structural damage, significant sinking, or extensive cracking across the entire area. If the patio is beyond repair, a new pour is the only option that will last.
