
Last Updated: August 18, 2026
Concrete sealer peel is one of the most frustrating outcomes after what should be straightforward maintenance. The good news is that concrete sealer peel almost always has a diagnosable cause.
Delamination is the technical term for the separation of a film-forming sealer from the concrete substrate. It happens when the bond between the two breaks down, and the root cause almost always falls into one of three categories: moisture problems, surface contamination, or environmental conditions during application.
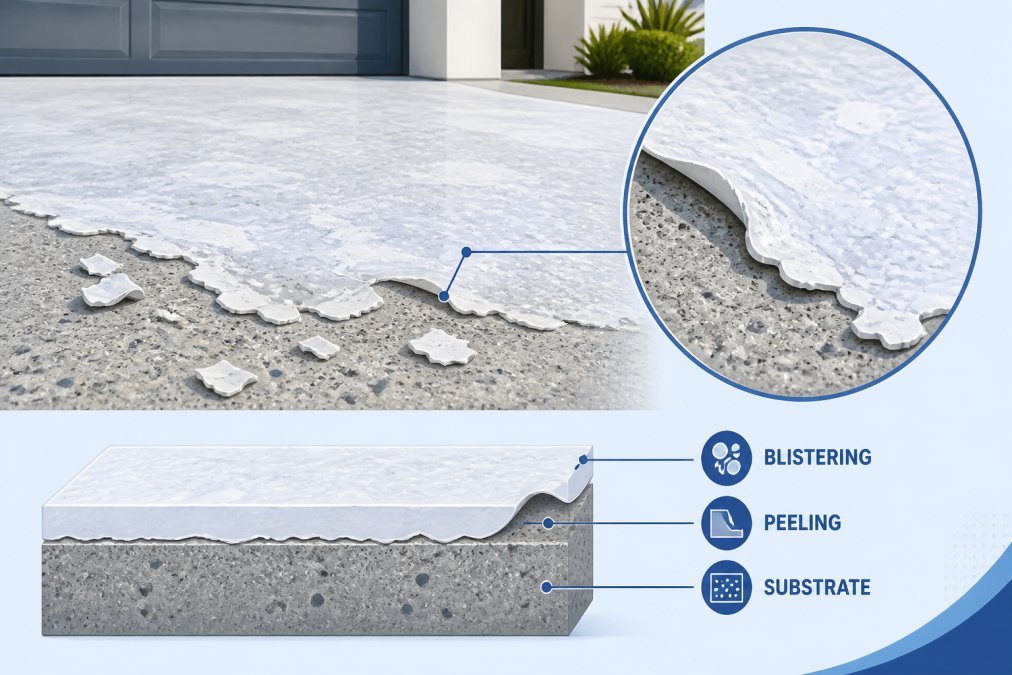
Moisture is the single biggest enemy of concrete sealer adhesion. Concrete is porous, and when water is present beneath a film-forming sealer, it has nowhere to go. As temperature rises, trapped moisture turns to vapour and pushes outward through the slab, generating enough hydrostatic pressure to physically lift the sealer off the substrate.
This is particularly common in slabs laid directly on ground without adequate vapour barriers, or in outdoor areas where water infiltrates from the sides and base. Applying sealer too soon after rain or before a freshly poured slab has fully cured dramatically increases the risk. Concrete typically needs at least 28 days to cure before sealing, and moisture content should be checked before application.
A clean surface sounds obvious, but it is where most DIY sealing jobs fall apart.
Concrete surfaces accumulate curing compounds from the original pour, efflorescence (white mineral deposits), oil stains, dust, algae, and old sealer residue. Any of these create a barrier between the new sealer and the concrete substrate, reducing bond strength to near zero. Surface contaminants are often invisible to the naked eye. Without acid etching or mechanical preparation to open the porosity of the substrate, the sealer sits on top of these contaminants rather than bonding to the concrete itself.
Concrete sealer requires a specific window of temperature and humidity to cure correctly. Applying sealer in direct summer sun on a surface exceeding 35°C causes the solvent to evaporate too quickly, creating blistering. Conversely, cool, humid conditions slow curing to the point where the film never achieves proper hardness.
Wind is an underrated factor, accelerating surface evaporation unevenly and leading to patchy adhesion. The ideal application window is a mild, overcast day with temperatures between 10°C and 30°C, low humidity, and minimal wind.
Most application errors come down to two things: too much product or the wrong product.
| Mistake | What Goes Wrong | Result |
|---|---|---|
| Over-application | Solvent trapped beneath thick film | Blistering, milky white spotting |
| Wrong sealer type | Poor chemical compatibility | Adhesion failure, flaking |
| Sealing damp concrete | Hydrostatic pressure builds | Widespread delamination |
| Skipping surface prep | Contaminants block bonding | Peeling at edges and high-traffic zones |
| Applying in extreme heat | Solvent evaporates too fast | Surface skinning, bubbling |
More is not better with concrete sealer. Thin-film application is correct for most acrylic sealers, and applying a coat that is too thick is one of the most reliable ways to cause failure.
When the film is too thick, the outer layer cures before the solvent from the lower layers has escaped. That trapped solvent pushes up through the partially cured film, creating bubbles and blistering. The same principle applies to applying a second coat before the first has fully cured.
Applying a new sealer over an existing one without checking chemical compatibility is a common mistake that produces dramatic failures.
Solvent-based and water-based sealers do not always work together. A solvent-based product applied over a water-based sealer can attack and soften the existing film, causing it to lift. The reverse can also cause adhesion failure. Without knowing what is already on the substrate, you are guessing at compatibility. A simple test: apply xylene to an inconspicuous area. If the existing sealer softens, it is solvent-based. If unaffected, it is likely water-based.
According to Concrete Institute of Australia's technical guidance on sealer selection, verifying substrate compatibility before resealing prevents the majority of adhesion failures in re-sealing projects.
Catching sealer failure early limits remediation work required.
Milky white spotting or blushing is often the first indicator. This whitish discolouration beneath the sealer film signals moisture entrapment and compromised adhesion.
Blistering and bubbling indicate solvent entrapment or moisture vapour transmission. Small bubbles appearing within days of application almost always point to over-application or sealing over damp concrete.
Flaking at edges and joints tends to appear in high-traffic zones first. If the sealer is lifting cleanly rather than crumbling, the substrate is likely sound and the failure is at the bond line.
Loss of sheen or patchy appearance indicates the sealer has worn through in spots, signalling the sealer has reached the end of its service life.
Removing peeling concrete sealer is the non-negotiable first step before any resealing work. Applying new sealer over a failing film is the single most common reason why concrete sealer peel recurs.
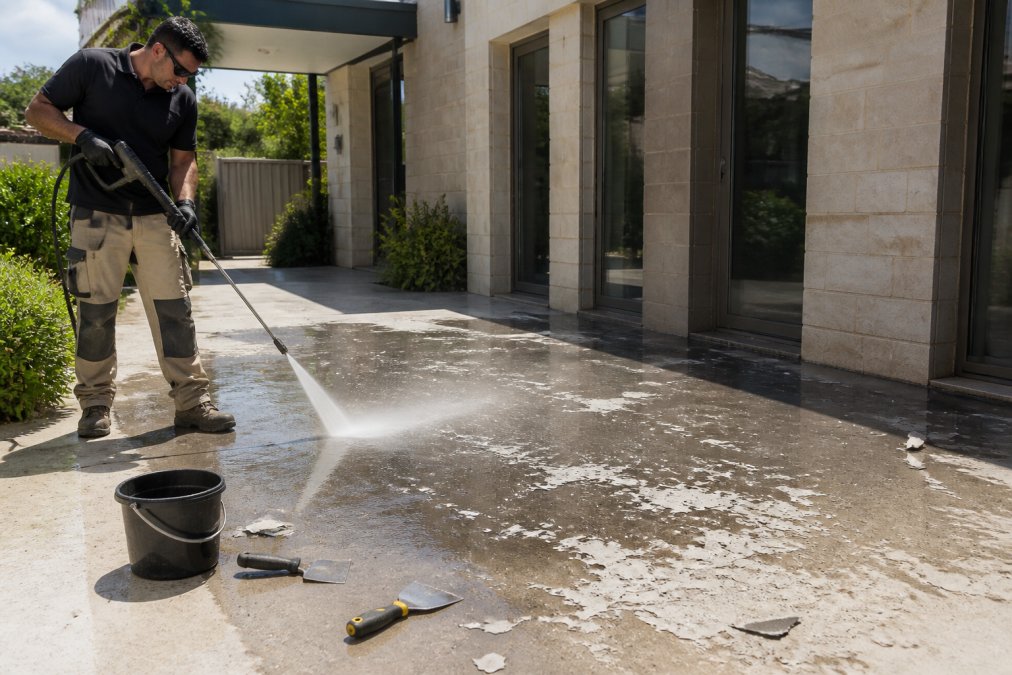
DIY removal is viable when peeling is localised and the sealer is a thin acrylic film. High-pressure washing at 3,000 PSI or above can lift loose sealer effectively, particularly with a chemical stripper applied beforehand. Mechanical methods using floor grinders or wire brush attachments work for stubborn residue. The key risk is incomplete stripping: leaving behind a ghost layer that compromises adhesion for the next coat.
Professional stripping is better when the sealer covers a large area, the existing product is thick-film epoxy or polyurethane, multiple incompatible layers have been applied, or the substrate shows damage or efflorescence. Professional contractors use industrial-grade chemical strippers or shot blasting equipment that removes sealer and opens substrate porosity in a single pass.
According to Master Painters Australia's surface preparation standards, thorough removal of existing coatings is the most critical variable in achieving long-term adhesion.
Preparation determines the outcome. A well-chosen sealer applied to a poorly prepared substrate will fail.
The correct preparation sequence is:
Cement Concrete & Aggregates Australia's guide to concrete surface preparation provides detailed technical guidance on surface preparation standards.
Solvent-based sealers penetrate deeper into the substrate, producing stronger adhesion on dense surfaces. They enhance colour and sheen more dramatically and resist moisture during application. The trade-off is higher VOC content and greater sensitivity to over-application.
Water-based sealers are lower in VOCs, easier to apply, and more forgiving of minor errors. They are practical for indoor applications where ventilation is limited. On highly porous concrete, water-based acrylics perform comparably to solvent-based products.
Penetrating sealers (silane, siloxane, or silicate-based) chemically react within the substrate to block moisture without forming a visible film. They cannot peel because there is no film to delaminate. For driveways where moisture vapour transmission is persistent, penetrating sealers are often the more durable long-term solution.
The right choice depends on substrate condition, existing sealer chemistry, exposure environment, and desired finish.
Call a professional when:
Spray Pave Pro has over 23 years of experience diagnosing and resolving concrete sealer failures. For complex failures, a professional assessment prevents repeating the same mistake twice.
Concrete sealer peel is solvable when the underlying cause is correctly identified and addressed. Whether failure stems from moisture entrapment, surface contamination, incompatible sealer chemistry, or poor application conditions, the fix follows the same logic: strip back completely, prepare the substrate properly, select the right sealer, and apply it correctly.
Spray Pave Pro offers professional sealing solutions backed by 23 years of experience and a 100% satisfaction guarantee. From high-pressure cleaning and surface preparation through to the final sealed finish, the team delivers results built to last. Get a free quote and find out what a correctly specified and professionally applied sealer can do for your driveway, patio, or commercial floor.
Sealer that flakes within a year almost always points to one of three problems: moisture trapped beneath the film at the time of application, over-application that prevented the solvent from escaping properly, or a surface that was not cleaned and etched before sealing. Film-forming acrylic sealers are especially prone to delamination when any of these conditions exist. Stripping the failed coating, correcting the preparation process, and applying a thin, even coat will produce a far more durable result.
No. Applying fresh sealer over a peeling coat traps the failing film underneath and the new layer will delaminate in the same way, often faster. The existing sealer must be fully removed, the substrate cleaned of all contaminants and efflorescence, and the concrete allowed to dry completely before any new product is applied. Skipping the removal step is one of the most common reasons concrete sealer peel problems keep recurring on the same surface.
Moisture is the single most common cause. Concrete releases moisture vapour continuously, and when a film-forming sealer is applied before that vapour can escape, hydrostatic pressure builds beneath the coating and forces it away from the substrate. This produces the characteristic blistering and milky white spotting seen on failed sealers. Sealing too soon after rain, pressure washing, or new pours dramatically increases the risk. The concrete surface should read below 5% moisture content before any sealer is applied.
A penetrating sealer applied to a correctly prepared substrate typically lasts 5 to 10 years with minimal maintenance. Film-forming acrylic sealers generally need reapplication every 2 to 3 years depending on traffic and sun exposure. Longevity depends heavily on surface preparation, the correct product choice for the substrate, and applying the sealer in thin, even coats. Surfaces exposed to heavy vehicle traffic, pool water, or direct sun will reach the lower end of those ranges without periodic maintenance.
This article was written using GrandRanker
