
Last Updated: October 2, 2026
If you're searching for an epoxy flooring cost per square meter review, no single figure applies to every job. Epoxy flooring cost depends on substrate condition, coating thickness, surface preparation, and whether you choose a DIY kit or professional application. This review breaks down each cost driver so you can judge quotes on substance, not just the bottom line.
Epoxy flooring is a resin-based coating applied over prepared concrete to create a hard, seamless, chemical-resistant surface. It bonds mechanically to the substrate, which is why surface preparation matters more than the coating itself.
A contractor's rate per square metre bundles several separate jobs. Strip it apart to compare quotes properly:
Two quotes for the same garage can differ by thousands and both be internally consistent. The usual reasons:
Consider two identical garages. The first is a sound, dry, indoor slab with light oil staining. The second has hairline cracks, a history of damp and old flaking paint.
Comparing quotes on the headline rate alone is misleading. Compare scope: what preparation is included, what thickness is specified, what warranty is offered, and what happens if moisture is found mid-job.
A coating that peels within two years because preparation was skipped doesn't save money, it costs the original job plus removal plus a second application. Compare cost per year of service, not cost per square metre on the invoice.
Concrete sealing and epoxy coating solve different problems. A penetrating sealer soaks into the concrete's pores to block moisture and stains, leaving the surface largely unchanged. Epoxy forms a film on top, adding colour, gloss and impact resistance.
| Factor | Penetrating Sealer | Epoxy Coating |
|---|---|---|
| Bond type | Chemical (inside pores) | Mechanical (surface bond) |
| Appearance | Natural concrete look | Coloured, gloss or matte finish |
| Best for | Driveways, patios, exposed aggregate | Garages, workshops, commercial floors |
| Recoating | Reapply every few years | Full recoat when worn |
| Stain protection | Good against water and salts | Excellent against oil and chemicals |
A topical sealant wears away under abrasion and UV, so recoating becomes routine. Epoxy resists abrasion and impact far better because the resin cures hard. The trade-off: epoxy needs a sound, dry substrate and can delaminate if moisture vapour transmission isn't addressed first.
Epoxy pulls ahead decisively here. Oil stains, petrol drips and most household chemicals wipe off a cured epoxy surface. A penetrating sealer slows staining but doesn't stop oil soaking into concrete porosity over time. For garages and workshops, that difference alone often justifies the higher upfront cost.
Concrete surface preparation requirements are where most coating failures begin. Epoxy needs a clean, profiled, dry substrate to form a mechanical bond.
The main preparation methods are:
A concrete densifier can harden soft, dusty surfaces before coating. Skipping moisture testing is the most common mistake on failed jobs: a floor that looks dry can still push vapour through and blister a coating from underneath.
The epoxy flooring installation process typically runs two to four days for a residential garage, including preparation and curing. The coating goes down fast; preparation and curing take longest.
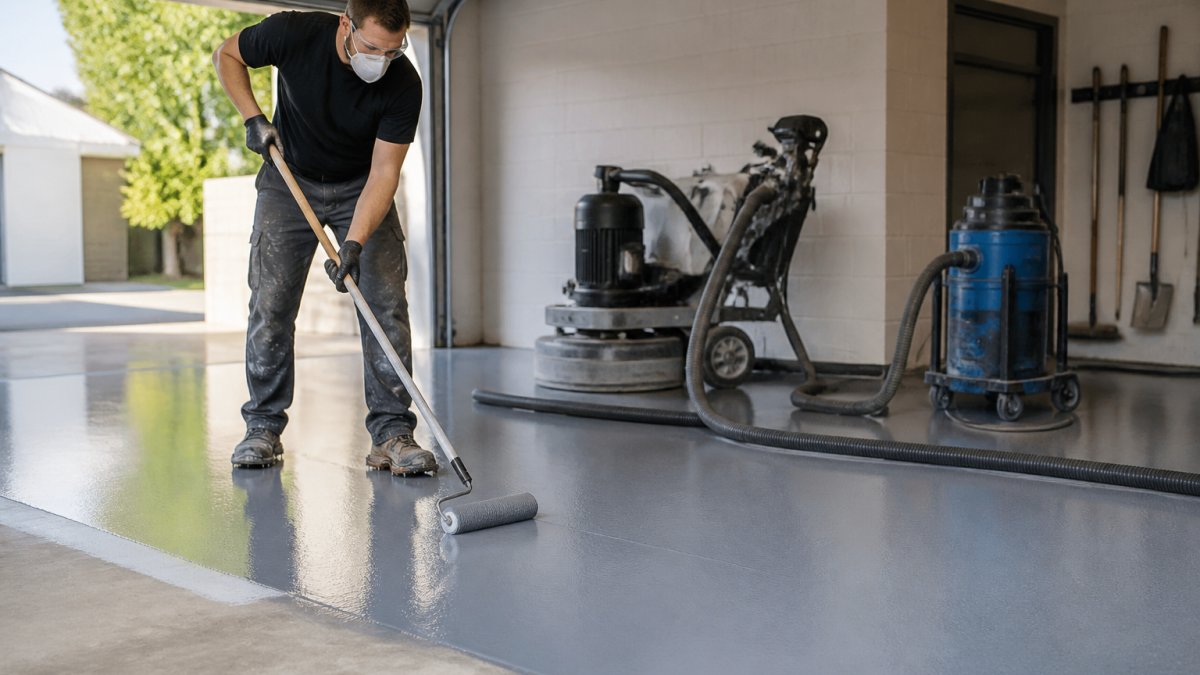
A typical sequence looks like this:
Most homeowners can walk on the floor within 24 hours and park on it after several days, depending on temperature and humidity. Cooler weather extends curing.
The DIY epoxy kit versus professional application decision comes down to how much prep you can genuinely do yourself. A kit saves on labour, but surface preparation determines whether the coating survives.
| Factor | DIY Epoxy Kit | Professional Application |
|---|---|---|
| Material cost | Lower per square metre | Included in quote |
| Labour | Your own time | Trained applicators |
| Surface prep | Often limited to etching | Diamond grinding and testing |
| Finish consistency | Variable | Uniform |
| Warranty | None | Workmanship guarantee |
For a small, sound, indoor slab, a DIY kit can work well. For cracked, oil-stained, or moisture-affected concrete, professional preparation is not optional. Spray Pave Pro handles the full process, from high-pressure cleaning and crack repair through to the final coat, backed by more than 23 years of resurfacing experience and a 100% satisfaction guarantee.
Most guides treat maintenance, repair and climate as afterthoughts. In practice these three factors decide whether a coating still performs in year eight, and they're where epoxy and penetrating sealers diverge most sharply.
Epoxy floors clean easily with a pH-neutral cleaner and a mop. Abrasion resistance holds up in high-traffic areas, and surface hardness resists hot tyre pickup better than most alternatives. Avoid acidic cleaners, which dull the finish, and abrasive pads on gloss surfaces.
A penetrating sealer is lower-effort day to day but is a consumable: it wears out of the pores and needs periodic reapplication to keep repelling water and salts.
Repairability is a genuine weak point for epoxy, and the mechanism matters more than the verdict.
The practical rule: epoxy rewards you with a harder, longer-lasting surface but punishes localised damage with visible repairs. Sealer is easier to touch up but needs touching up more often.
Climate affects epoxy and sealers differently, and the failure modes are not the same.
UV exposure. Intense sun yellows standard epoxy over time.
Moisture vapour transmission. This is the single biggest climate-related risk for epoxy.
Temperature swings and freeze-thaw. Where freeze-thaw cycles are regular, water trapped in surface pores expands as it freezes, cracking concrete and lifting coatings at the edges.
A lightly used residential garage and a workshop taking daily chemical spills and rolling loads need different systems. Climate matters too: a humid coastal slab and a frost-prone inland slab present different risks. The right question isn't 'which coating is best' but 'which coating suits this slab, this use and this climate', the question a properly scoped quote should answer.
The epoxy flooring cost per square meter review always circles back to one question: what is your floor actually going to be used for?
At Spray Pave Pro, we've spent over 23 years resurfacing concrete across residential and commercial properties, from high-pressure cleaning and crack repair to epoxy flooring and professional sealing.
Get a free quote from Spray Pave Pro and find out exactly what your floor needs before you commit to a coating.
It depends on what you need. A penetrating sealer soaks into the concrete pores and protects against moisture and stains but adds no surface thickness. Epoxy creates a film-forming layer that resists impact, chemicals and hot tire pickup. For a garage that sees vehicle traffic, oil spills and heavy use, epoxy offers better abrasion resistance and long-term value. For a low-traffic patio, a sealer may be enough.
The main risks are poor surface preparation and moisture vapor transmission. If the substrate is not properly prepared through diamond grinding, the coating can delaminate within months. Fresh concrete needs a curing time of 28 days before coating. Epoxy also becomes slippery when wet unless a slip coefficient additive or decorative flake is used. UV stability is another concern for outdoor areas, as standard epoxy yellows in direct sunlight.
Pricing depends on the system specified, substrate condition and site access. A basic epoxy resin coating sits at the lower end, while 100% solids systems and decorative chip finishes cost more due to material quality and application complexity. Because every slab differs, most installers provide a site-specific quote. Request a free quote from a specialist to get an accurate figure for your floor area and surface preparation needs.
Polyaspartic coatings cure faster and resist UV yellowing better than standard epoxy, making them a strong option for outdoor slabs. 100% solids epoxy systems offer superior impact resistance and zero VOC content for high-traffic areas. Decorative chip systems combine durability with slip resistance. The best choice depends on your climate exposure, traffic load and whether you need a fast return to service.
DIY epoxy kits cost less in materials but require significant manual preparation, including acid etching or diamond grinding, and careful mixing. Common mistakes include inadequate surface preparation, applying too thin, and coating damp concrete. Professional application ensures correct substrate assessment, moisture testing and even coverage. If your slab has cracks, hydrostatic pressure issues or heavy oil staining, professional installation is worth the investment.
A note on pricing: Every slab is different. Epoxy flooring cost depends on area, substrate condition, preparation required, and finish chosen. Spray Pave Pro provides project-specific quotes rather than flat rates, so you get an accurate figure for your actual floor.
Last Updated: September 20, 2026
Searching for a concrete painter near me usually means your driveway, patio, or pool surround has faded, cracked, or stained, and you want it fixed without a full replacement. Spray Pave Pro has spent 23 years restoring these surfaces across residential and commercial properties.
Residential and commercial jobs differ more in specification than technique. A home driveway needs a hard-wearing surface that resists tyre scuffing and looks sharp from the street. A retail or industrial floor needs a coating that handles foot traffic, trolleys, and cleaning chemicals without losing its slip rating.
For homes, the usual scope covers:
The real differences sit in four areas most service pages never spell out:
| Specification | Residential | Commercial |
|---|---|---|
| Slip rating | Often P3 for wet outdoor areas | Frequently P4 or P5 for kitchens, ramps, and trolley traffic |
| Cure window | Flexible, can stage across days | Tight, often overnight or weekend shutdowns |
| Chemical exposure | Pool chlorine, sunscreen, general cleaning | Degreasers, sanitising agents, hot water wash-downs |
| Coating system | Acrylic sealer, decorative resurfacing, epoxy | High-build epoxy, polyaspartic, urethane cement in wet processing areas |
Spray Pave Pro handles both residential and commercial work, with quick installation that keeps disruption short. The specification is matched to the surface and the traffic it faces, not a one-size-fits-all product.
Proper cleaning is not a formality. Every coating system, from acrylic sealer to full epoxy, needs a clean, sound substrate to bond to. This stage decides whether the finish lasts three years or fifteen, and it is the stage most DIY attempts and cheap quotes skip.
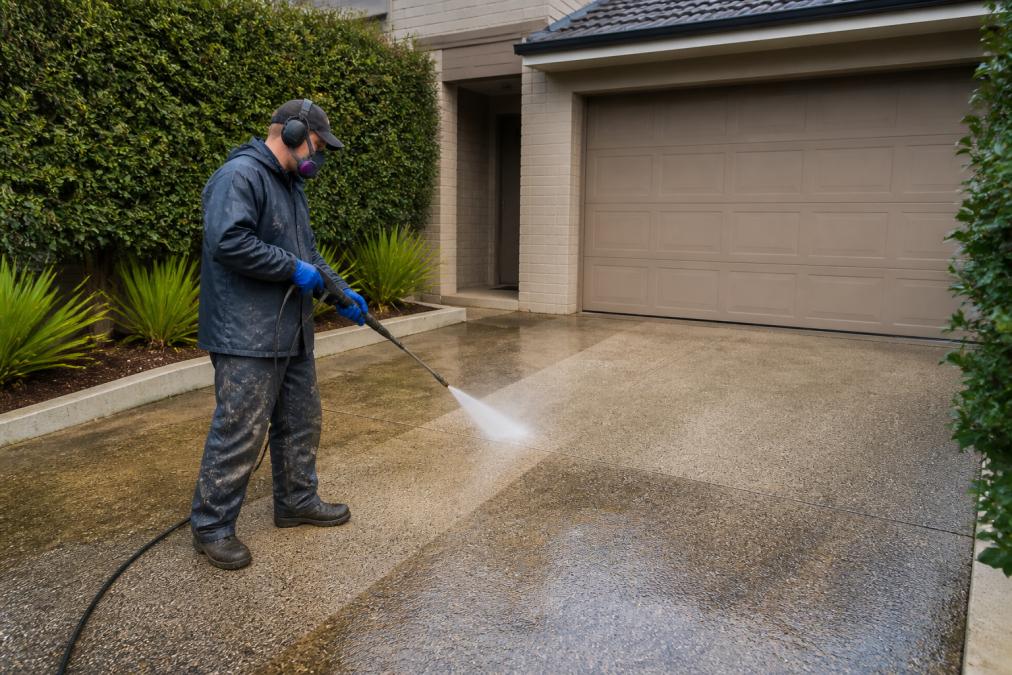
The process starts with pressure cleaning to strip dirt, mould, oil, and old failing coatings. Each contaminant behaves differently:
After cleaning comes concrete repair: filling cracks, patching spalled sections, and grinding back high spots. Concrete etching may open the surface profile so the coating can grip, but grinding or shot blasting is often preferred over acid etching because it produces a more consistent profile and leaves no residue to neutralise.
A common method is the plastic sheet test: plastic taped to the slab for 24 hours, with any condensation underneath indicating moisture vapour rising through the concrete. More accurate readings come from a calibrated moisture meter or calcium chloride test. The result determines whether the slab needs a moisture-tolerant primer, a vapour barrier, or more drying time.
The cleaning routine does not end when the job is done, how you maintain the surface directly affects how long the coating lasts:
Concrete resurfacing cost depends on surface area, slab condition, coating system, and preparation required. There is no flat rate, and any quote given without seeing the site is a guess.
The factors that move a quote most:
| Factor | Why It Matters | Effect on Cost |
|---|---|---|
| Surface area | More square metres, more material and labour | Scales directly |
| Crack and damage repair | Deep cracks need structural patching, not filler | Increases with severity |
| Coating system | Acrylic sealer vs epoxy vs decorative finish | Varies widely |
| Access and drainage | Tight access slows equipment movement | Increases labour time |
| Existing coatings | Old coatings must be stripped first | Adds a preparation stage |
Epoxy flooring installation follows a set sequence, and rushing any stage shortens the coating's life. The process runs across several days, with curing time built in.
The best low maintenance option for non-slip pool surfacing is a textured epoxy or resurfacing system with an integrated slip-resistant aggregate, sealed against moisture. It holds its grip when wet and needs only routine cleaning.
What to look for:
DIY concrete painting looks cheaper on the material receipt. It rarely is once you account for preparation equipment, coating failures, and rework.
Here is the honest comparison:
| Factor | DIY | Professional |
|---|---|---|
| Upfront cost | Lower material cost | Higher, includes labour |
| Equipment | Pressure washer, grinder, applicators | Included |
| Surface preparation | Often underdone | Full prep and repair |
| Coating life | Frequently short | Longer with correct system |
| Rework risk | High if prep is skipped | Low, backed by guarantee |
| Time | Weekends over several weeks | Days |
A correctly applied coating on a well-prepared slab outlasts a cheap coating on a poorly prepared one by a wide margin. Longevity comes from correct specification, proper application, and basic ongoing care.
Keep it simple:
Resurfacing is usually the better choice for driveways and patios with cracks, stains or uneven texture. A concrete painter near me will often recommend a spray-on paving system because it bonds to the existing slab and hides flaws, whereas paint sits on the surface and can peel within a year. Resurfacing also lets you add a slip-resistant coating, which matters around pool areas. If your concrete is structurally sound and only needs a colour refresh, a stain or sealer may be enough, but for long-term durability, resurfacing wins.
A professionally applied coating can last 5 to 10 years or more, depending on the system used and how well it is maintained. Epoxy coatings on garage floors typically last longer than basic acrylic sealers, especially when a protective topcoat is added. The key is surface preparation: if the concrete is properly cleaned, etched and primed, the coating adheres better and resists UV damage. Regular sweeping and occasional re-sealing will extend the life of any coating, particularly in outdoor areas exposed to sun and rain.
No, you should not paint directly over most existing sealers. Paint and epoxy need to bond with the concrete itself, and a sealer creates a barrier that prevents adhesion. If you try to coat over a sealed surface, the new layer will likely peel or flake within months. A professional concrete painter will first test the surface to see if a sealer is present, then remove it using a chemical stripper or mechanical grinding before applying any new coating. Skipping this step is one of the most common reasons DIY coatings fail.
They are strongly recommended for any outdoor concrete that gets wet, especially pool surrounds, driveways and patios. Standard smooth coatings become dangerously slippery when wet, increasing the risk of falls. A slip-resistant coating adds texture that grips even in heavy rain or splashes. Many non-slip systems also include UV resistance to stop fading and a moisture barrier to protect the concrete underneath. If you have children, elderly visitors or a pool, a slip-resistant finish is not optional; it is a safety essential.
