
Last Updated: October 6, 2026
Spray-on concrete and stamped concrete are two fundamentally different approaches to resurfacing and finishing concrete.
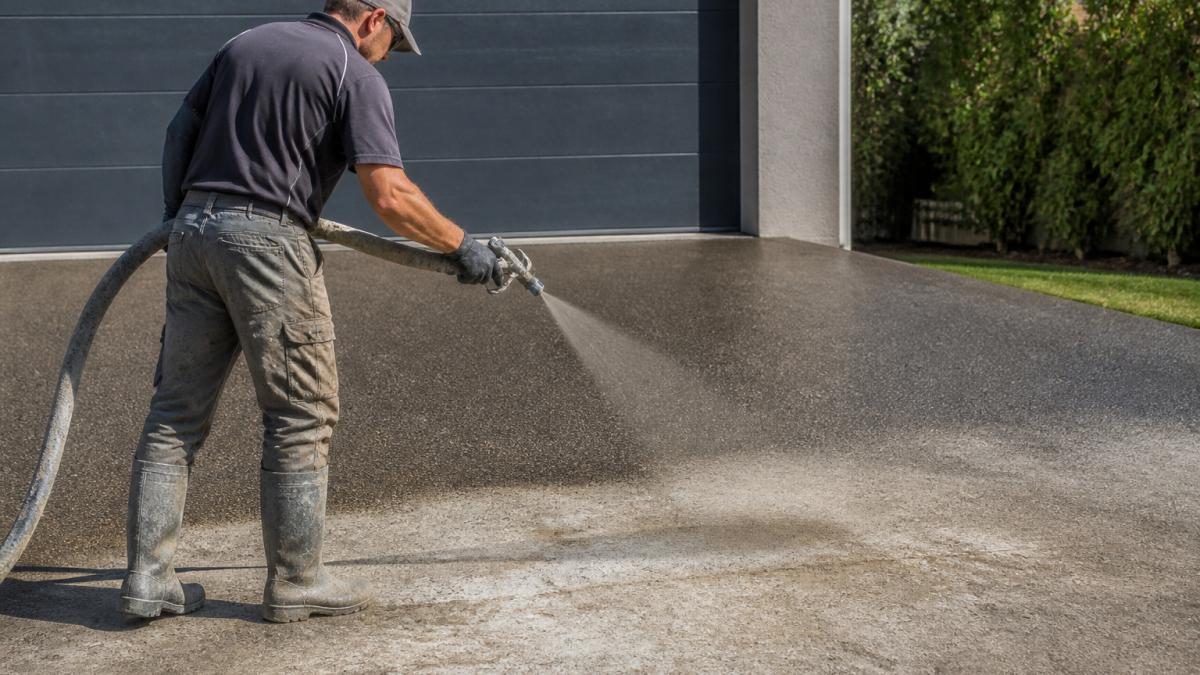
Spray-on concrete (also called spray-applied coating or spraycrete) is a liquid coating sprayed onto existing concrete, bonding to the substrate and hardening into a new wearing layer.
The key difference is application: spray-on concrete works over what's already there, while stamped concrete requires new pouring or significant preparation. That affects cost, timeline, durability, and suitability.
Spray-on concrete excels when restoring deteriorating surfaces quickly without demolition; stamped concrete suits fresh installations where you want intricate patterns built into the surface.
The choice comes down to your situation: resurfacing existing concrete with cracks and stains, or installing a brand-new decorative surface? That answer usually determines which option suits your budget and timeline.
The two finishes are priced on different bases. Spray-on concrete is a coating over an existing slab, so you pay for preparation, product and labour.
Because rates move with product choice, slab condition and access, treat any single national figure with suspicion. Rely on the structure of the quote instead.
What drives a spray-on concrete quote
What drives a stamped concrete quote
Timeline and what it means for cost
Stamped concrete is a construction project. A new pour needs formwork, reinforcement, the pour, a window to apply colour and stamp the pattern before the concrete sets, then curing.
Lifecycle cost, not just upfront cost
A spray-on coating is a recurring cost: reseal every two to three years and recoat when the coating wears through.
A practical way to compare is to add up, over a ten-year window:
For a sound existing slab, spray-on usually wins on total ten-year cost because you avoid demolition and a new pour.
For a site-specific figure, book an on-site assessment. A photo or phone description cannot reveal slab condition, drainage fall or access constraints, the variables that move the number most.
Lifespan figures only help if you understand what ends a surface's life. Spray-on coatings and stamped concrete fail differently, and that matters more than any single number of years.
How a spray-applied coating ages
A spray-on coating is a thin wearing layer bonded to the slab beneath it. Its life is governed by three things:
A well-prepped, well-sealed coating on a stable slab commonly gives five to ten years before a recoat, with resealing every two to three years.
How stamped concrete ages
Stamped concrete is a structural slab with a decorative surface, so its failure modes are those of concrete plus those of a finish:
A properly built and maintained stamped slab can last fifteen to twenty-five years or more, assuming correct base compaction, reinforcement, cut joints and maintained sealer.
Repairability is the real durability difference
Stamped concrete is far less forgiving. A crack through a stamped pattern cannot be hidden by filling it, because the repair won't match the surrounding texture and colour.
What to check in a warranty
Warranties on decorative concrete vary widely, and the wording matters more than the length. Look for:
Climate and site factors
Durability is not just about the product. Intense UV accelerates sealer breakdown and colour fade.
Guide to concrete sealing and maintenance intervals
The honest summary: a spray-on coating is a renewable surface with a shorter cycle and easier repairs, while stamped concrete lasts longer but costs more to replace when it fails.
Stamped concrete offers distinctive visual appeal. Its patterns convincingly mimic brick, tile, cobblestone or custom designs, giving your driveway or patio a high-end look that's hard to achieve with other finishes.
Stamped concrete pros:
Stamped concrete cons:
Stamped concrete suits new builds or major renovations where you'll invest time and money upfront for a distinctive, long-lasting finish. If your existing concrete is structurally sound but aesthetically tired, spray-on concrete often delivers better value.
Concrete resurfacing applies a new wearing surface over existing concrete that's still structurally sound but damaged, stained or worn. Spray-on concrete is the most practical option because it bonds directly to the old surface without removal.
Resurfacing works best when the underlying concrete is not severely cracked or heaving. Minor cracks (under 6mm) can be filled before coating. Significant structural damage may require removal and replacement rather than resurfacing.
The advantage over replacement is cost and speed: you avoid demolition and disposal, and your driveway is restored in days rather than weeks. For homeowners selling up or facility managers minimising downtime, resurfacing is a practical middle ground.
Spray Pave Pro specialises in assessing whether your concrete suits resurfacing or whether replacement is the better long-term investment. In most cases, resurfacing delivers excellent results.
Spray-on concrete is significantly easier to maintain than stamped concrete. Regular pressure washing keeps it fresh, most stains wash away easily, and the non-porous sealed surface resists dirt better than traditional concrete.
Sealer maintenance is key to longevity. A quality sealer should be reapplied every 2-3 years, depending on exposure and traffic, a straightforward process that extends coating life and maintains appearance and slip resistance.
Repairs are simple: small chips or worn areas can be spot-repaired with fresh coating, without patching the entire surface.
Stamped concrete needs more intensive maintenance. Sealer must be reapplied regularly to prevent pattern fade and protect the concrete from water infiltration. Stains are harder to remove from textured surfaces, and cracks are difficult to repair without affecting the pattern.
For pool decks and wet areas, spray-on concrete with non-slip additives is easier to keep safe and clean, the smooth, sealed surface resists algae and mould better than textured stamped concrete.
If you're preparing to sell, curb appeal matters. Both spray-on and stamped concrete improve your property's presentation, but return on investment depends on your market and the condition of existing surfaces.
Stamped concrete creates a distinctive, high-end look that appeals to buyers seeking premium finishes, adding perceived value particularly in competitive markets.
Freshly applied spray-on concrete with a quality finish presents a clean, well-maintained appearance that signals the property has been cared for.
Buyers also value durability and low maintenance. An easy-to-clean spray-on surface may appeal more to busy households than a stamped finish needing frequent sealing and careful upkeep.
For maximum curb appeal and value, focus on the condition of your existing surfaces. A freshly restored driveway, spray-on or stamped, beats a neglected one every time.
Choosing between spray-on and stamped concrete comes down to your situation: the condition of your existing surfaces, your timeline, your budget and your aesthetic.
Our team can assess your concrete, discuss the pros and cons of each approach, and recommend the solution that delivers the best value for your needs. Get a free quote today and discover how we can restore your driveway or outdoor surface to like-new condition.
Spray-on concrete lifespan typically ranges from 5 to 10 years, depending on climate, traffic, and maintenance. High-quality sealing and regular cleaning extend this period. Factors like UV exposure, freeze-thaw cycles, and moisture affect durability. With professional maintenance and resealing every 2-3 years, spray-on concrete can maintain its appearance and protective qualities well into its second decade.
Spray-on concrete cost per square metre depends on surface area, existing concrete condition, design complexity, and sealer type. Smaller projects typically cost more per square metre than larger ones. For an accurate quote tailored to your driveway or patio, contact Spray Pave Pro directly. They can assess your site and provide pricing based on your specific needs and budget requirements.
Yes, concrete resurfacing over existing concrete is one of spray-on concrete's key advantages. It works well on driveways with minor cracks, stains, or surface wear. However, deep structural damage or severely compromised foundations may require repair first. Proper surface preparation, cleaning, patching, and priming, is essential for adhesion and longevity. Spray Pave Pro assesses each surface to determine suitability before resurfacing.
Spray-on concrete generally requires less maintenance than stamped concrete. Its smooth, sealed surface resists staining and is easier to clean with high-pressure water. Stamped concrete has textured grout lines that trap dirt and require more frequent scrubbing. Both benefit from regular sealing, but spray-on's simpler surface makes routine care faster and less labour-intensive over time.
Last Updated: October 6, 2026
Concrete driveway restoration is the process of repairing and resurfacing an existing concrete slab rather than replacing it. For most homeowners weighing enhance curb appeal vs low maintenance for concrete driveway restoration, you rarely get both at full strength.
The good news is that modern restoration gives you a middle path. According to CSIRO's research on concrete durability and surface performance, the life of a concrete surface depends heavily on how well it sheds water and resists UV exposure, which is exactly what a good resurfacing system controls.
Concrete driveway resurfacing means applying a new decorative or protective layer over your existing slab instead of demolishing and repouring it. Replacement means heavy machinery, weeks of disruption and a much larger bill.
The process starts with assessment. We check for structural cracks, movement, and drainage problems, because a coating will not fix a slab that is failing underneath.
Preparation decides how long the finish lasts. High-pressure cleaning strips away dirt, old sealers and loose material. Cracks and spalls are then filled with repair mortars before any overlay goes down.
Skip this step and you are coating a surface that is already moving, the single most common reason a resurfaced driveway fails early.
A properly prepared and applied resurfaced driveway typically lasts 10 to 15 years with basic care, and many exceed that with regular sealing.
Spray-on concrete driveway finishes are textured coatings that mimic exposed aggregate, slate or sandstone at a fraction of the cost. If kerb appeal is your goal, this is where restoration earns its keep.
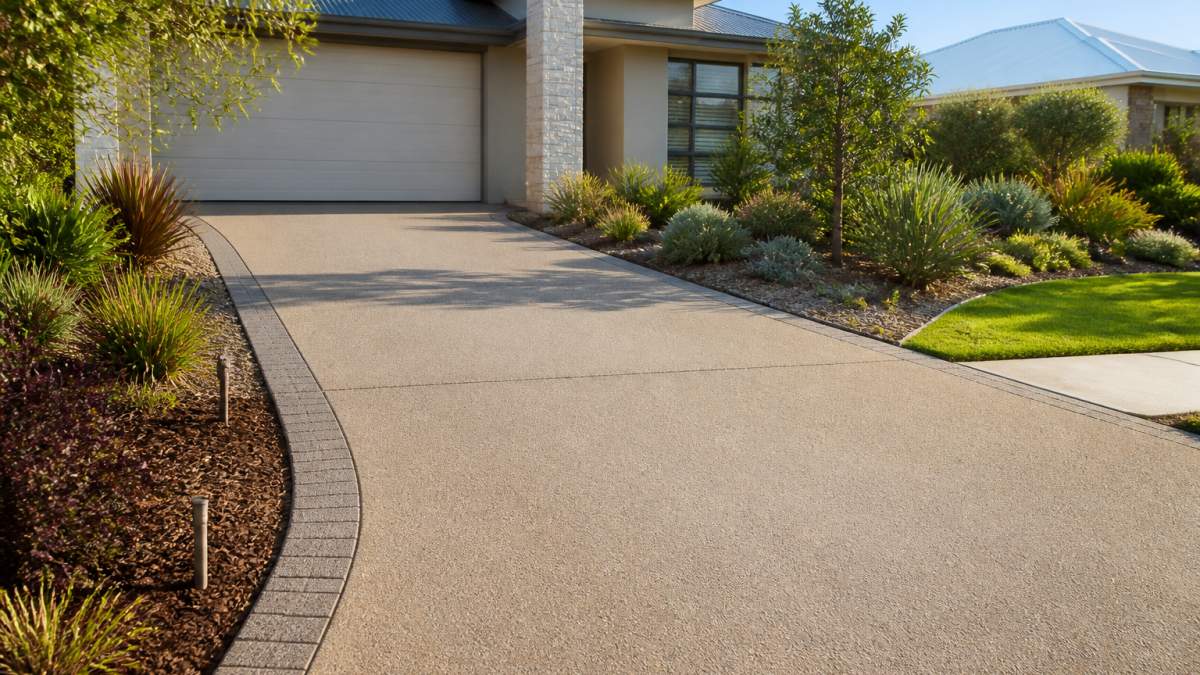
First impressions form fast. A cracked, stained slab pulls down the whole facade, while a clean, evenly coloured surface makes the same house look maintained.
Exposed aggregate remains the classic choice: it hides dust and tyre marks and offers natural slip resistance, suiting families and wet weather.
Decorative concrete broadens the palette: stamped concrete imitates pavers or stone, while coloured concrete matches your brickwork or render.
Warm neutrals and earthy tones work with most local facades. Lighter colours reflect heat better, which matters on a west-facing driveway that bakes all afternoon.
Texture is not just cosmetic: a slightly rougher profile improves grip underfoot and under tyres, worth considering if your driveway slopes.
Low-maintenance finishes reduce how often you clean, seal and weed, but no outdoor concrete surface is truly maintenance-free. The gap between finishes is about frequency and trigger points, not elimination. Here is a realistic schedule by finish.
Three mechanisms drive upkeep:
Weeding is the wildcard. Weeds appear where water and organic matter collect, expansion joints, control joints, the driveway-to-garden-bed boundary, and the apron where the driveway meets the street. A sound sealer and clean, well-filled joints do most of the work; if weeds keep returning, the cause is usually an opened joint or a damp drainage line, not the finish itself.
A five-minute walk-over twice a year catches almost everything:
| Finish | Cleaning Frequency | Resealing Interval | Inspection Trigger | Best For |
|---|---|---|---|---|
| Sealed smooth concrete | Monthly wash | Every 2-4 years | Water no longer beads | Minimal upkeep |
| Spray-on textured overlay | Quarterly wash | Every 2-3 years | Chalking or colour fade | Balanced look and care |
| Exposed aggregate | Annual pressure clean | Every 2-3 years | Dirt no longer lifts | Hiding marks |
| Stamped decorative | Monthly sweep and rinse | Every 2-3 years | Grooves holding debris | Maximum kerb appeal |
Concrete driveway sealing and maintenance is the single biggest factor in how long your finish looks new. Sealer forms a barrier against water, oil, UV and staining, the difference between a surface that ages gracefully and one that greys out.
Resealing is not a wipe-on job. The surface must be cleaned, dried and checked for damage first, because trapping moisture under a new coat causes peeling.
Timing depends on traffic, sun exposure and sealer type, so your installer should give a realistic interval rather than a blanket figure.
Concrete driveway repair versus resurfacing comes down to what is wrong with the slab. Repair targets isolated defects; resurfacing renews the whole surface and hides widespread cosmetic damage.
Choose repair for localised problems, a few cracks, a chipped edge, one stained section. Choose resurfacing when damage is spread across the driveway, the colour has faded unevenly, or you want a different look entirely.
Restoration is not always the answer.
For everything else, resurfacing is usually the faster and more affordable route.
Cost per square metre varies with finish, preparation and job size, so a responsible quote is always driveway-specific. What you can compare is the cost structure and how it behaves over the surface's life, where the curb appeal versus low maintenance decision is actually made.
Upfront price alone is misleading; compare total cost of ownership over the expected service life:
A finish that costs more upfront but reseals less often and lasts longer can beat a cheaper finish that needs resealing sooner, and the reverse is also true. The crossover point depends on how long you plan to stay and how much sun and traffic the driveway sees.
A restored driveway helps at inspection time. It lifts kerb appeal, and buyers read a maintained exterior as a maintained home. Treat it as presentation rather than a guaranteed return, it makes the property easier to sell and supports the asking price, but it is not a renovation you should expect to profit from.
| Your priority | Best-fit finish | Why |
|---|---|---|
| Maximum kerb appeal, willing to reseal | Stamped decorative or spray-on textured | Strong visual impact; reseal every 2-3 years |
| Balanced look and upkeep | Spray-on textured overlay | Good appearance with moderate care |
| Lowest ongoing effort | Sealed smooth concrete | Fewest reseals; simplest cleaning |
| Hiding marks and tyre dust | Exposed aggregate | Texture masks dirt; annual pressure clean |
| Selling within a year | Spray-on textured | Fast visual lift with modest upkeep |
If the slab has sunk, heaved or broken into moving sections, an overlay will crack with it. If water pools against the slab, drainage must be solved first. If the top layer is failing across the whole surface, replacement may be the better spend.
The curb appeal versus low maintenance trade-off is real, but it is not a coin flip. Appearance-led finishes ask for more cleaning and resealing; low-maintenance finishes give years of easy ownership with a quieter look.
Spray Pave Pro has spent 23 years resurfacing driveways and patios across Perth, and we back every job with a 100% satisfaction guarantee.
Get a free quote from Spray Pave Pro and find out which finish best matches your priority.
A sealed decorative concrete driveway with a smooth or lightly textured finish is generally easiest to maintain. It resists stains and needs only regular sweeping, occasional washing and resealing every few years. Exposed aggregate and resin-bound stone look good but trap more dirt, so they need more frequent cleaning. For the least ongoing work, choose a sealed finish and keep up with the resealing schedule.
Most restored concrete driveways need resealing every two to five years, depending on the finish and how much traffic and weather exposure it gets. A high-quality sealer applied over a properly prepared surface can last longer than a thin coat. If you notice water soaking in rather than beading, or the colour fading, it is time to reseal. Regular resealing protects the surface and helps it last 10 to 15 years.
Yes, if the cracks are surface-level or limited to a few areas, resurfacing can work well. A resurfacing specialist will clean out the cracks, fill them with repair materials, and apply a surface overlay to create a fresh finish. However, if the cracks are widespread, deep, or caused by structural movement in the slab, resurfacing alone may not last. In those cases, repair or replacement is the better option.
Spray-on concrete is a practical choice for an existing driveway because it can be applied directly over a prepared surface, covering stains, minor cracks and uneven colour. It gives you a wide range of colours and textures, from plain to decorative concrete, and it is faster to install than a full replacement. The key is proper surface preparation and sealing, which determines how long the finish lasts. Ask for a quote to see if your driveway is suitable.
Last Updated: October 4, 2026
High pressure cleaning drives water into a surface at forces that strip away more than grime.
The surfaces that suffer most are the ones homeowners most want cleaned: painted render, timber decking and weatherboards, and composite cladding, all porous or coated, and vulnerable to high-pressure water.
This guide from Spray Pave Pro covers what to use instead, surface by surface, so you can clean without causing damage.
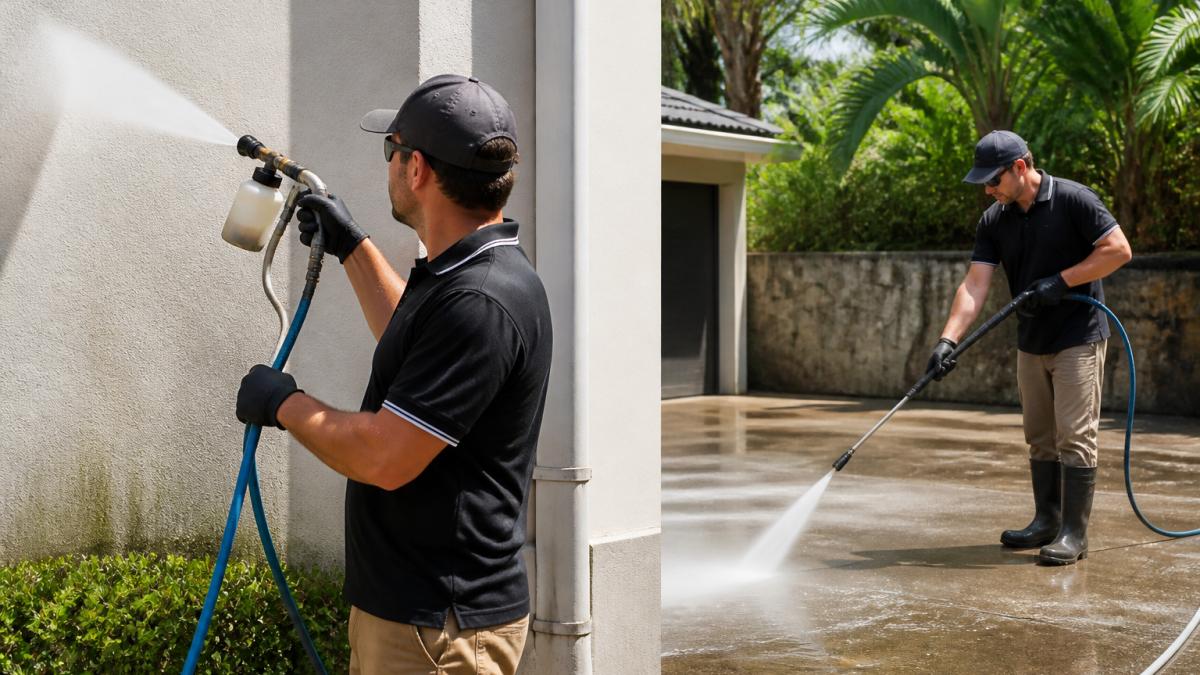
Soft washing is a low-pressure method that relies on cleaning solutions to break down organic growth rather than water force.
The two methods solve different problems. Pressure washing removes loose dirt and grime from hard, uncoated surfaces. Soft washing removes mould, mildew, algae, and bacteria from surfaces that would not survive a high-pressure blast.
| Feature | Soft Washing | Pressure Washing |
|---|---|---|
| Water pressure | Low | High |
| Primary cleaning agent | Cleaning solution | Water force |
| Best for | Render, timber, cladding, roofs | Concrete, pavers, hard paving |
| Risk of surface damage | Low | High on soft materials |
| Typical dwell time | 10-30 minutes | Not applicable |
You can clean an entire exterior without a pressure washer using a pump sprayer, a garden hose, and the right cleaning solution. It is slower per square metre but far safer for coatings and cladding.
The sequence is the same for every surface:
Rendered and cladded walls respond well to a soft wash because the solution works in the pores. Apply bottom-up so it does not streak down dry render, then rinse top-down.
Keep the rinse pressure low, a garden hose with a fan nozzle is enough. For stubborn algae, apply a second round and let it dwell longer rather than scrubbing harder, which abrades the render.
Weatherboards need the gentlest approach. Timber swells when saturated, and high-pressure water forces moisture into the grain and behind the boards, where rot begins.
Work in sections, keep the rinse moving, and avoid water pooling at the base of the wall. A soft brush on a pole handles any remaining film.
Timber responds best to a low-pressure wash with a timber-safe cleaner: lift organic growth without raising the grain or driving water into the fibres.
A workable approach for decking:
Cleaner choice matters more than technique. An alkaline cleaner on timber can raise the grain and leave a dull finish, so check the label for timber suitability before buying.
Concrete tolerates more force, but you still do not need a pressure washer. A stiff-bristle brush, a concrete-safe cleaner, and a hose handle most driveway and patio grime.
For stains, apply the cleaner, let it dwell, and scrub in manageable patches before it dries so the chemistry stays active.
On sealed concrete, be careful: harsh cleaners and abrasive scrubbing wear the sealer, and once it is gone the surface stains faster than before.
Cleaner selection decides the outcome more than any other variable. Get chemistry, dilution, and dwell time right and the surface comes clean with almost no agitation; get them wrong and you can bleach render, raise timber grain, or strip a coating in minutes.
The useful version is a decision framework: match the active ingredient to the soil type, match the pH to the material, then set dilution and dwell time from the label rather than habit.
Different soils need different chemistry:
This is where most DIY damage happens: a cleaner safe on concrete can ruin timber or etch a coating.
If you are unsure, test on a small, inconspicuous patch and let it dry fully before committing to the whole surface.
More concentrate is not more cleaning power. Over-strength solutions bleach colour, strip coatings, and leave residue that attracts new dirt; under-strength solutions waste a day and force the scrubbing you were trying to avoid.
Dwell time is how long the solution stays wet and working. Too short and it does nothing; too long and it dries, stops working, and starts staining.
Agitation is a supplement, not the main event. A soft-bristle brush along the grain of timber, or a soft brush on render, lifts stubborn film without abrading. Rinse top-to-bottom with low-pressure water until the runoff runs clear.
| Material | Suitable chemistry | Avoid |
|---|---|---|
| Timber decking and weatherboards | pH-neutral or timber-specific cleaner | Strong alkali, chlorine |
| Composite cladding | Mild detergent, oxygen-based cleaner | Solvent-based, abrasive |
| Painted render | Mild detergent, diluted oxygen-based cleaner | Acidic cleaners, strong hypochlorite |
| Unsealed masonry and concrete | Wider pH range, surfactant detergent | , |
| Sealed concrete or pavers | Sealer-safe neutral cleaner | Harsh alkali, acid |
| Glass and metal trim | Glass cleaner, mild detergent | Abrasives, strong alkali |
Safe handling and storage of household chemicals
If you are not confident matching chemistry to a material, that is the point at which a professional clean is cheaper than a repair. A wrong cleaner can do more damage in ten minutes than a pressure washer does in an hour.
Runoff is the part most DIY guides skip, and it causes the most avoidable harm. Cleaning solutions, loosened mould, paint flakes, and dissolved dirt all end up somewhere, and in most urban and suburban areas that somewhere is a stormwater drain flowing to a creek, river, or bay without treatment.
The goal is simple: keep dirty water on your property, or dilute and filter it before it leaves, and protect plants and waterways from the chemistry.
A common pattern is that homeowners assume the drain at the front of the property is a sewer. It is almost always stormwater. Check before you start.
Requirements vary by council and state, and are easier to plan around than fix afterwards. Before a large exterior clean, check your council's guidance on exterior cleaning runoff and whether your water authority restricts what can enter the stormwater system.
Stormwater and waterway protection guidance
If the job is large, the surface is heavily contaminated, or the runoff risk is high, a professional clean is often the better environmental choice, the right equipment and containment are already in place, and the waste is handled correctly.
DIY soft washing suits single-storey homes, small areas, and surfaces you can reach safely from the ground. With a pump sprayer and a section-by-section approach, you can handle most render, cladding, and timber cleaning yourself.
Professional cleaning makes more sense when:
The trade-off is time versus risk. A DIY soft wash takes a full day for most homes; a professional crew finishes faster and has the expertise to avoid damage that turns a clean into a repair.
Soft washing uses low-pressure water and cleaning solutions to remove organic growth without damaging surfaces. Other options include manual scrubbing with a brush and detergent, chemical treatments like bleach or vinegar solutions, and steam cleaning. For delicate materials such as timber, render, or composite, these methods are safer than high-pressure cleaning.
Yes. Soft washing operates at low pressure, typically under 500 psi, which prevents surface damage like etching, splintering, or water intrusion. High-pressure cleaning can strip paint, crack render, and force water behind cladding. Soft washing relies on cleaning solutions to break down mould, algae, and mildew, then rinses gently, making it suitable for timber, vinyl, and composite surfaces.
Use a soft brush or low-pressure washer with a mild detergent or oxygen bleach solution. Avoid high pressure, which can splinter wood and strip finishes. Work in small sections, scrub along the grain, and rinse thoroughly. For mould, apply a diluted bleach solution, let it dwell for 10-15 minutes, then scrub and rinse. Always test a small area first.
A stiff-bristle brush, a garden hose, and a concrete cleaner or degreaser can remove most stains. For organic growth like algae or mildew, apply a diluted bleach solution (1 part bleach to 3 parts water), let it sit for 10-15 minutes, then scrub and rinse. For tough stains, consider a commercial concrete cleaner or hire a professional for soft washing.
Delicate surfaces fail slowly, then all at once, and pressure washing is often what tips them over the edge. If your render, timber, or cladding is already showing its age, cleaning it gently is only half the job. Spray Pave Pro brings 23 years of experience to exterior surface restoration, with professional sealing, spray-on concrete, and epoxy flooring backed by a 100% satisfaction guarantee. Get a free quote and find out what your surfaces actually need.
Last Updated: October 3, 2026
DIY concrete sealing looks like the cheap fix until the first wet season proves otherwise. On new, sound concrete, a hardware-store sealer can work fine.
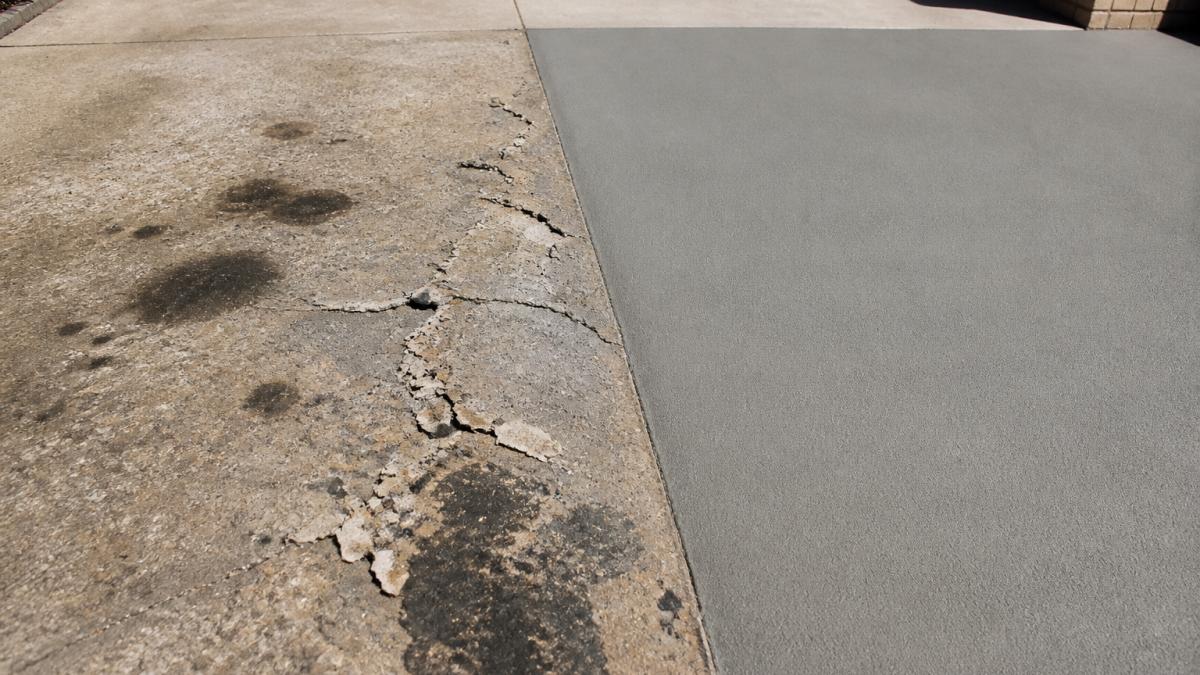
The core issue: most DIY sealers are film-forming coatings that sit on top of the slab rather than soaking in.
The problem is the substrate, no topical sealer fixes spalling, deep cracks or years of ground-in oil.
Three professional routes dominate: spray-on resurfacing, epoxy and polyaspartic coatings, and polished concrete. Each suits a different slab condition and budget, and choosing wrong is the most common and costly mistake we see.
A spray-on overlay is a cement-based coating applied over the existing slab to rebuild a worn surface. It covers cracks, stains and minor spalling, then gets a coloured or stencilled finish that can mimic tile, slate or exposed aggregate. Application is quick, often a day or two for a driveway, making it the strongest fit for weathered residential concrete that needs both repair and a new look.
Epoxy resin bonds hard and gives a seamless, glossy finish with strong chemical resistance. Polyaspartic cures faster and handles UV better, resisting yellowing and chalkiness in direct sun. Both need a dry, sound substrate and proper preparation, including etching or grinding. Epoxy struggles outdoors with moisture: a slab with no damp-proof membrane can push vapor up and delaminate the coating.
Polished concrete mechanically grinds and densifies the slab to a high-sheen finish with no topical sealer to peel, making it the most durable option for high-traffic areas with very little maintenance. Grind-and-seal is the lighter version: grind the surface, remove imperfections, then apply a protective sealer. It costs less than full polishing and still delivers a clean, modern look.
| Option | Best For | Key Strength | Main Trade-off |
|---|---|---|---|
| Spray-on overlay | Weathered, cracked driveways and patios | Covers damage and restyles the surface | Needs professional application |
| Epoxy / polyaspartic | Garages, commercial floors, wet areas | Chemical and abrasion resistance | Can delaminate on damp slabs |
| Polished concrete | High-traffic floors, long-term low maintenance | No topical sealer to wear out | Highest upfront investment |
| Grind-and-seal | Cost-conscious durable flooring | Balance of cost and wear resistance | Grinding needs pro equipment |
Professional concrete resurfacing outlasts DIY sealing because it fixes the substrate first: high-pressure cleaning, crack repair and surface preparation before any coating goes down, where a DIY reseal skips straight to the coating.
The other gap is product grade.
What most guides miss is that a failed DIY sealer does not just look bad. It actively damages the slab by trapping moisture, turning a cosmetic problem into a structural one.
Pool surrounds need a different answer to driveways: slip resistance, not just looks. A glossy epoxy finish around a pool is a liability, because a wet, smooth surface is exactly where people slip.
The better options for wet areas share three traits: a textured profile, water resistance, and UV stability so the finish does not chalk or fade under constant sun.
The failure mode to avoid is a coating that peels in wet conditions.
The cost of professional concrete sealing is higher upfront than a bucket of DIY sealer, and that comparison is misleading on its own. DIY looks cheaper until you count the resealing every year or two, the surface prep you do yourself, and the eventual repair when trapped moisture damages the slab.
The honest way to compare is cost per year of service life, not cost per tin. Work through the four cost lines below and the picture changes fast.
A cheap coating that fails in two years costs more than a durable system that lasts a decade, because you pay for the product, the prep and the downtime twice, and still end up repairing the slab.
Professional pricing depends on the size of the area, the slab condition, the system chosen and the prep required, so we quote each job on its own merits rather than publish a flat rate.
If a quote cannot answer those four, the low number is not a saving. It is a deferred cost.
Match the method to the slab, not to the budget alone. That single rule decides whether your surface lasts five years or fifteen. The decision has three layers most guides skip: what is already on the slab, what the climate will do to it, and how hard it will be to remove later.
You cannot apply most alternatives straight over an unknown old sealer. Compatibility is the first filter, and getting it wrong is the most common cause of a new coating failing within a season.
| Existing surface | Spray-on overlay | Epoxy / polyaspartic | Grind-and-seal | Polished concrete |
|---|---|---|---|---|
| Bare, sound concrete | Yes | Yes | Yes | Yes |
| Old acrylic / water-based sealer | Usually needs removal or a bonding primer | Needs full removal and grinding | Grinding removes it | Grinding removes it |
| Old solvent-based sealer | Needs mechanical removal | Needs mechanical removal | Grinding removes it | Grinding removes it |
| Peeling epoxy or film coating | Needs full removal first | Needs full removal first | Grinding removes it | Grinding removes it |
| Damp slab, no membrane | Only with a moisture-tolerant system | High delamination risk | Lower risk | Lowest risk |
| Heavily spalled or cracked | Best fit, rebuilds the surface | Does not fix the substrate | Cosmetic only | Not suitable |
The pattern is simple: overlays and grind-and-seal tolerate a tired surface better than epoxy, and epoxy is the least forgiving of a damp or contaminated slab. If you do not know what is on the concrete, a test patch in an inconspicuous corner is the cheapest diagnostic you can run.
Performance is not universal. The same product can excel in one climate and fail in another.
This is the exit strategy, and almost no guide covers it. Every alternative has a removal cost worth knowing before you commit.
If there is any chance you will want to change the finish later, favour a system with a low removal cost. If you want to set and forget, favour one with no film at all.
For most weathered residential slabs, a spray-on overlay is the best alternative to DIY sealing because it repairs and restyles in one process. For commercial and high-traffic floors, polished concrete or epoxy wins on durability.
Choosing between spray-on resurfacing, epoxy and polished concrete comes down to your slab's condition and climate, and getting that wrong wastes money. At Spray Pave Pro, we have spent 23 years resurfacing concrete, and we offer professional sealing, epoxy flooring and spray-on concrete backed by a 100% satisfaction guarantee.
Get a free quote from Spray Pave Pro and transform your old concrete into a surface that stands up to the weather.
The cheapest upfront option is a DIY acrylic or water-based sealer, but these often need reapplication every 1-2 years. Over a decade, the cost of professional concrete sealing can be comparable or lower because the finish lasts much longer. For a cost-effective long-term solution, spray-on resurfacing or a penetrating sealer applied by a professional usually offers better value per year of protection.
You can seal concrete yourself if the surface is clean, un cracked, and you use the right product for your climate. However, DIY sealing often fails when the concrete is weathered, has moisture issues, or requires surface preparation like grinding or etching. Professional concrete resurfacing includes proper prep and commercial-grade materials, which is why it outlasts most DIY applications. If your concrete is stained, cracked, or you want a non-slip finish, a professional service is the more reliable choice.
Epoxy flooring forms a thick, durable coating that resists chemicals, abrasion, and moisture far better than most DIY sealants. It also provides a seamless, glossy finish and can include non-slip additives. The trade-off is that epoxy requires professional installation for best results, has a longer cure time, and can be slippery when wet unless textured. For high-traffic areas or pool surrounds, epoxy is often a superior alternative to DIY sealers.
Professional resurfacing adds a new, durable layer that can fix cracks, stains, and uneven surfaces, whereas DIY sealing only protects what is already there. A resurfaced driveway or patio typically lasts 10-15 years with minimal maintenance, compared to 1-3 years for many DIY sealers. It also improves slip resistance and curb appeal, which can add real value if you plan to sell.
Yes, spray-on concrete overlays are generally more durable than topical sealers because they bond to the existing slab and create a new wear surface. They resist UV fading, abrasion, and moisture better than most DIY products. However, durability depends on proper surface preparation and the quality of the overlay mix. A professional installer will ensure the substrate is ready, which is critical for longevity.
Last Updated: October 2, 2026
If you're searching for an epoxy flooring cost per square meter review, no single figure applies to every job. Epoxy flooring cost depends on substrate condition, coating thickness, surface preparation, and whether you choose a DIY kit or professional application. This review breaks down each cost driver so you can judge quotes on substance, not just the bottom line.
Epoxy flooring is a resin-based coating applied over prepared concrete to create a hard, seamless, chemical-resistant surface. It bonds mechanically to the substrate, which is why surface preparation matters more than the coating itself.
A contractor's rate per square metre bundles several separate jobs. Strip it apart to compare quotes properly:
Two quotes for the same garage can differ by thousands and both be internally consistent. The usual reasons:
Consider two identical garages. The first is a sound, dry, indoor slab with light oil staining. The second has hairline cracks, a history of damp and old flaking paint.
Comparing quotes on the headline rate alone is misleading. Compare scope: what preparation is included, what thickness is specified, what warranty is offered, and what happens if moisture is found mid-job.
A coating that peels within two years because preparation was skipped doesn't save money, it costs the original job plus removal plus a second application. Compare cost per year of service, not cost per square metre on the invoice.
Concrete sealing and epoxy coating solve different problems. A penetrating sealer soaks into the concrete's pores to block moisture and stains, leaving the surface largely unchanged. Epoxy forms a film on top, adding colour, gloss and impact resistance.
| Factor | Penetrating Sealer | Epoxy Coating |
|---|---|---|
| Bond type | Chemical (inside pores) | Mechanical (surface bond) |
| Appearance | Natural concrete look | Coloured, gloss or matte finish |
| Best for | Driveways, patios, exposed aggregate | Garages, workshops, commercial floors |
| Recoating | Reapply every few years | Full recoat when worn |
| Stain protection | Good against water and salts | Excellent against oil and chemicals |
A topical sealant wears away under abrasion and UV, so recoating becomes routine. Epoxy resists abrasion and impact far better because the resin cures hard. The trade-off: epoxy needs a sound, dry substrate and can delaminate if moisture vapour transmission isn't addressed first.
Epoxy pulls ahead decisively here. Oil stains, petrol drips and most household chemicals wipe off a cured epoxy surface. A penetrating sealer slows staining but doesn't stop oil soaking into concrete porosity over time. For garages and workshops, that difference alone often justifies the higher upfront cost.
Concrete surface preparation requirements are where most coating failures begin. Epoxy needs a clean, profiled, dry substrate to form a mechanical bond.
The main preparation methods are:
A concrete densifier can harden soft, dusty surfaces before coating. Skipping moisture testing is the most common mistake on failed jobs: a floor that looks dry can still push vapour through and blister a coating from underneath.
The epoxy flooring installation process typically runs two to four days for a residential garage, including preparation and curing. The coating goes down fast; preparation and curing take longest.
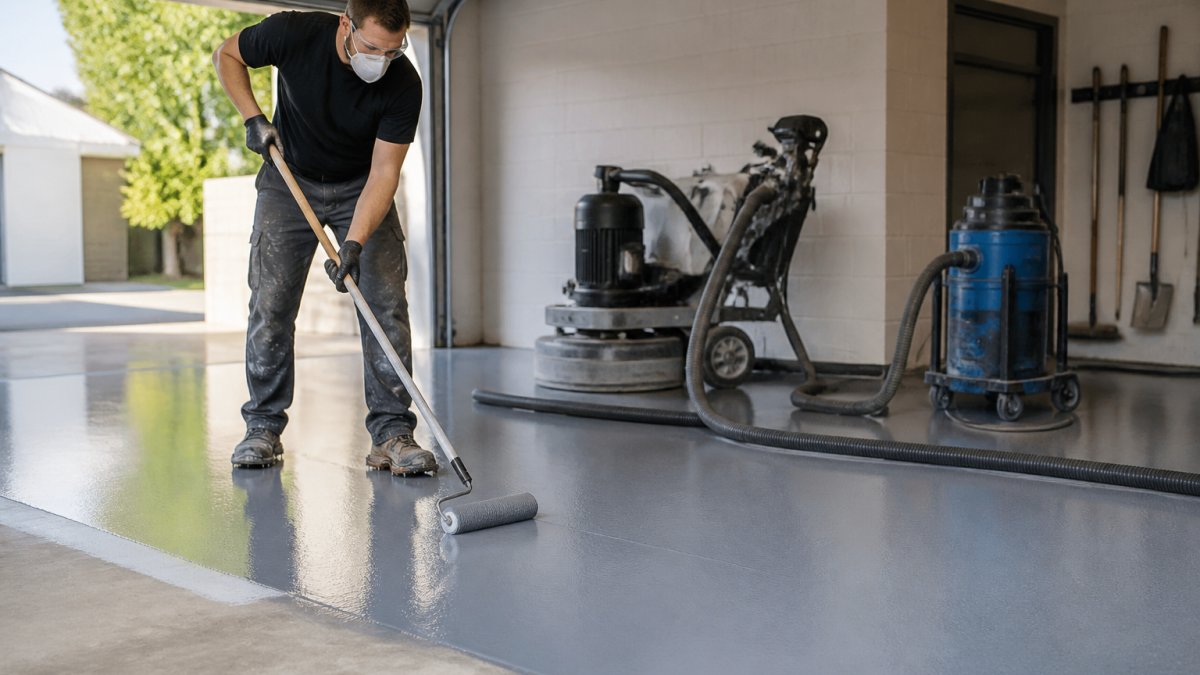
A typical sequence looks like this:
Most homeowners can walk on the floor within 24 hours and park on it after several days, depending on temperature and humidity. Cooler weather extends curing.
The DIY epoxy kit versus professional application decision comes down to how much prep you can genuinely do yourself. A kit saves on labour, but surface preparation determines whether the coating survives.
| Factor | DIY Epoxy Kit | Professional Application |
|---|---|---|
| Material cost | Lower per square metre | Included in quote |
| Labour | Your own time | Trained applicators |
| Surface prep | Often limited to etching | Diamond grinding and testing |
| Finish consistency | Variable | Uniform |
| Warranty | None | Workmanship guarantee |
For a small, sound, indoor slab, a DIY kit can work well. For cracked, oil-stained, or moisture-affected concrete, professional preparation is not optional. Spray Pave Pro handles the full process, from high-pressure cleaning and crack repair through to the final coat, backed by more than 23 years of resurfacing experience and a 100% satisfaction guarantee.
Most guides treat maintenance, repair and climate as afterthoughts. In practice these three factors decide whether a coating still performs in year eight, and they're where epoxy and penetrating sealers diverge most sharply.
Epoxy floors clean easily with a pH-neutral cleaner and a mop. Abrasion resistance holds up in high-traffic areas, and surface hardness resists hot tyre pickup better than most alternatives. Avoid acidic cleaners, which dull the finish, and abrasive pads on gloss surfaces.
A penetrating sealer is lower-effort day to day but is a consumable: it wears out of the pores and needs periodic reapplication to keep repelling water and salts.
Repairability is a genuine weak point for epoxy, and the mechanism matters more than the verdict.
The practical rule: epoxy rewards you with a harder, longer-lasting surface but punishes localised damage with visible repairs. Sealer is easier to touch up but needs touching up more often.
Climate affects epoxy and sealers differently, and the failure modes are not the same.
UV exposure. Intense sun yellows standard epoxy over time.
Moisture vapour transmission. This is the single biggest climate-related risk for epoxy.
Temperature swings and freeze-thaw. Where freeze-thaw cycles are regular, water trapped in surface pores expands as it freezes, cracking concrete and lifting coatings at the edges.
A lightly used residential garage and a workshop taking daily chemical spills and rolling loads need different systems. Climate matters too: a humid coastal slab and a frost-prone inland slab present different risks. The right question isn't 'which coating is best' but 'which coating suits this slab, this use and this climate', the question a properly scoped quote should answer.
The epoxy flooring cost per square meter review always circles back to one question: what is your floor actually going to be used for?
At Spray Pave Pro, we've spent over 23 years resurfacing concrete across residential and commercial properties, from high-pressure cleaning and crack repair to epoxy flooring and professional sealing.
Get a free quote from Spray Pave Pro and find out exactly what your floor needs before you commit to a coating.
It depends on what you need. A penetrating sealer soaks into the concrete pores and protects against moisture and stains but adds no surface thickness. Epoxy creates a film-forming layer that resists impact, chemicals and hot tire pickup. For a garage that sees vehicle traffic, oil spills and heavy use, epoxy offers better abrasion resistance and long-term value. For a low-traffic patio, a sealer may be enough.
The main risks are poor surface preparation and moisture vapor transmission. If the substrate is not properly prepared through diamond grinding, the coating can delaminate within months. Fresh concrete needs a curing time of 28 days before coating. Epoxy also becomes slippery when wet unless a slip coefficient additive or decorative flake is used. UV stability is another concern for outdoor areas, as standard epoxy yellows in direct sunlight.
Pricing depends on the system specified, substrate condition and site access. A basic epoxy resin coating sits at the lower end, while 100% solids systems and decorative chip finishes cost more due to material quality and application complexity. Because every slab differs, most installers provide a site-specific quote. Request a free quote from a specialist to get an accurate figure for your floor area and surface preparation needs.
Polyaspartic coatings cure faster and resist UV yellowing better than standard epoxy, making them a strong option for outdoor slabs. 100% solids epoxy systems offer superior impact resistance and zero VOC content for high-traffic areas. Decorative chip systems combine durability with slip resistance. The best choice depends on your climate exposure, traffic load and whether you need a fast return to service.
DIY epoxy kits cost less in materials but require significant manual preparation, including acid etching or diamond grinding, and careful mixing. Common mistakes include inadequate surface preparation, applying too thin, and coating damp concrete. Professional application ensures correct substrate assessment, moisture testing and even coverage. If your slab has cracks, hydrostatic pressure issues or heavy oil staining, professional installation is worth the investment.
A note on pricing: Every slab is different. Epoxy flooring cost depends on area, substrate condition, preparation required, and finish chosen. Spray Pave Pro provides project-specific quotes rather than flat rates, so you get an accurate figure for your actual floor.
Last Updated: October 1, 2026
Choosing between epoxy flooring vs concrete sealing for garages comes down to one question: do you want a coating that sits on top of your slab, or a treatment that soaks into it? Epoxy forms a thick, resin-based layer bonded to the surface. A sealer penetrates the concrete and repels liquid from within.
Epoxy is a two-part resin and hardener system that cures into a rigid, film-forming layer on top of the concrete. It creates a mechanical bond with the slab, which is why surface preparation matters so much.
A penetrating sealer soaks into the concrete's pores and reacts internally rather than building a film. Because nothing sits on top, there is nothing to peel, flake or delaminate.
Epoxy outperforms sealers on abrasion, impact and chemical resistance, but only when the slab underneath is sound and dry. Get the prep wrong and the most expensive coating will fail within months.
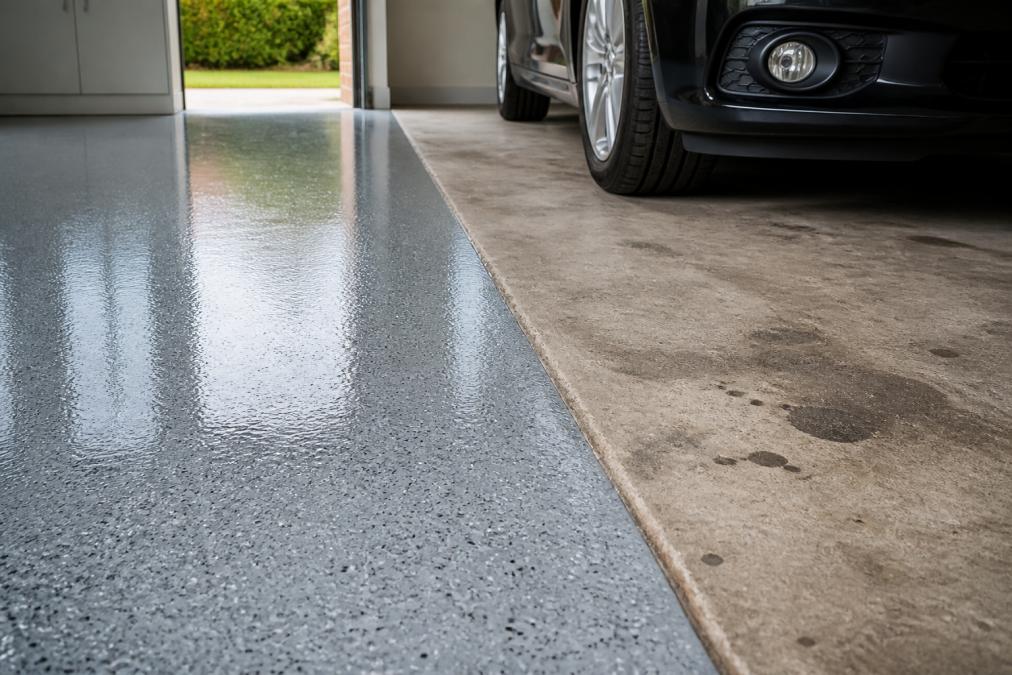
Hot tire pickup happens when warm tyres bond to a coating and lift it as the car reverses out, the most common failure on cheap DIY epoxy jobs. Proper surface preparation and a high-solids system prevent it. Penetrating sealers never suffer hot tire pickup because there is no film to lift, but they also repel oil stains less over the long term.
The cost of epoxy flooring vs concrete sealing depends heavily on slab condition, size and preparation, so pricing is best quoted after an on-site assessment. You can still budget sensibly if you understand what drives the number.
Four variables move the quote more than anything else:
Rather than quote a fixed figure that will be wrong for your slab, think in bands:
| Factor | Epoxy Coating | Penetrating Sealer |
|---|---|---|
| Upfront cost | Higher | Lower |
| Preparation needed | Diamond grinding, crack repair | Cleaning, sometimes light etch |
| Reapplication | Full recoat when worn | Periodic refresh |
| Lifespan under heavy use | Long with correct prep | Shorter, needs topping up |
| Appearance | Glossy, coloured finishes | Natural concrete look |
Over a longer horizon, the cheaper option is not always the sealer. If a sealer needs refreshing every couple of years with a call-out fee each time, the cumulative spend can approach a single well-prepped epoxy system that lasts many times longer. The break-even point depends on how long you stay and how hard the floor is used.
The most expensive outcome is not choosing the pricier system, it is paying for epoxy on a slab that was never properly prepared, or sealing a slab that then needs stripping and coating anyway. Both mean paying twice. A moisture test and hammer-tap survey before quoting cost little and prevent the most common expensive mistake.
Concrete floor preparation for coatings separates a floor that lasts a decade from one that peels in a season. No coating or sealer can outperform the bond it forms with the slab.
Diamond grinding opens the concrete's pores and creates a profile epoxy resin can grip. Acid etching can work on sound slabs but is harder to control and less reliable on older, denser concrete. Moisture testing, usually with a plastic sheet or calcium chloride test, tells you whether the slab is dry enough to coat; if hydrostatic pressure is present, standard epoxy is the wrong choice.
Most comparison guides stop at 'epoxy is durable, sealers are cheap' and never cover damage. Repairability is where the two systems diverge most sharply, and it decides the true long-term cost of ownership.
Sealers are easier to maintain because there is no film to match:
Epoxy repairs are more involved because the coating is a film with a colour and texture:
A solid-colour epoxy is relatively forgiving to patch because the repair can be blended. A decorative flake, quartz or metallic finish is not: flake blends are hard to reproduce exactly, and metallic finishes can show a visible patch even under careful work. On a decorative floor, a localised repair often looks worse than the original damage, pushing owners toward a full recoat sooner than expected.
Neither epoxy nor a sealer prevents cracking from structural or ground movement. Repair the crack before coating, open it out, fill with a suitable repair mortar or flexible filler, and let it cure, then accept that movement may reappear. Coating over a live crack transfers the failure into the coating.
A useful rule of thumb: if the damaged area is small and caused by impact or abrasion, repair it. If damage is widespread, recurring, or accompanied by blistering and lifting, the problem is underneath the coating and no patching will fix it. Strip, assess the slab and start again, which is why getting the substrate right the first time matters.
Temperature swings and vehicle type change the recommendation more than most guides admit. Epoxy becomes brittle in sustained cold and can soften in extreme heat, though a polyaspartic topcoat improves both. A penetrating sealer moves with the slab because it is part of it.
If you want the decision taken off your hands, Spray Pave Pro assesses your slab, tests for moisture and recommends the system that fits your usage and budget, backed by a 100% satisfaction guarantee.
The wrong choice is not picking the "lesser" system; it is picking one that does not match how you use the garage. A sealer on a welding bay will disappoint; a full epoxy system on a storage shed is money you did not need to spend.
It depends on how you use the garage. A penetrating sealer suits storage and light parking because it repels oil and water without changing the concrete's look, and it never peels. Epoxy flooring vs concrete sealing comes down to wear: epoxy forms a resin-based film that resists hot tire pickup, brake fluid and abrasion, making it the better choice for workshops, heavy tools and high-traffic areas. Sealing costs less initially, but epoxy typically delivers stronger long-term value where the floor takes real punishment.
Epoxy demands meticulous surface preparation. Without diamond grinding or acid etching, the coating can delaminate within months. Moisture vapor transmission through the slab is another risk: if hydrostatic pressure builds under a film-forming coating, blistering follows. Epoxy also needs a full cure before vehicles return, and gloss levels can fade under intense UV if the formula lacks UV stability. None of these are dealbreakers, but they explain why professional installation matters more with epoxy than with a simple topical sealant.
A penetrating sealer typically needs reapplication every few years depending on traffic and exposure, while a well-installed epoxy system can hold up for many years before showing wear. The trade-off is maintenance style: sealers are reapplied, epoxy is repaired. If stains return after a year, the sealer has usually worn thin rather than failed outright. Regular cleaning and prompt spill removal extend the life of both systems considerably.
Polyaspartic and polyurea coatings cure faster and handle temperature swings better than standard epoxy, and they resist yellowing from UV exposure. They cost more upfront. For garages with significant moisture issues, a concrete densifier plus a penetrating sealer can outperform a film-forming coating because it lets the slab breathe. The right answer depends on your slab's condition, your climate and how hard the floor works.
Match the coating to the job. For a workshop with chemical spills and heavy tools, a high-solids epoxy or polyurea system with proper substrate preparation is hard to beat. For a garage used mainly for parking and storage, a penetrating sealer offers low maintenance and a natural finish at lower cost. Whichever you choose, surface preparation, moisture testing and correct curing time decide how long the result lasts.
Last Updated: September 30, 2026
Driveway resurfacing is the process of applying a new decorative or protective layer over an existing concrete slab, restoring its appearance and surface integrity without demolishing the original structure. For most worn driveways, it can cost less than replacement and often finishes in days rather than weeks. At Spray Pave Pro, we've spent 23 years restoring driveways across Perth, and homeowners who resurface early often avoid the excavation, skip-bin and re-pour cycle entirely.
The decision comes down to what's happening beneath the surface. If the slab is structurally sound, resurfacing wins. If it's moving, replacement is the honest answer.
Deep structural cracking, sinking sections or a failed sub-base point to replacement instead. A site inspection settles it quickly.
Concrete resurfacing beats replacement when the slab is intact and the damage is cosmetic. Replacement makes sense when the base has failed. That's the whole decision in two sentences.
Replacement means breaking out the old slab, removing it, re-compacting the sub-base and pouring fresh concrete. Expect heavy machinery, a skip bin and days of curing before you can park on it. Resurfacing skips all of that. The existing slab stays put, and a new bonded layer goes over the top.
The trade-off is honest: resurfacing won't fix a slab that's sinking or heaving. If the sub-base integrity is gone, no coating will hold.
DIY patching looks cheaper on the receipt. It rarely is over time.
A bag of patching compound and a weekend gets you a cosmetic fix. But most patch jobs fail at the edges, where the new material meets the old.
There's no single figure for spray-on concrete cost per square metre, and any website quoting one flat rate is guessing. Pricing depends on the surface area, the condition of the existing slab, the finish you choose and how much preparation is required.
The main cost drivers:
Most resurfacing jobs follow the same sequence, and understanding it helps you judge any quote you receive.
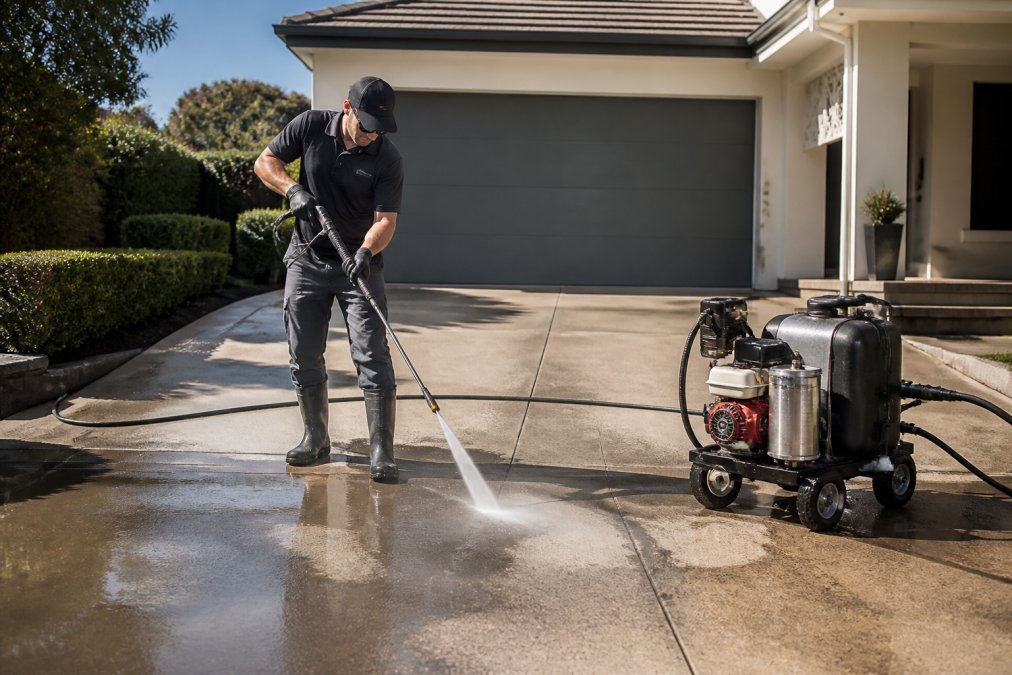
A typical residential driveway takes one to three days from start to finish, depending on size and finish. Curing time before you drive on it usually adds another day or two. That's the honest timeline, and it's why resurfacing can be a suitable option for busy households.
The finish you choose decides how the driveway looks and how long it lasts. There's no single best option, only the right one for your home and climate. Understanding what each material actually is, not just what it's called, is what separates a finish that lasts a decade from one that fails in two summers.
Most local service pages show the same three stencil patterns and call it a day. The finishes actually gaining traction are more considered:
A resurfaced driveway needs very little, but the little it needs matters. These driveway maintenance tips keep the finish looking new for years.
Searching for driveway resurfacing near me returns plenty of options. The filter that actually matters is proof of past work, not the lowest quote.
Ask every contractor for:
Pricing depends on the driveway size, surface condition, and finish you choose, so there is no single figure that applies to every home. Factors like crack repair, pressure cleaning, and the number of coats all affect the final amount. Spray Pave Pro offers a free on-site quote, and getting one lets you compare the resurfacing price against a full replacement before deciding.
For most driveways with surface-level cracking, staining, or fading, resurfacing is the more cost-effective option. Replacement means breaking up and removing the old slab, which adds demolition, disposal, and new concrete costs on top. Resurfacing keeps the existing sub-base, so you avoid that expense and the job is usually finished far faster, with less disruption to your household.
Yes, provided the cracks are in the surface layer rather than the slab itself. A professional contractor will inspect the driveway first, pressure clean it, and fill or bridge cracks before applying the resurfacing coat. If the sub-base has moved or the slab is structurally failing, resurfacing alone will not hold, and the contractor should tell you that during the site inspection.
A properly applied resurfacing system can last many years when the surface is prepared correctly and maintained. Longevity depends on the coating used, traffic levels, and how well you keep the surface clean and sealed. Ask your contractor about the expected lifespan of the specific product they use, and follow their driveway maintenance tips, such as regular cleaning and resealing, to get the most out of it.
Most driveways don't need replacing. They need the right surface preparation, a bonded coating and a proper seal, and that's a job for a specialist rather than a weekend patch. Spray Pave Pro handles the full process, from high-pressure cleaning and crack repair through to spray-on concrete, epoxy flooring and professional sealing. Get your free quote and see what your driveway can look like again.
Last Updated: September 29, 2026
Choosing between epoxy vs polyurethane flooring for heavy traffic comes down to one question: hardness or flexibility? Epoxy delivers a rigid, high-strength finish that resists abrasion and chemical spills. Polyurethane stays flexible, handles UV exposure and thermal shock, and bridges minor cracks instead of cracking with them. This comparison from Spray Pave Pro breaks down durability, lifespan, maintenance and cost for warehouses, workshops and busy commercial floors.
Epoxy is the harder, cheaper workhorse for indoor floors. Polyurethane is the more forgiving, UV-stable option for outdoors and temperature swings. Many facilities use both in a hybrid system: epoxy as the base, polyurethane as the topcoat.
| Factor | Epoxy | Polyurethane |
|---|---|---|
| Hardness | Very hard, rigid | Flexible, slightly softer |
| UV stability | Yellows in sunlight | Excellent colour retention |
| Best location | Indoor, controlled climate | Outdoor, thermal shock areas |
| Crack bridging | Limited | Good |
| Relative cost | Lower | Higher |
| Typical use | Warehouses, garages | Loading docks, ramps, food plants |
Epoxy flooring is a two-part resin system that cures into a rigid, seamless coating bonded to prepared concrete, one of the hardest floor coating systems available.
That hardness is the point. Epoxy resists abrasion, impact and chemical exposure well, which is why it dominates warehouses and manufacturing plants.
Polyurethane flooring is a resin-based coating that cures into a flexible, UV-stable surface engineered to move with the concrete rather than fight it.
Industrial concrete floor coating durability depends less on the brand and more on matching the coating's chemistry to the load. Three properties decide how a floor behaves under traffic: compressive strength (resists downward load), tensile strength (resists being pulled apart) and flexural modulus (how much the coating bends before cracking). Epoxy scores high on compressive strength and flexural modulus, it is stiff.
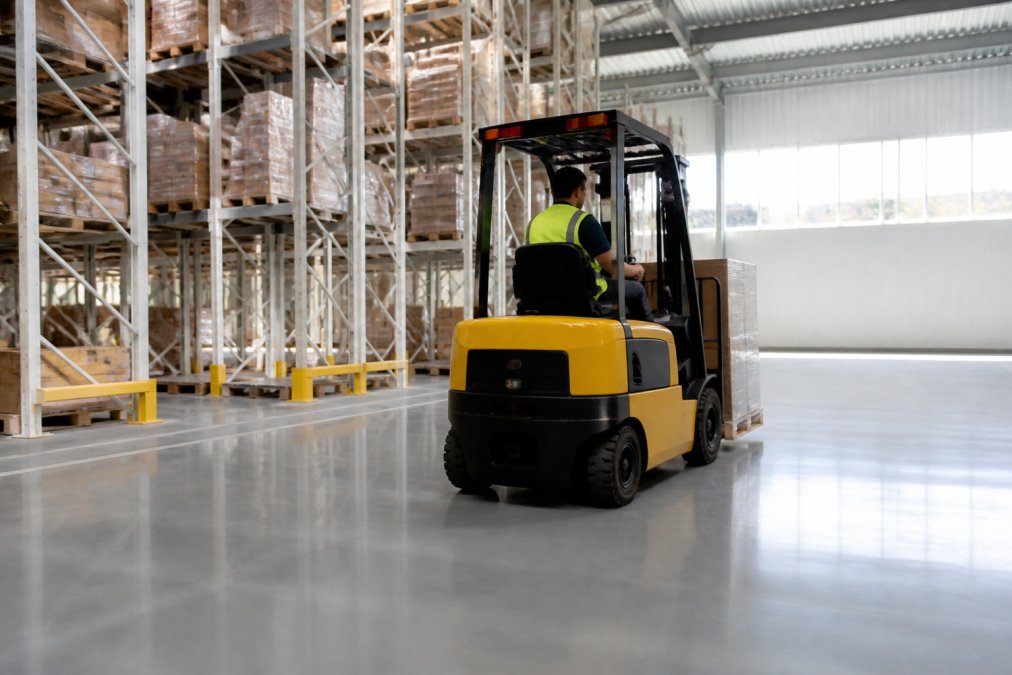
That single trade-off explains almost every real-world difference.
Abrasion resistance is measured by how much material a standardised abrasive wheel removes under load. Epoxy's dense, hard surface typically outperforms polyurethane, which is why it dominates workshops and floors exposed to solvent or acid spills.
UV stability is where polyurethane pulls clearly ahead. Epoxy yellows and chalks in direct sunlight because its aromatic chemistry breaks down under UV; polyurethane holds colour and gloss for years. On a sun-exposed slab this is not cosmetic, chalking degrades the surface and shortens service life.
Slip resistance is quantified two ways. The coefficient of friction (COF) is a ratio, higher means more grip. The R-rating (R9 to R13) classifies wet slip resistance, with R9 least and R13 most slip-resistant. For heavy-traffic industrial environments, most specifiers target R10 to R12 depending on whether the floor is dry, wet or oily.
Coatings rarely fail because the resin was wrong. They fail because of:
Polyurethane floor coating lifespan in high-traffic zones typically runs longer than a standard epoxy topcoat where UV and thermal movement are in play, because the coating flexes instead of fatiguing. Indoors, a well-applied epoxy can match or beat it.
Epoxy flooring maintenance tips for busy facilities come down to a simple routine: sweep daily, mop with a neutral cleaner, and address spills before they set. A seamless finish leaves nowhere for dust or bacteria to collect, which is why epoxy suits cleanrooms and food areas.
Substrate preparation decides the outcome more than the resin choice. The slab must be sound, clean, dry and profiled so the coating can bond. Diamond grinding or shot blasting opens the surface; moisture testing confirms the slab is ready. Get this wrong and even the best coating delaminates.
The professional approach layers a rigid epoxy primer and base coat for strength and chemical resistance, then a flexible polyurethane topcoat for UV stability, scuff and slip resistance, the hardness of epoxy and the resilience of polyurethane in one floor.
Upfront price per square metre is the least useful figure in flooring specification. What matters is lifecycle cost, total spend over five to ten years, including installation, maintenance and recoating.
The pattern most practitioners see:
Pricing is quoted per project, because the variables dominate:
As a general guide, a basic epoxy coat sits at the lower end, a polyurethane topcoat adds to the figure, and a full hybrid system with surface preparation sits at the upper end. The right question is not "what is the cheapest option?" but "what is the lowest cost per year of service for this slab and this traffic?"
| System | Relative Upfront Cost | Relative Service Life | Best For |
|---|---|---|---|
| Epoxy only | Lower | Shorter in high-traffic lanes | Indoor warehouses, garages |
| Polyurethane only | Higher | Longer where UV/thermal movement applies | Outdoor slabs, food plants |
| Hybrid (epoxy base + polyurethane topcoat) | Highest | Longest in heavy-traffic industrial use | Heavy-traffic industrial floors |
There is no single winner. Epoxy wins indoors on hardness, abrasion resistance and cost. Polyurethane wins outdoors and in temperature-swing areas on UV stability, crack bridging and thermal shock performance. The best heavy-traffic floors use both.
Polyurethane flooring is more flexible and better at absorbing impact without cracking, while epoxy is harder and offers higher compressive strength. For heavy traffic, polyurethane often outperforms epoxy in areas with thermal movement or impact from dropped tools. Epoxy excels under static loads and chemical exposure. The right choice depends on your facility's specific demands.
Epoxy flooring can yellow and chalk when exposed to UV light, so it suits indoor areas best. It is also rigid, meaning it can crack if the concrete substrate moves or if heavy impact occurs. Without a polyurethane topcoat, epoxy offers less slip resistance when wet. Proper substrate preparation and a quality topcoat reduce these issues.
Heavy traffic wears down epoxy faster in high-impact zones, especially where vehicles turn or brake sharply. Abrasion resistance is good, but without a protective topcoat, scratches and scuffs appear within a few years. Industrial concrete floor coating durability improves significantly when epoxy is paired with a polyurethane topcoat, extending the maintenance cycle.
Epoxy flooring maintenance tips include sweeping daily, damp mopping with pH-neutral cleaners, and avoiding harsh solvents that dull the finish. Polyurethane floors need similar care but resist scuff marks better and tolerate more frequent wet cleaning. Both benefit from periodic reapplication of a topcoat to maintain slip resistance and appearance in busy facilities.
Polyurethane floor coating lifespan is often longer in wet areas because it handles moisture vapour transmission and thermal shock better than standard epoxy. Polyurethane also offers better slip resistance when textured, making it safer for pool surrounds and commercial kitchens. Epoxy can be made slip-resistant with aggregates, but it may delaminate if moisture is not addressed.
Last Updated: September 28, 2026
Finding the 5 best epoxy coating for garage floor durability starts with one hard truth: the coating is only as good as the concrete beneath it. A garage floor takes a beating that no other surface in the home faces. Hot tyres, dropped tools, oil drips, chemical spills and constant traffic all work against whatever sits on top of the slab. This guide from Spray Pave Pro breaks down five coatings that hold up under that pressure, plus what separates a coating that lasts a decade from one that peels within two years.
| Product | Type | Best For | Key Strength |
|---|---|---|---|
| Spray Pave Pro | Professional applied system | Full-service durability | 23 years of experience |
| ArmorGarage 100% Solids | 100% solids epoxy | Heavy vehicle traffic | Impact resistance |
| MPC-100 Epoxy Kit | High-build epoxy | UV-exposed garages | Anti-yellowing |
| Rust-Oleum EpoxyShield | Water-based epoxy | DIY budgets | Easy application |
| Seal-Krete Epoxy-Seal | Water-based epoxy | Moisture-prone slabs | Low-odour formula |
Durability in a garage floor coating comes down to four measurable factors: adhesion to the concrete substrate, abrasion resistance, chemical resistance, and impact durability. A coating that scores well on all four handles hot tyre pickup, road salt, oil and dropped weight without failing.
We assessed each product on solids content, tensile strength, recommended mil thickness, and how well it tolerates moisture vapour transmission. Surface preparation demands and realistic curing time also shaped the ranking. A coating that needs diamond grinding to perform is not the same product as one that works over a properly etched slab, and buyers deserve to know the difference before they commit.
For homeowners who want the job done properly the first time, Spray Pave Pro is the strongest option on this list. This concrete resurfacing specialist brings over 23 years of experience to every project, handling surface preparation, application and sealing as one complete service rather than leaving the hard parts to the customer.
The difference shows in the details. Proper concrete preparation, correct primer coat selection and controlled curing time are what separate a coating that lasts from one that lifts within a season. Spray Pave Pro manages all of it, backed by a 100% satisfaction guarantee and a team that works quickly to minimise disruption.
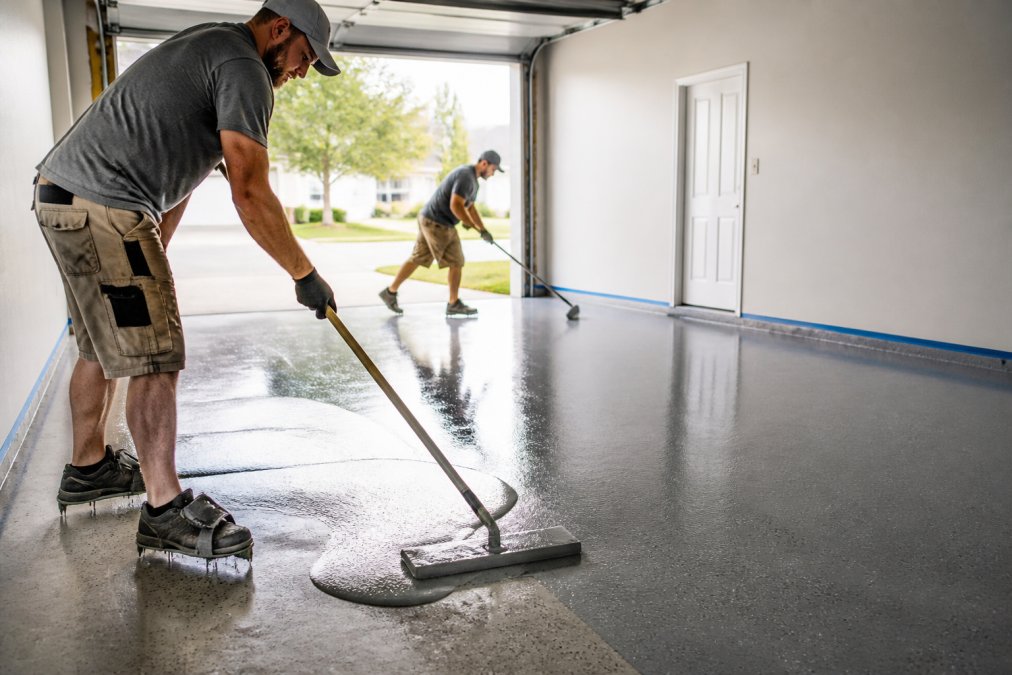
Pros:
Cons:
ArmorGarage earns its place through solids content. A 100% solids epoxy contains no water or solvent to evaporate, so essentially everything you roll out stays on the slab and cures into film. Water-based kits, by contrast, are typically around 40-60% solids, which means a large share of what you apply disappears into the air and the cured film is correspondingly thinner. That single difference explains most of the durability gap between this product and the budget options further down the list.
Where it stands apart is chemical resistance. Once fully cured, a high-solids film forms a tight cross-linked surface that oil, petrol, brake fluid and road salts struggle to penetrate. Spills sit on top long enough to wipe up rather than soaking into the concrete. The trade-off is preparation and forgiveness. This system demands careful surface preparation, often diamond grinding to open the concrete's pores and create a mechanical key, and it has a finite pot life once the two parts are mixed. Mistakes during application, thin spots, missed sections, applying over a damp slab, are far less forgiving than with a water-based kit, because you cannot simply sand back and re-roll a fully cured 100% solids coat without scarifying it first.
Pros:
Cons:
Most epoxy coatings yellow when sunlight hits them, which matters for garage floors near open doors or carports. The reason is chemistry: standard epoxy is built on aromatic amines, and the aromatic rings absorb UV light and degrade into the amber tint homeowners notice after a season or two. MPC-100 addresses this directly by using an aliphatic (non-aromatic) curing system, which resists that UV-driven colour shift and keeps the finish clear rather than amber over time. It is the same chemistry used in UV-stable topcoats, applied here as a high-build resin.
The high-build resin system delivers strong adhesion to properly prepared concrete and a seamless surface that is easy to clean. Coverage is generous, so a single kit goes further than many competitors. The catch is availability: this is not a product you will find on a standard hardware shelf, which makes sourcing less convenient for a weekend project.
This is the part most guides skip, and it is where a good product still fails. Epoxy cures by an exothermic chemical reaction, and that reaction is temperature-sensitive. Below roughly 15°C the cure slows dramatically and the film can stay tacky for days; above about 30°C the pot life shortens and the coating can flash-cure before it levels, leaving roller marks.
Pros:
Cons:
Rust-Oleum EpoxyShield is the practical entry point for DIY enthusiasts. The water-based formula cleans up easily, applies in a single coat and comes with decorative colour chips to hide imperfections in the slab.
Pros:
Cons:
Seal-Krete targets a specific problem: slabs that push moisture upward. Its water-based formula resists oil, grease and petrol stains while standing up to moisture vapour transmission better than many budget coatings.
Pros:
Cons:
Polyaspartic coating generally outlasts standard epoxy in UV stability and curing speed, while 100% solids epoxy wins on thickness and cost per square metre. The right choice depends on sun exposure, traffic and budget.
100% solids epoxy systems generally outlast water-based kits because they cure thicker and resist abrasion, chemical spills and hot tyre pickup better. A high-build epoxy with a polyaspartic topcoat gives the longest service life, since the topcoat adds UV stability the epoxy alone cannot provide. Durability also depends on surface preparation: diamond grinding and a primer coat matter as much as the product you choose.
A well-installed garage floor epoxy usually keeps its colour and gloss after five years, especially with a UV-stable topcoat. Floors that fail early tend to show peeling near the garage door, hot tyre pickup marks, or yellowing from sunlight. Moisture vapor transmission through the concrete substrate is a common cause, which is why moisture testing before application matters.
DIY kits can perform reasonably in light-duty garages, but they usually contain less solids and cure thinner than professional systems. A DIY roller-applied coating may last a few years, while a professionally applied 100% solids epoxy with proper surface preparation can last considerably longer. The biggest difference is preparation: acid etching versus diamond grinding changes how well the coating bonds.
Lifespan depends on the system, traffic and maintenance. A water-based DIY coating might give three to five years, while a professionally installed 100% solids epoxy with a topcoat can last a decade or more. Regular sweeping, prompt spill cleanup and avoiding harsh solvents extend garage floor longevity. Recoating before the coating wears through is far cheaper than full removal.
Polyaspartic coatings cure faster, resist UV yellowing and tolerate lower temperatures during application, which suits outdoor or sun-exposed slabs. Epoxy bonds strongly and builds a thicker, harder film at a lower material cost. Many installers combine them, using epoxy as the base and polyaspartic as the topcoat, so you get abrasion resistance plus UV stability in one system.
A garage floor coating only performs as well as the preparation and application behind it. Spray Pave Pro handles the full process, from high-pressure cleaning and surface preparation through to epoxy flooring and professional sealing, backed by 23 years of experience and a 100% satisfaction guarantee. If your concrete is cracked, stained or simply worn out, get a free quote from Spray Pave Pro and find out what your garage floor can actually become.
Last Updated: September 27, 2026
Epoxy flooring alternatives for commercial kitchens exist because standard epoxy has a specific weakness: it cannot handle thermal shock. According to Safe Work Australia's guidance on managing risks in food premises, slips and trips remain among the most common workplace injuries, and a wet kitchen floor is where that risk concentrates.
Standard epoxy is rigid. When a 90°C washdown hits a 20°C floor, the coating expands faster than the concrete beneath it. That stress builds at the bond line until the floor peels.
Four factors decide whether an alternative will last:
Get these four right and the floor outlasts the fit-out. Get them wrong and you're resurfacing again in two years.
| Material | Thermal Shock | Chemical Resistance | Best For | Relative Cost |
|---|---|---|---|---|
| Polyurethane cement | Excellent | Excellent | Wet, high-heat zones | Higher upfront |
| Commercial vinyl | Moderate | Moderate | Budget renovations, front-of-house | Lowest upfront |
| High-build resin (HBE) | Good | Very good | Aesthetic + industrial mix | Mid-range |
| Resin flooring systems | Very good | Excellent | Large-scale food facilities | Project-quoted |
The table shows the trade-off clearly: nothing wins on every line. The right choice depends on where in the kitchen the floor sits and how it's used.
Polyurethane cement flooring is a high-performance system built for the extreme temperature swings in commercial kitchens. It handles hot water washdowns, food acids, and heavy equipment traffic without the cracking that plagues standard epoxy.
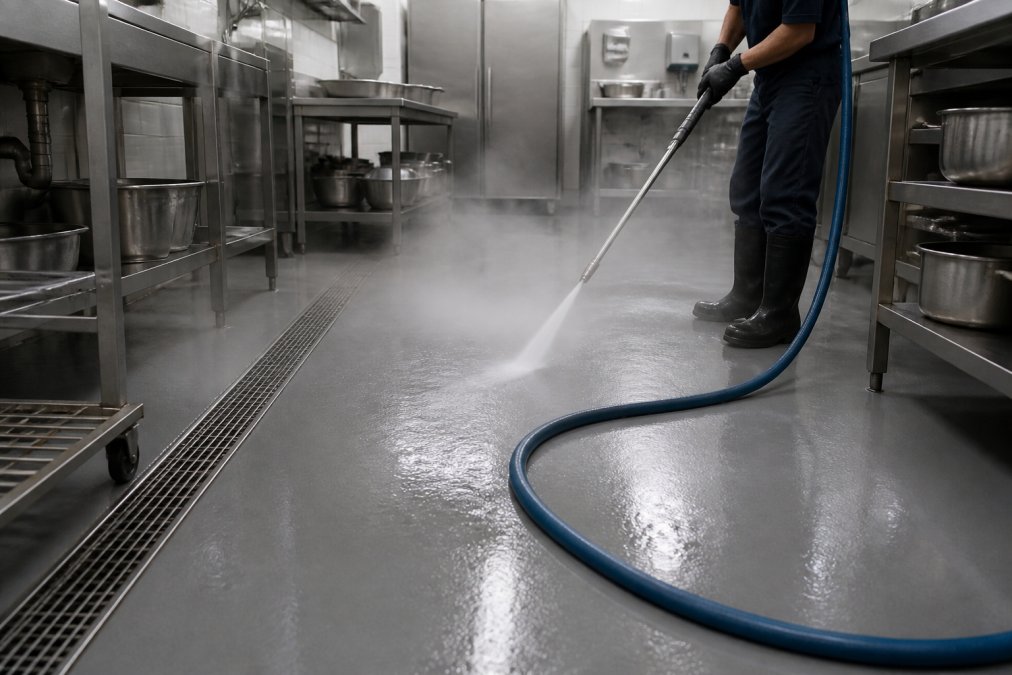
The short answer: anywhere the floor meets heat and water at the same time.
Urethane cement costs more upfront and needs professional installation because of its curing requirements. For a dry storage area or front-of-house, it's overkill. Save it for the wet zones where it earns its keep.
Commercial vinyl flooring is the most affordable epoxy alternative for kitchens where the budget is tight. It's water-resistant, available in slip-resistant textures, and quick to install.
High-build epoxy (HBE) systems are applied at a much greater film thickness than standard decorative epoxy, typically built up in multiple coats with aggregate broadcast between layers, rather than a single thin seal coat. That extra build is the whole point: a thicker resin matrix absorbs impact, bridges minor substrate imperfections, and takes far longer to wear through under trolley traffic and dropped equipment than a 200-300 micron decorative coating.
A high-build system is not one product, it is a build-up. A typical specification includes a primer, a base coat, a broadcast layer of graded aggregate (silica or quartz) for grip and body, and one or more seal coats. The result is a floor that behaves more like a thin screed than a paint film.
That build-up is what delivers the performance gains:
Against standard epoxy, high-build wins on almost every durability metric. It resists impact, abrasion, and chemical attack better, and it lasts longer in food preparation environments where the floor is cleaned daily with degreasers and sanitisers.
The most common specification error is applying a high-build system everywhere in a kitchen when only part of the space needs it. A zone-by-zone approach, urethane cement in the washdown and dishwash areas, high-build resin in prep, plating, and front-of-house, usually delivers the same service life for a lower total spend than a single premium system across the whole floor.
The slip resistance standards AS 4586 set out how floor surfaces are classified for slip risk in Australia. If your kitchen floor doesn't meet the right classification for its use, you're exposed to both safety incidents and compliance problems.
AS 4586 classifies flooring by test results, and the classification you need depends on the area. A dry storage room and a wet dishwashing zone have very different requirements.
The wetter and greasier the zone, the higher the slip resistance classification it needs. This is where a lot of generic flooring advice fails: it treats the whole kitchen as one surface when the requirements differ from corner to corner.
Commercial kitchen flooring maintenance requirements vary sharply by material, and they affect your long-term costs more than the install price does.
| Material | Daily Care | Deep Clean | Typical Repair |
|---|---|---|---|
| Urethane cement | Damp mop, degreaser | Periodic scrub | Patch with same system |
| Commercial vinyl | Sweep, mop | Machine scrub | Replace tiles or sections |
| High-build resin | Damp mop | Degreaser scrub | Localised recoat |
| Standard epoxy | Damp mop | Careful scrub | Often full resurface |
Most comparison guides stop at the install quote. That is the smallest number in the decision. The three factors below decide whether a floor is genuinely good value over its service life, and almost no competitor article covers them in any depth.
A cheap floor that needs replacing in two years costs more than an expensive one that lasts ten. The problem is that most quotes only show the install figure, so the comparison never happens.
A commercial kitchen floor will get damaged. A dropped knife, a dragged oven, a chemical spill left overnight. The question is not whether damage happens, it is whether you can patch a section or whether you must close the kitchen and resurface the lot.
How each material behaves:
Hard resin floors reflect sound. In a busy kitchen with dozens of staff, stainless steel benches, and extraction running, that reflection turns the room into a noise box. Over a shift, the effect is fatigue, raised voices, and more communication errors.
Polyurethane cement is the most durable option for wet, high-traffic commercial kitchens. It handles thermal shock from hot water washdowns, resists food acids, oils and cleaning chemicals, and forms a seamless, non-porous surface that will not harbour bacteria. High-build resin systems also perform well where thermal extremes are less severe. Standard epoxy is the weakest of these in wet kitchens because it can crack when temperatures swing quickly, which makes it a poor fit for dishwashing and cooking zones.
Polyurethane cement, commercial vinyl, high-build resin systems and trowel-applied resin flooring all work as alternatives. Urethane cement suits extreme temperature swings and heavy chemical exposure. Vinyl suits front-of-house and budget renovations where upfront cost matters most. High-build resin sits between the two, offering a thicker protective layer than standard epoxy without the full cost of urethane cement. The right pick depends on your kitchen's heat, grease and traffic profile.
Polyurethane cement outperforms standard epoxy on thermal shock, chemical resistance and impact resistance, which is why it is common in commercial kitchens and food processing plants. Epoxy cures to a hard, glossy finish that cleans easily but can crack when hit with rapid temperature changes. Urethane cement flexes with those swings instead. The trade-off is cost and installation complexity, since urethane cement needs professional application and a longer curing window.
AS 4586 sets out how slip resistance is measured and classified in Australia. Wet and greasy kitchen zones need a higher classification than dry storage areas, and your local health department regulations may impose extra requirements. When you get quotes, ask for the AS 4586 classification of the proposed finish, not just the product name. A coating that meets the standard on paper can still fail in practice if the wrong profile or application method is used.
Downtime depends on the system. Vinyl is the fastest, often installed in a day or two. High-build resin systems typically need two to four days including curing. Urethane cement takes longer because of substrate preparation and curing requirements, so plan for several days to a week of partial or full closure. Ask your installer for a written schedule with cure times before you commit, and factor in when the kitchen can safely reopen for food preparation.
