
Last Updated: September 26, 2026
Working out the pressure cleaning cost in Perth for 2026 starts with understanding that no single rate exists. Every quote reflects the size of the job, the surface type, how much grime has built up, and how easily the crew can access the area. This guide from Spray Pave Pro breaks down what moves the number up or down.
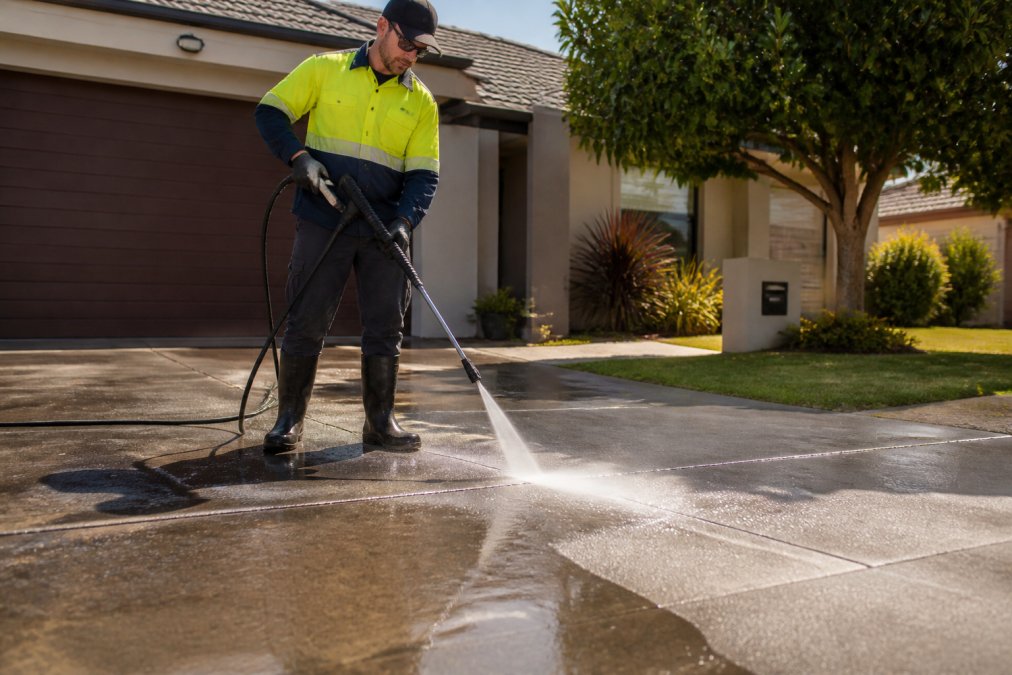
Most established operators quote per square metre rather than by the hour, because it gives you a fixed number to compare. Square metre pricing bundles labour, equipment, water, and detergents into one rate, so a larger driveway costs more but the rate per square metre often drops as the job scales.
| Pricing Method | Best For | Watch Out For |
|---|---|---|
| Per square metre | Driveways, patios, large flat areas | Minimum charges on small jobs |
| Hourly rate | Stain removal, tight access, unknown scope | Costs can creep if the job runs long |
| Fixed-price quote | Most residential and commercial work | Make sure inclusions are in writing |
A fixed-price quote locks in your total before work starts. A thorough quote should list the areas covered, the cleaning method, whether stain treatment or sealing is included, and how runoff will be managed.
Most guides still quote 2024 or 2025 figures, which understate what a contractor must now charge because every major input into an exterior cleaning job has moved. Understanding the drivers lets you sanity-check a quote instead of guessing.
The figures below are typical ranges for a standard single-storey residential job with reasonable access, quoted per square metre. They are indicative only, every operator's minimum charge, travel zone, and inclusions differ, and a firm quote depends on an on-site assessment.
| Surface / Job Type | Typical 2026 Range (per m²) | Notes |
|---|---|---|
| Concrete driveway or path (light soiling) | Lower end of the residential band | Fastest job; surface cleaner does most of the work |
| Concrete driveway (heavy or oil-stained) | Mid to upper residential band | Pre-treatment and repeat passes add time |
| Exposed aggregate or pavers | Mid residential band | Joint sand and loose aggregate need care |
| Limestone or sandstone paving | Upper residential band | Requires soft wash or reduced pressure |
| Painted render or timber | Upper residential band | Soft wash only; detergent dwell time |
| Roof (tiled or metal, soft wash) | Quoted per roof, not per m² | Access, height, and runoff control dominate |
| Commercial hardstand or loading dock | Quoted per site | Frequency, after-hours access, and runoff plan |
Treat the ranges as a filter, not a quote. If a figure sits well below the band for your surface, ask what is excluded, pre-treatment, stain removal, sealing, and runoff management are the usual omissions. If it sits well above, ask what extra work is included, such as crack treatment, re-sanding of joints, or a post-clean sealer.
Water Corporation, waterwise and outdoor water use guidance
Soft washing and pressure washing are not interchangeable, and choosing wrong is how surfaces get damaged. Soft washing is a low-pressure method that relies on specialised detergents to break down mould, algae, and grime, then rinses them away gently. Pressure washing uses high-pressure water to blast away dirt mechanically.
| Method | Pressure Level | Best For | Avoid On |
|---|---|---|---|
| Soft washing | Low | Render, painted walls, timber, aged stone | Heavy oil or deep-set stains |
| Pressure washing | High | Concrete, pavers, brick, driveways | Soft stone, painted or cracked surfaces |
When a surface cannot handle high pressure, several gentler options still deliver a clean result. Soft washing is the primary alternative, but not the only one.
Different surfaces fail in different ways under pressure, and knowing the risks prevents an expensive mistake.
Sealing is the step most homeowners skip, and it determines how long a clean actually lasts. The concrete sealing cost per square metre depends on the sealer type, the surface condition, and whether preparation is needed.
Hiring a machine and doing it yourself looks cheaper on paper, and for a small, lightly soiled path it genuinely can be. The maths changes once you price the full job, not just the hire fee.
The repair bill is where DIY stops being cheap. Common outcomes:
A professional job bundles commercial-grade equipment, the correct detergent for each surface, the judgement to know what pressure a surface can take, insurance cover, and a result you can hold the operator to. It also includes runoff containment and disposal, which DIY rarely does properly.
DIY is reasonable when the job is small, the surface is hard-wearing concrete or brick, the soiling is light, and you already own or can cheaply hire the right machine. A single concrete path or small paved courtyard fits that description.
Professional cleaning wins on ROI when any of the following apply:
Getting the pressure cleaning cost right comes down to matching the method and quote to your actual surface, not chasing the lowest number. The cheapest quote is rarely the best value once inclusions, sealing, and surface risk are factored in.
Pressure cleaning cost in Perth depends on the surface area, level of grime, and accessibility. Most providers quote per square metre or offer a fixed price after a site inspection. Larger driveways, heavy oil stains, and delicate surfaces requiring soft washing will sit at the higher end. Request a free quote for an accurate figure based on your property.
Key factors include total square metres, surface type (concrete, pavers, brick), severity of stains or mould, access for equipment, and whether sealing is added. A simple concrete driveway with light grime costs less than a paver surface with oil stains and moss. Water consumption and eco-friendly detergent use also affect the final quote.
No. High-pressure cleaning can damage delicate surfaces like rendered walls, timber decking, and aged mortar. For these, soft washing or chemical treatments are safer alternatives. A professional site inspection determines the correct method to protect surface integrity while still removing grime and mould effectively.
Standard pressure cleaning uses high-pressure water to blast away dirt, ideal for concrete and pavers. Soft washing uses low pressure with specialised detergents to kill mould and algae at the root, making it safer for render, timber, and painted surfaces. The right choice depends on the material and the type of buildup.
Sealing is recommended after pressure cleaning to protect against future stains, UV damage, and moisture. Concrete sealing cost per square metre varies with the sealer type and surface condition, but it typically extends the life of the clean and reduces long-term maintenance. It also enhances curb appeal and property value.
Most residential driveways benefit from professional cleaning every 12 to 18 months, depending on tree cover, traffic, and weather exposure. Commercial premises with high foot traffic may need quarterly or half-yearly servicing. Regular cleaning prevents grime and mould from bonding to the surface, which keeps costs lower over time.
Last Updated: September 25, 2026
Concrete sealing is the process of applying a protective coating to concrete surfaces to prevent moisture, stains, and chemical damage. For homeowners across Perth, choosing the right concrete sealing service protects one of your most valuable assets: your driveway, patio, or pool surround.
This guide compares concrete sealing services in Perth, covering what each does best, where they fall short, and how to compare them on substance rather than sales pitch. Below, we break down each provider and explain exactly what separates a sealing job that lasts a decade from one that fails in a year.
Spray Pave Pro is a concrete resurfacing and sealing specialist with over 23 years of experience transforming residential and commercial properties across Perth. The team handles spray-on concrete, high-pressure cleaning, epoxy flooring, and professional sealing in one coordinated service.
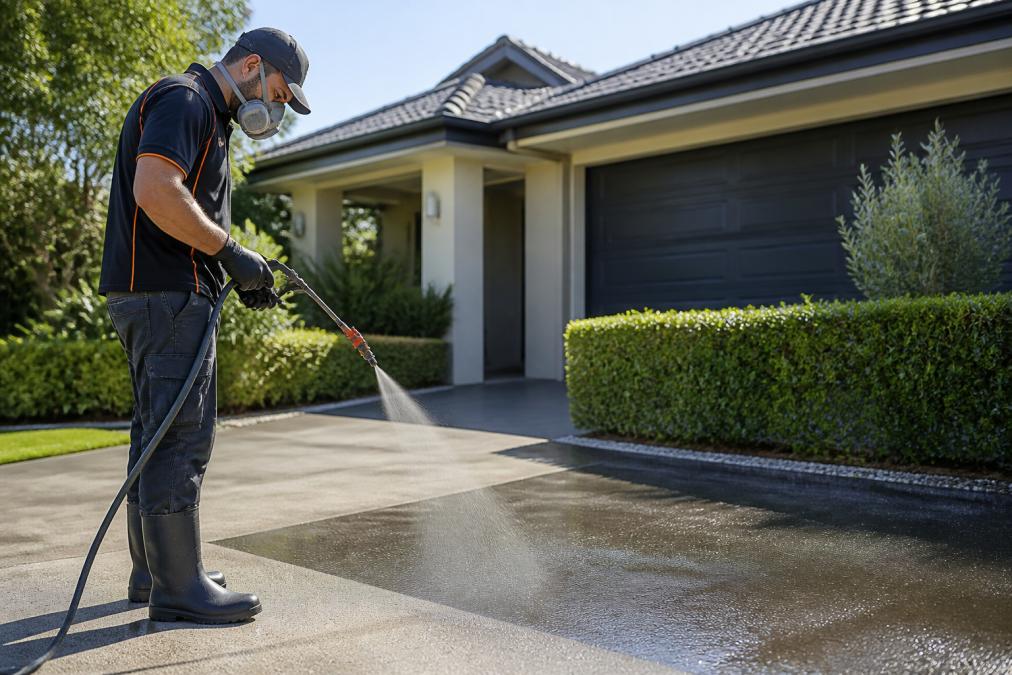
What sets this service apart is the pairing of resurfacing with sealing. If your driveway has cracks, stains, or worn patches, a sealer alone will not fix the surface underneath. Spray Pave Pro addresses the damage first, then applies a protective finish designed for long-term performance.
Pros:
Cons:
Cons:
A sealing-only quote is not the same as a resurfacing quote, and the line items should reflect that. A properly scoped driveway or slab sealing job normally covers:
If a quote lists only "clean and seal" with a single figure, treat it as a starting point rather than a finished scope. The preparation and joint work are where most sealing failures originate, and they are the first items a low quote will quietly drop.
Cons:
Cons:
Cons:
Compare concrete sealing services on four criteria: surface preparation, sealer type, warranty terms, and total resurfacing cost. A cheap quote that skips crack repair or uses a thin acrylic sealer may cost more over five years than a properly prepared job.
Use this checklist when reviewing quotes:
| Provider | Specialisation | Best For | Quote Basis |
|---|---|---|---|
| Spray Pave Pro | Resurfacing and sealing | Cracked, stained driveways and pool surrounds | Free quote |
| PM Industries | Dedicated sealing | Driveways and slabs needing protection only | Free quote after inspection |
| NextGen Concrete Services | Remedial and sealing | Structurally damaged concrete | Custom quote |
| Tuff Cut n Seal | Cutting and sealing | Small residential maintenance | Service-based quote |
| Concrete and Spray Solutions WA | Decorative spraying | Exposed aggregate and coloured concrete | Per square metre |
The best non-slip pool deck coating for wet areas is a textured epoxy or rubberised surface with a verified coefficient of friction rating. Standard smooth sealers become dangerous when wet, which is why pool surrounds need a different specification from driveways.
Rubberised and textured epoxy finishes add grip through surface texture rather than a separate anti-slip treatment that wears off. For pool surrounds, prioritise:
Most pool-deck guides stop at slip ratings and never mention that the surface is sitting in a mild chemical bath for years. Chlorinated water, salt water and pool-balancing chemicals each attack a coating differently, and the wrong sealer will chalk, blister or lift long before its warranty period ends.
A practical test before you commit: ask the provider which sealer chemistry they recommend for your specific pool type, and whether they will warrant the coating against chemical exposure as well as UV. A provider who offers only one product for every pool has not thought about the chemistry.
In full sun, a dark sealed concrete deck can become uncomfortable or unsafe to walk on barefoot, and the difference between coatings is larger than most buyers expect. Colour and finish matter more than the sealer brand.
If cool-underfoot performance matters, the two levers are colour and texture, in that order. A light, textured finish will outperform a dark, smooth one regardless of the sealer chemistry, and no amount of UV additive will fix a black deck in full sun.
Sealed concrete also needs a maintenance schedule to keep performing. Reseal high-traffic areas every two to three years, clean with pH-neutral products rather than harsh acids, and address hairline cracks before they widen. For guidance on surface safety standards, refer to Safe Work Australia's slip and trip prevention guidance.
Rubberised coatings and textured epoxy with non-slip additives offer the best grip when wet. They create a coefficient of friction that meets Australian slip resistance standards, reducing the risk of falls on wet pool surrounds. Spray Pave Pro applies these coatings over existing concrete, so you get a safer surface without full replacement. Regular cleaning and resealing every few years keep the texture effective.
Concrete resurfacing cost depends on the area size, surface condition, and coating type. Most providers quote per square metre after an on-site inspection. Spray Pave Pro offers free quotes and can tailor a solution to your budget. Request a quote to get an accurate figure for your project.
To maintain sealed concrete, sweep or hose it regularly to remove grit, and clean spills promptly with mild detergent. Avoid harsh chemicals that can break down the sealer. Reapply a fresh coat every two to three years, or sooner in high-traffic or coastal areas. Spray Pave Pro can advise on a maintenance schedule suited to your surface and climate.
Professional sealing typically lasts longer and provides better protection than DIY kits. Professionals prepare the surface correctly, use commercial-grade sealers, and apply even coats. While DIY may save money upfront, poor preparation often leads to peeling and early failure. Spray Pave Pro's 23 years of experience and 100% satisfaction guarantee mean you get a durable result.
Choosing the wrong sealing provider costs more than the original quote, because failed coatings mean paying twice. Spray Pave Pro has spent 23 years sealing and resurfacing concrete across Perth, pairing crack repair with durable protective coatings and backing every job with a 100% satisfaction guarantee. Get a free quote from Spray Pave Pro and protect your driveway, patio, or pool surround with a finish built to last.
Last Updated: September 24, 2026
Choosing the best low maintenance for non-slip pool surfacing comes down to one trade-off: how much ongoing work you accept for grip, comfort and looks. Spray Pave Pro has spent 23 years resurfacing concrete around pools. Below is a comparison of six options, followed by detail on each.
| Option | Maintenance Level | Slip Resistance | Best For |
|---|---|---|---|
| Spray Pave Pro resurfacing | Low | High, textured | Cracked or stained existing concrete |
| Tanzite Stone Decks | Low | High | Stone-look upgrades |
| Polysplash Rubber | Low | Very high | Families with young children |
| Porcelain Pavers | Very low | High (R-rated) | Long-term value |
| Acrylic Elastomeric Coating | Medium | Medium-high | Budget concrete resurfacing |
| Broom-Finished Concrete | Very low | Medium | New pool builds |
Spray Pave Pro is a concrete resurfacing specialist that transforms worn pool surrounds with spray-on concrete, high-pressure cleaning and professional sealing, backed by 23 years of experience and a 100% satisfaction guarantee.
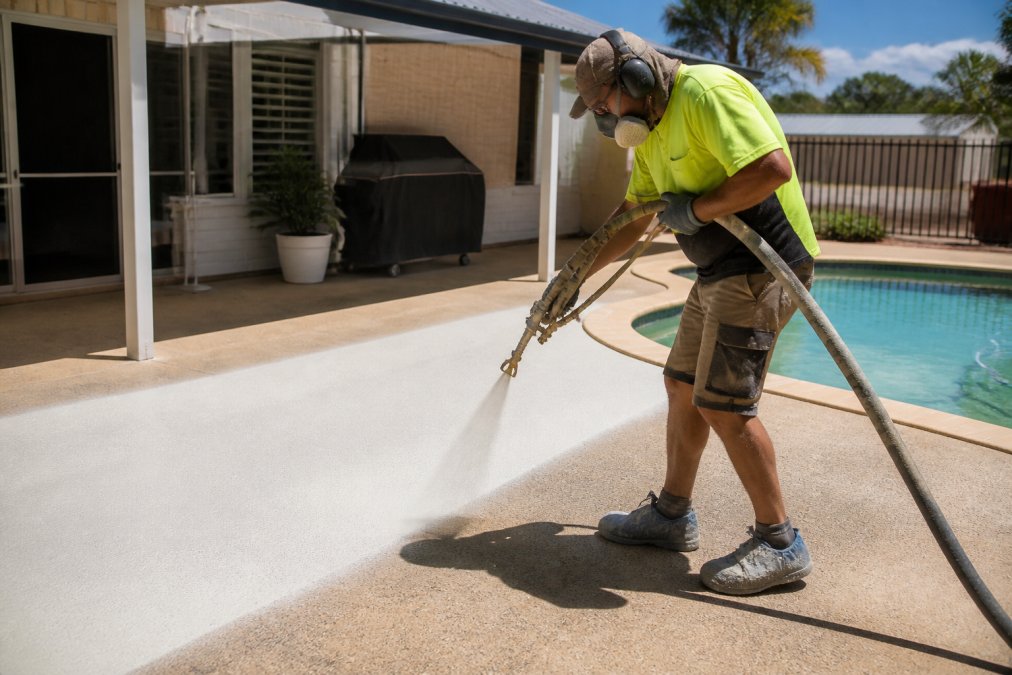
Tanzite Stone Decks is a composite stone decking system built for pool surrounds. Its engineered stone resists water absorption, and the textured profile provides grip without exposed aggregate's roughness.
Polysplash is a rubberised safety surface for wet areas and the softest option here. Its porous design drains water quickly, and the cushioning reduces impact if someone falls near the pool edge.
Porcelain pavers are high-density, vitrified tiles made for outdoor use and the lowest-maintenance surface here. The non-porous face resists staining and mould and never needs sealing.
Acrylic elastomeric coating is a textured, liquid-applied finish applied straight over existing concrete. It is the most affordable way to resurface a sound slab, and its flexible formula bridges minor cracks.
Broom-finished concrete is created by dragging a stiff broom across the surface while it cures, leaving fine grooves that improve grip. It is the cheapest option upfront and needs almost no maintenance.
Slip resistance for pool surrounds in Australia is governed by two standards. AS 1926.1 sets barrier and safety requirements for swimming pool surrounds, and AS 4586 sets out how slip resistance is classified and tested. If an installer cannot tell you which classification their finished surface achieves under AS 4586, that is a red flag.
AS 4586 recognises two main wet tests for pedestrian surfaces:
| Classification | Test | Typical use around a pool |
|---|---|---|
| R10-R11 | Wet pendulum | Minimum for general wet areas |
| R12-R13 | Wet pendulum | Pool decks, ramps, steps |
| A | Wet barefoot ramp | Pool surrounds, shallow water zones |
| B | Wet barefoot ramp | Pool surrounds, sloping entries |
| C | Wet barefoot ramp | Steep ramps and pool steps |
A product can carry an R-rating and an A/B/C classification at once, they measure different things. For a residential pool deck, look for at least R11 under the wet pendulum test and A or B under the wet barefoot ramp test. Higher ratings mean more grip but also more texture, affecting comfort and cleaning.
Slip ratings apply to the installed surface, not the tin. A coating that tests R12 in a laboratory can drop to R9 once thinned, over-broomed or worn. Two mechanisms cause this:
Slip resistance is not static, it degrades with chemical exposure. Pool surrounds are constantly splashed with chlorinated water, salt water and pH-balancing chemicals, and surfaces respond differently:
AS 4586 slip resistance classification
How to clean non-slip pool surfaces comes down to one rule: never scrub textured finishes with anything abrasive. A stiff brush and mild detergent lift most dirt, and a low-pressure rinse clears the grooves.
Non-slip pool deck coating cost depends on three things: surface area, the existing slab's condition, and the finish you choose. Resurfacing an existing deck costs less than laying new pavers, no demolition, disposal or sub-base work.
Rather than quote a single rate that will not apply to your deck, it helps to understand the order of magnitude. From lowest to highest upfront cost:
Spray Pave Pro provides free quotes, so you can get a figure for your actual deck rather than a generic rate. Ask for the quote to list the finish, the slip classification of the cured surface, and the resealing interval so you can compare the lifetime cost, not just the day-one price.
The best non-slip pool surfacing depends on your priorities. Porcelain pavers offer the lowest maintenance because they are non-porous and resist algae growth. Rubberised surfaces provide the best grip and cushioning for families with children. Acrylic elastomeric coatings are the most affordable way to resurface existing concrete. Each option meets slip resistance standards for pool surrounds when installed correctly by a professional.
Regular cleaning is the main task. Sweep debris weekly and wash the surface with a mild detergent and a stiff brush to prevent algae growth. For textured coatings, a low-pressure hose works better than a high-pressure cleaner, which can damage the surface profile. Resealing frequency depends on the material: acrylic coatings may need recoating every two to three years, while porcelain pavers and rubberised surfaces need no sealing at all.
Acrylic elastomeric coating is typically the most affordable resurfacing option for existing concrete pool decks. It is a liquid-applied product that bridges minor cracks and provides a textured, heat-reflective finish. Broom-finished concrete is cost-effective for new builds but cannot be applied over an existing slab. For a precise non-slip pool deck coating cost for your specific pool surround, request a quote from a resurfacing specialist.
Acrylic elastomeric coatings have heat-reflective properties that keep the surface cooler in direct sun compared with plain concrete or dark stone. Porcelain pavers also stay relatively cool because they do not absorb as much heat. Rubberised surfaces can warm up in full sun but remain comfortable due to their cushioning. Light-coloured finishes consistently perform better than dark tones for heat retention.
Resealing depends on the material. Acrylic elastomeric coatings generally need recoating every two to three years to maintain optimal slip resistance and colour. Concrete sealers may need reapplication annually in high-traffic or chemically exposed areas. Porcelain pavers and rubberised surfacing do not require sealing. Check with your installer for a maintenance schedule specific to your pool surround and local climate.
Last Updated: September 23, 2026
Car park paving is the process of designing, preparing and surfacing a parking area so it carries vehicle loads, drains properly and stays serviceable for years. A commercial project combines subgrade preparation, base course installation, compaction, surfacing, kerbing, drainage and line marking into one scope.
The choice comes down to traffic load, climate exposure and how much maintenance you will tolerate. Bitumen and asphalt are flexible and quick to lay; concrete is rigid, handles heavy duty loads well, and costs more upfront.
| Surface | Best For | Key Weakness |
|---|---|---|
| Asphalt | Fast turnaround, tight budgets | Softens in heat, needs sealing |
| Bituminous | Resurfacing over sound base | Inherits base defects |
| Concrete | Heavy duty, industrial paving | Higher upfront cost, joint maintenance |
A commercial paving installation process follows a fixed sequence, and skipping any stage shows up within a season or two.
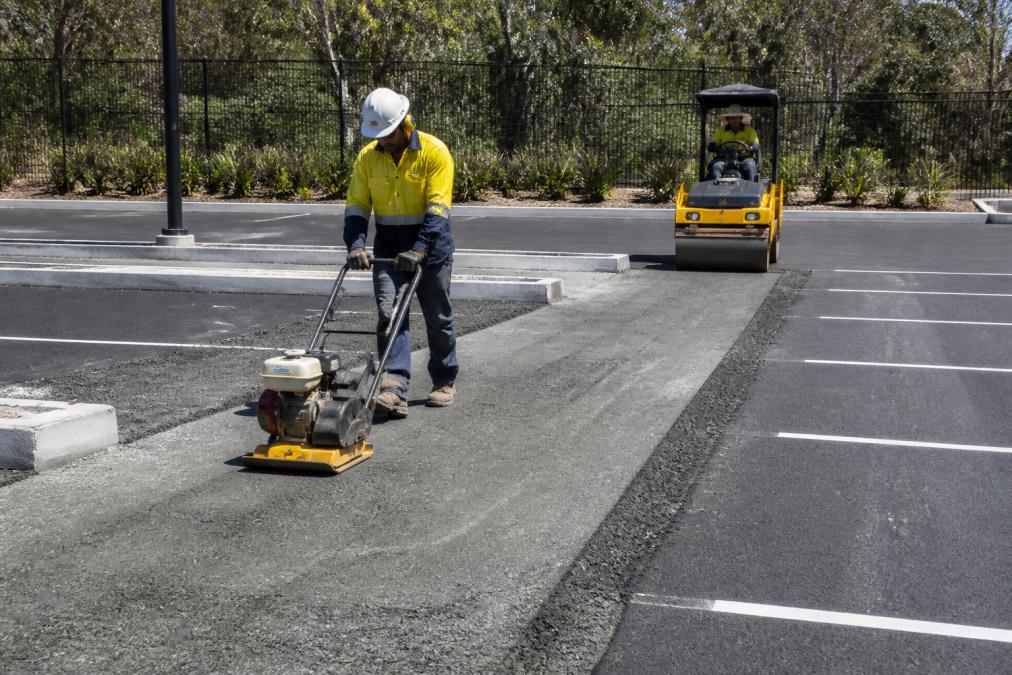
Subgrade is the natural soil beneath the pavement; base course is the engineered aggregate layer on top of it. Compaction turns loose aggregate into a load-bearing structure.
Water is the single biggest cause of premature car park failure. Drainage and kerbing requirements exist to move surface water away from the pavement structure before it saturates the base course.
Key elements include:
Resurfacing is the right call when the base structure is still sound and damage is confined to the surface layer. Rebuilding is the right call when the base has failed. Look at the pattern of the damage.
Durable outdoor floor coatings are surface systems applied over prepared concrete or asphalt to improve wear resistance, slip resistance and appearance. They are not a substitute for structural repair, but they extend service life on sound pavements.
Line marking and signage make a finished car park legal and usable. Getting them wrong creates liability long after the paving crew has left, and it is one of the few parts of a car park project where a defect can be enforced against the owner rather than the contractor.
Off-street car parking in Australia is governed primarily by AS/NZS 2890.1 (off-street car parking) and AS/NZS 2890.6 (off-street parking for people with disabilities). These are the reference documents councils, certifiers and building surveyors use when assessing a car park against its development approval.
Line marking degrades faster than the surface beneath it. In a busy retail or office car park, expect legibility to drop noticeably within two to three years, sooner on entries, exits and loading zones where tyre scuffing is heaviest. Faded accessible bay markings and directional arrows are compliance and liability issues, and cheap to fix compared with the cost of an incident.
Maintenance is where car park owners consistently under-budget. The pattern is predictable: nothing for three years, then a large unplanned repair bill that lands in the same financial year as a roof replacement or an HVAC failure.
These are typical ranges for a well-constructed car park on a sound base, in a temperate climate, with basic maintenance. Poor drainage, heavy vehicle loads or a clay subgrade will pull these numbers down.
| Surface | Typical Service Life | Major Intervention |
|---|---|---|
| Asphalt (sealed) | 15-20 years | Reseal every 3-5 years; resurface at end of life |
| Asphalt (unsealed) | 8-12 years | Oxidation and raveling accelerate without sealing |
| Concrete | 25-30 years | Joint sealing and slab repair; full replacement rarely needed |
| Exposed aggregate / decorative | 15-20 years | Resealing to maintain appearance and slip resistance |
| Permeable pavers | 20-25 years | Periodic cleaning to maintain infiltration |
| Task | Frequency | Purpose |
|---|---|---|
| Inspection and debris clearing | Every 6 months | Catch drainage blockages and early cracking |
| Crack sealing | Annually | Stop water entering the base course |
| Pothole repair | As needed | Prevent edge deterioration spreading |
| Resealing (asphalt) | Every 3-5 years | Restore surface protection and appearance |
| Line marking refresh | Every 2-4 years | Maintain compliance and legibility |
| Joint sealing (concrete) | Every 5-7 years | Prevent water ingress at joints |
| Full-depth repair | As needed | Address localised base failures before they spread |
A practical approach for a commercial car park is to budget for routine maintenance, plus a separate reserve for the major intervention at end of life. For asphalt, that is a mill-and-resurface; for concrete, typically joint rehabilitation and localised slab repair.
For a commercial car park, the cost of the work is only part of the budget. Lost parking, staged closures, relocating tenants or customers, longer travel times, often exceeds the construction cost on a busy site. Scheduling major works during low-demand periods and staging so a portion stays open is usually worth the small premium.
Permeable paving allows water to pass through the surface into the sub-base rather than running off. For car parks, it reduces stormwater load, lowers ponding risk and can help projects meet sustainability requirements in planning approvals.
Options worth considering:
Pricing for car park paving depends on the surface type, site access, subgrade condition and total area, so it varies from project to project. Asphalt, bitumen and concrete each carry different material and labour costs, and resurfacing an existing slab is usually cheaper than a full rebuild. Request a site assessment and itemised quote rather than relying on a generic per-square-metre figure.
Asphalt car parks typically need resurfacing within 15 to 20 years, while well-constructed concrete pavements can last 30 years or more with proper maintenance. Lifespan depends heavily on base course preparation, drainage, traffic loads and how quickly cracks and potholes are repaired. Regular crack sealing and seal coating extend the interval between major works considerably.
In many cases, yes. If the subgrade and base course are structurally sound and damage is limited to surface cracking, staining or minor potholes, commercial concrete resurfacing restores the pavement at a fraction of rebuild cost. A site assessment confirms whether the slab can carry the intended traffic load or whether sections need full-depth repair first.
Car park projects must satisfy AS 2890 for parking facilities and AS 3600 for concrete structures, along with local council and state drainage requirements covering stormwater discharge and runoff. Line marking, bay dimensions and accessible parking spaces must comply before the car park is signed off for use.
Last Updated: September 22, 2026
Choosing the right concrete sealers in Western Australia means matching the product to your surface, climate exposure, and desired finish. Long dry summers, intense UV, and coastal salt spray all attack an unsealed slab. This guide from Spray Pave Pro compares five proven options, from full-service professional application to DIY penetrating formulas.
| Sealer | Type | Finish | Best For | Starting Price |
|---|---|---|---|---|
| Spray Pave Pro | Full-service sealing | Custom | Driveways, patios, commercial | Free quote |
| Avista Concrete Sealer | Solvent-based acrylic | High gloss | Decorative concrete | Contact for pricing |
| Crommelin DiamondCoat | Tinted acrylic | Charcoal matte | Faded or tired slabs | $75.90 |
| Foundation Armor SX5000WB | Silane-siloxane penetrating | Natural | Driveways, walkways | Contact for pricing |
| Deco Crete D-ONE | High-solids topical | Satin | High-traffic surfaces | Contact for pricing |
Penetrating sealers soak into the concrete and react below the surface; topical sealers form a film on top. The choice shapes appearance, slip resistance, maintenance, and longevity.
Penetrating sealers, typically silane-siloxane or siliconate formulas, bond chemically with the substrate inside the pores, leaving the surface almost unchanged while making it hydrophobic so water beads and runs off.
Film-forming sealers, acrylic, polyurethane, and epoxy coatings, sit on top of the concrete as a continuous membrane. They deliver gloss or matte finishes, deepen decorative concrete colour, and resist oil and chemical stains more aggressively.
Work through these questions in order; the first that applies usually settles the choice.
Not every product fits one camp. Some penetrating sealers have a slight sheen, and some topical acrylics are more breathable than a traditional membrane. Lithium silicate densifiers harden rather than waterproof the surface and are usually a preparatory step before a sealer. If a technical data sheet does not state whether a product is breathable or film-forming, ask the supplier before you buy.
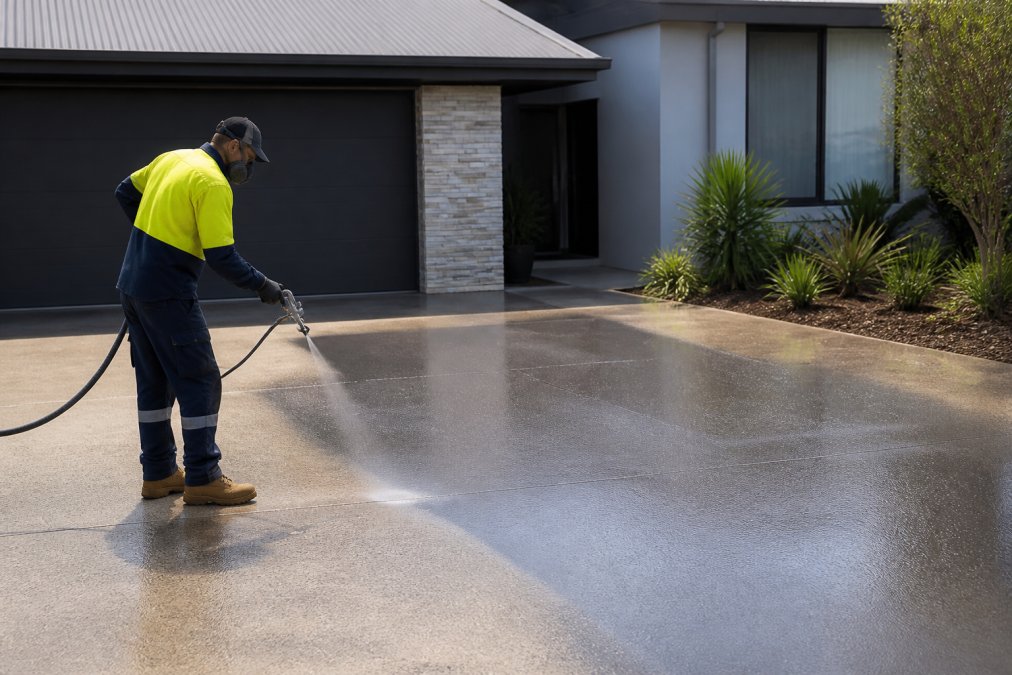
Our top pick for most homeowners is Spray Pave Pro, because the job is only as good as the preparation and application behind it. With 23 years of experience, the team handles high-pressure cleaning, crack repair, and professional sealing as a complete package, backed by a 100% satisfaction guarantee.
Pros:
Cons:
Avista Concrete Sealer is a solvent-based acrylic for decorative concrete that needs to look as good as it performs. The high-gloss finish deepens colour and adds a wet-look sheen suited to exposed aggregate and stamped surfaces.
Pros:
Cons:
Crommelin DiamondCoat Charcoal Tint protects the slab and refreshes its colour at once. If your concrete has faded to patchy grey, this tinted acrylic sealer gives a uniform charcoal finish while blocking water and oil penetration.
Pros:
Cons:
Foundation Armor SX5000WB is a water-based, high-solids silane-siloxane penetrating sealer for protection without changing how the concrete looks. It soaks deep into the substrate, reducing water absorption and salt damage while staying non-yellowing and UV stable.
Pros:
Cons:
Deco Crete D-ONE is built for surfaces that take a pounding: commercial entries, industrial floors, and busy residential driveways. Its high-solids content delivers better coverage per litre, and enhanced chemical resistance holds up against fuel, oil, and cleaning agents.
Pros:
Cons:
Proper preparation is the difference between a sealer that lasts years and one that fails within months. These steps apply to penetrating and film-forming products alike.
Concrete sealing cost per square metre varies with surface area, sealer type, and preparation required. A simple penetrating sealer on a clean slab sits at the lower end; decorative coatings, crack repair, and high-traffic commercial products push it higher.
Use the table below as a starting point, not a rule, the complexity of your slab should override the square metreage.
| Situation | Recommended approach | Why |
|---|---|---|
| Small patio or path, under roughly 30 m², sound and clean | DIY with a quality penetrating sealer | Low risk, low material cost, easy to recoat |
| Standard driveway, 30-80 m², no major defects | Either, depending on confidence and tools | Prep is the deciding factor; a pressure cleaner and roller are the main requirements |
| Driveway with oil stains, cracks, or an existing failed coating | Professional | Stripping, degreasing, crack repair, and profiling are skilled work |
| Decorative concrete (exposed aggregate, stamped, coloured) | Professional | Lap marks and uneven gloss are almost impossible to fix after the fact |
| Commercial or high-traffic surface | Professional | Downtime, abrasion resistance, and documented slip resistance all matter |
| Slab within a few kilometres of the coast | Professional assessment first | Salt exposure and moisture testing change the product choice |
| Any slab showing moisture, efflorescence, or spalling | Professional assessment first | Sealing over an active moisture problem guarantees failure |
A failed sealer is not just a wasted tin. Stripping a peeling coating, re-etching, and starting again can cost several times the original job. The common causes are predictable: sealing a damp slab, skipping prep, applying in direct heat, and choosing a film-forming product where a breathable one was needed.
Solvent-based acrylic sealers and UV-stable penetrating sealers hold up best under strong sun. Look for products labelled non-yellowing and UV resistant, such as Avista Concrete Sealer or Foundation Armor SX5000WB. These resist the chalking and colour fade that cheaper sealers develop after a summer or two, keeping your concrete looking consistent for longer.
It depends on the finish you want. Penetrating sealers soak into the concrete, keep a natural matte look, and resist moisture without trapping vapour, which suits driveways and paths. Topical sealers sit on the surface and add gloss or colour, but they can peel if moisture gets underneath. For most outdoor slabs, a penetrating sealer is the lower-maintenance choice.
Most driveways need resealing every two to five years, depending on the product and traffic. Penetrating sealers often last longer than film-forming ones because they do not wear away as a visible layer. Test by dripping water on the surface: if it soaks in instead of beading, it is time to reseal.
Hot summers, intense UV, and coastal salt spray all shorten sealer life. Sealers that resist UV degradation and moisture vapour transmission cope better with these conditions. Applying at the right temperature and preparing the surface properly also matters more than the brand name, since poor adhesion causes most early failures.
Professional sealing protects against stains, oil, and water damage while making the surface easier to clean. It also extends the life of the slab and improves appearance. A specialist can match the sealer to the concrete's porosity and the conditions it faces, which reduces the risk of peeling, efflorescence, or patchy finishes.
Last Updated: September 21, 2026
Epoxy has a reputation problem on driveways, and it is deserved. The same hard, glossy finish that works beautifully on a garage floor fails outdoors because epoxy is not UV-stable: sunlight breaks down its chemical bonds, causing yellowing, chalking and eventual delamination. Once water gets under a lifting edge, the coating peels in sheets.
The main alternatives to epoxy for residential driveways are polyaspartic and polyurea coatings, spray-on concrete resurfacing, decorative concrete stains, acrylic and penetrating sealers, and full replacement with pavers or tiles. Each solves a different problem.
| Option | Best For | Upfront Cost | Lifespan | Maintenance |
|---|---|---|---|---|
| Polyaspartic coating | Sun-exposed driveways, hot tyre areas | Higher than epoxy | Long, with UV stability | Low |
| Spray-on concrete | Cracked, stained or patchy concrete | Mid-range, quoted per job | Long | Low |
| Concrete stain | Decorative colour on sound concrete | Lower | Permanent colour | Re-seal periodically |
| Acrylic sealer | Budget protection on good concrete | Low | Short, needs redoing | Frequent |
| Pavers or tiles | Full replacement, high-end finish | Highest | Very long | Occasional re-sanding |
Polyaspartic is a fast-curing aliphatic polyurea coating. The word that matters is aliphatic: its molecular backbone lacks the aromatic rings that epoxy contains, and those rings are exactly what absorb UV energy and break down. That is why epoxy chalks, yellows and eventually delaminates on a sun-facing driveway while polyaspartic holds its colour.
| Property | Epoxy | Polyaspartic |
|---|---|---|
| UV stability | Poor, yellows and chalks | Good, colour-stable |
| Cure time | Slow (often 12-24 hours before traffic) | Fast (often return to service same day) |
| Hot tyre pickup | Common | Rare |
| Flexibility | Rigid, brittle in cold | More flexible |
| Moisture tolerance during cure | Low | Higher |
| Relative material cost | Lower | Higher |
Polyaspartic also tolerates application in a wider band of temperatures and humidity, which matters if you are trying to book a job in a shoulder season. Epoxy is fussier: too cold, too damp, or too humid and the cure goes wrong, which is one of the most common reasons a DIY epoxy driveway fails in its first year.
This is where most guides stop, and where the real decision sits. The same driveway can punish a coating in two completely different ways depending on where you are.
Polyaspartic costs more in materials and installation than epoxy, and it still needs sound, dry concrete underneath. Neither coating fixes a failing slab, and neither will hide structural movement, if the concrete is cracking because the base is moving, the coating will crack with it.
If your slab is sound and sun-exposed, polyaspartic is the strongest coating alternative to epoxy, and it is the option most likely to still look right after several summers. If your slab is sound but shaded, or if you are in a cool, wet climate, a penetrating sealer or a sealed resurfacing system may give you better long-term value for less money.
Spray-on concrete is a resurfacing system that lays a new, bonded concrete layer over your existing slab, rather than a thin film coating. It hides cracks, stains and patchy repairs while restoring a uniform, textured finish.
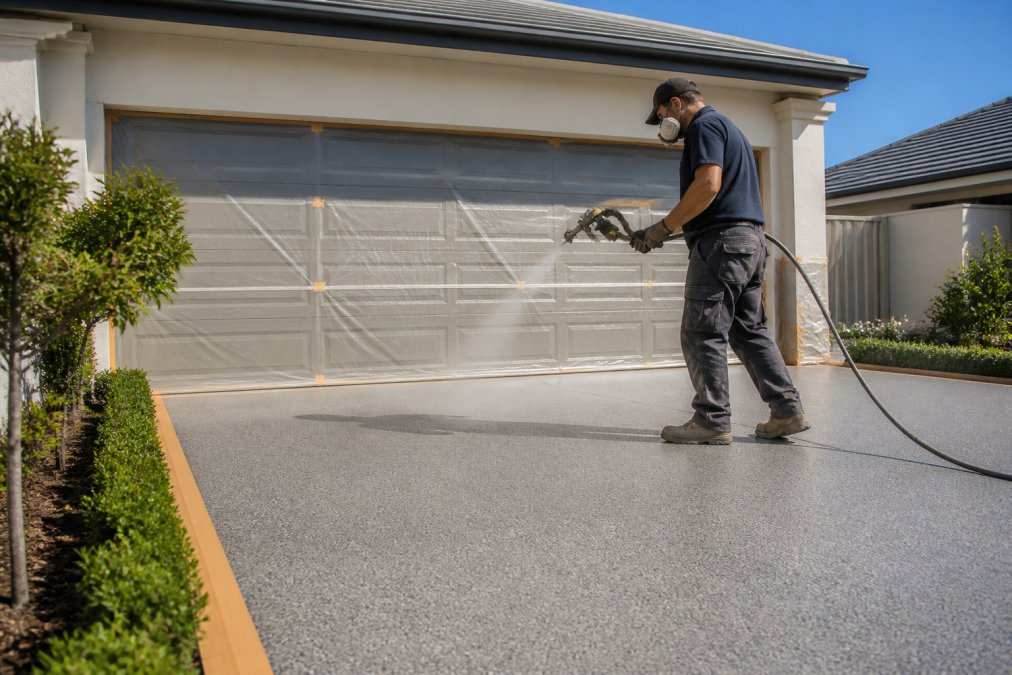
Key advantages include:
Spray-on concrete fixes cosmetic and surface-level damage: cracks, stains, spalling and worn patches. It cannot fix structural failure. If the slab is sinking, heaving or badly broken, resurfacing will crack again. A common mistake is coating over a slab that needed underpinning or replacement first, which wastes the whole job. Get the substrate assessed before committing.
Beyond coatings and spray-on concrete, several options suit specific budgets and goals. The right pick depends on how much you want to spend and how long you plan to stay.
Concrete stain is a penetrating colour treatment that reacts with the slab rather than sitting on top of it, so it cannot peel or flake. It suits sound concrete and pairs well with a sealer for protection.
When a driveway is beyond resurfacing, pavers or tiles are the durable replacement. They handle heavy loads, individual units can be lifted for utility repairs, and permeable options help with stormwater. The catch is cost: this is the most expensive route upfront, and it means the most disruption while the old surface is removed and a new base is laid.
Concrete resurfacing cost is driven by surface area, substrate condition, the system chosen and how much preparation is needed. There is no single national figure, and any guide that quotes one is guessing. What you can do is understand the cost structure, so you can sanity-check a quote instead of trusting it.
1. Size. Material and labour scale roughly with square metres. A double driveway is not double the cost of a single, because setup, masking and travel are largely fixed, but it is close.
This is the strongest argument for choosing the right system the first time. A UV-stable coating on a sun-exposed slab, or a breathable system in a wet climate, avoids the strip-and-replace cycle entirely.
When you have two or three quotes in front of you, compare them on these lines rather than on the headline number:
Because every driveway differs in size, condition and access, a site assessment and written quote is the only reliable way to know your figure. Spray Pave Pro provides free quotes so you can compare options on real numbers rather than guesswork.
The right choice comes down to three factors: your climate, the condition of the substrate, and how long you intend to keep the property. A sun-exposed driveway in a hot climate needs a UV-stable system, which rules epoxy out immediately.
Match the coating to the conditions. In a hot, sunny climate, choose a UV-stable option such as polyaspartic or a properly sealed spray-on concrete surface. If the slab is sound, resurfacing wins on value. If it is failing structurally, replacement is the honest answer.
Polyaspartic coatings are the closest like-for-like substitute, offering faster curing, better UV stability and greater flexibility than standard epoxy. Spray-on concrete resurfacing is another strong option because it rebuilds the worn surface rather than just coating it, and it can hide cracks and stains. Penetrating stains and acrylic sealers suit homeowners who want a lower-cost, no-peel finish, while pavers or interlocking tiles work when the existing slab is too far gone to coat.
Polyaspartic coatings cure much faster than epoxy, often allowing a driveway to be back in use the same day, and they resist UV yellowing that dulls epoxy over time. They also stay flexible through thermal expansion and contraction, which reduces cracking. The trade-off is a higher upfront cost than epoxy. For driveways exposed to strong sun and heat, the longer service life and colour retention usually justify the difference.
For driveways with existing cracks, pitting or staining, spray-on concrete often performs better long term because it adds a new wearing surface rather than sitting on top of a failing one. Epoxy bonds well to sound, dry concrete but can delaminate if moisture vapor transmission is high. Spray-on concrete also gives you control over texture and slip resistance, which matters for pool surrounds and steep driveways.
Acrylic sealers cost the least upfront and are simple to reapply, but they typically need refreshing more often than polyurethane or polyaspartic systems. If you want fewer maintenance cycles, a penetrating sealer paired with a quality topcoat gives better protection against stains and UV. The most cost-effective choice depends on how much traffic the driveway sees and how long you plan to stay in the property.
Polyaspartic and polyurea coatings handle heat well because they stay flexible and resist UV degradation. Light-coloured finishes also help by reflecting rather than absorbing heat, which reduces surface temperature and hot tire pickup. Concrete stains are a good option too, since they penetrate the slab instead of forming a film that can soften or peel in high temperatures.
A cracked, faded driveway drags down the whole look of a property, and patching it yourself rarely lasts. Spray Pave Pro has spent 23 years resurfacing driveways and patios, with spray-on concrete, professional sealing, high-pressure cleaning and epoxy flooring backed by a 100% satisfaction guarantee and a highly professional team. Get a free quote from Spray Pave Pro and transform your driveway with a finish built to handle the sun.
Last Updated: September 20, 2026
Searching for a concrete painter near me usually means your driveway, patio, or pool surround has faded, cracked, or stained, and you want it fixed without a full replacement. Spray Pave Pro has spent 23 years restoring these surfaces across residential and commercial properties.
Residential and commercial jobs differ more in specification than technique. A home driveway needs a hard-wearing surface that resists tyre scuffing and looks sharp from the street. A retail or industrial floor needs a coating that handles foot traffic, trolleys, and cleaning chemicals without losing its slip rating.
For homes, the usual scope covers:
The real differences sit in four areas most service pages never spell out:
| Specification | Residential | Commercial |
|---|---|---|
| Slip rating | Often P3 for wet outdoor areas | Frequently P4 or P5 for kitchens, ramps, and trolley traffic |
| Cure window | Flexible, can stage across days | Tight, often overnight or weekend shutdowns |
| Chemical exposure | Pool chlorine, sunscreen, general cleaning | Degreasers, sanitising agents, hot water wash-downs |
| Coating system | Acrylic sealer, decorative resurfacing, epoxy | High-build epoxy, polyaspartic, urethane cement in wet processing areas |
Spray Pave Pro handles both residential and commercial work, with quick installation that keeps disruption short. The specification is matched to the surface and the traffic it faces, not a one-size-fits-all product.
Proper cleaning is not a formality. Every coating system, from acrylic sealer to full epoxy, needs a clean, sound substrate to bond to. This stage decides whether the finish lasts three years or fifteen, and it is the stage most DIY attempts and cheap quotes skip.
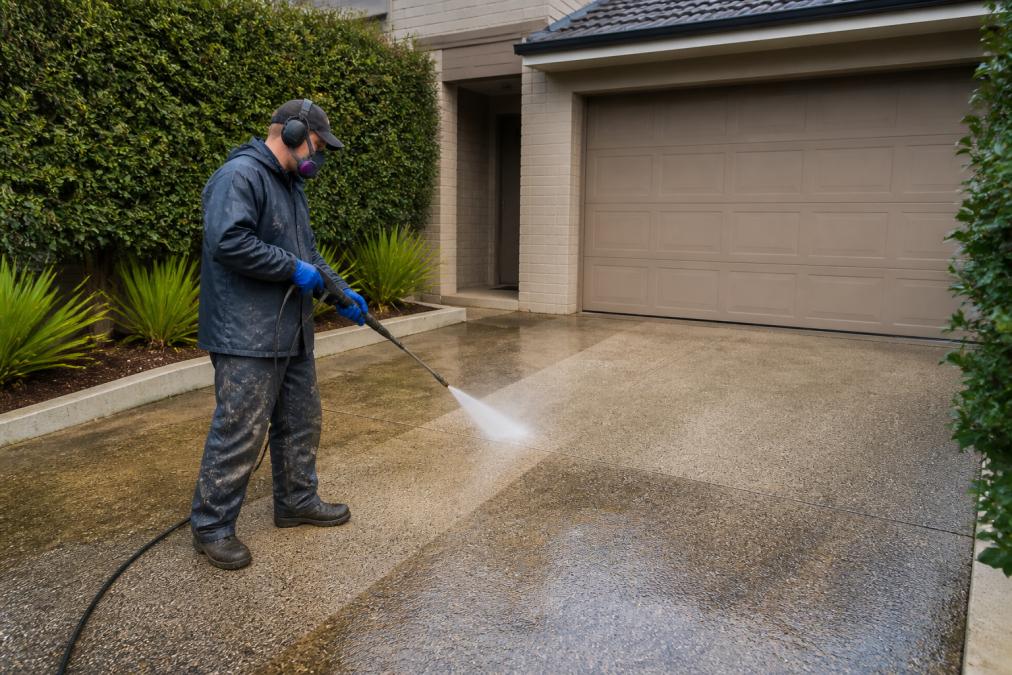
The process starts with pressure cleaning to strip dirt, mould, oil, and old failing coatings. Each contaminant behaves differently:
After cleaning comes concrete repair: filling cracks, patching spalled sections, and grinding back high spots. Concrete etching may open the surface profile so the coating can grip, but grinding or shot blasting is often preferred over acid etching because it produces a more consistent profile and leaves no residue to neutralise.
A common method is the plastic sheet test: plastic taped to the slab for 24 hours, with any condensation underneath indicating moisture vapour rising through the concrete. More accurate readings come from a calibrated moisture meter or calcium chloride test. The result determines whether the slab needs a moisture-tolerant primer, a vapour barrier, or more drying time.
The cleaning routine does not end when the job is done, how you maintain the surface directly affects how long the coating lasts:
Concrete resurfacing cost depends on surface area, slab condition, coating system, and preparation required. There is no flat rate, and any quote given without seeing the site is a guess.
The factors that move a quote most:
| Factor | Why It Matters | Effect on Cost |
|---|---|---|
| Surface area | More square metres, more material and labour | Scales directly |
| Crack and damage repair | Deep cracks need structural patching, not filler | Increases with severity |
| Coating system | Acrylic sealer vs epoxy vs decorative finish | Varies widely |
| Access and drainage | Tight access slows equipment movement | Increases labour time |
| Existing coatings | Old coatings must be stripped first | Adds a preparation stage |
Epoxy flooring installation follows a set sequence, and rushing any stage shortens the coating's life. The process runs across several days, with curing time built in.
The best low maintenance option for non-slip pool surfacing is a textured epoxy or resurfacing system with an integrated slip-resistant aggregate, sealed against moisture. It holds its grip when wet and needs only routine cleaning.
What to look for:
DIY concrete painting looks cheaper on the material receipt. It rarely is once you account for preparation equipment, coating failures, and rework.
Here is the honest comparison:
| Factor | DIY | Professional |
|---|---|---|
| Upfront cost | Lower material cost | Higher, includes labour |
| Equipment | Pressure washer, grinder, applicators | Included |
| Surface preparation | Often underdone | Full prep and repair |
| Coating life | Frequently short | Longer with correct system |
| Rework risk | High if prep is skipped | Low, backed by guarantee |
| Time | Weekends over several weeks | Days |
A correctly applied coating on a well-prepared slab outlasts a cheap coating on a poorly prepared one by a wide margin. Longevity comes from correct specification, proper application, and basic ongoing care.
Keep it simple:
Resurfacing is usually the better choice for driveways and patios with cracks, stains or uneven texture. A concrete painter near me will often recommend a spray-on paving system because it bonds to the existing slab and hides flaws, whereas paint sits on the surface and can peel within a year. Resurfacing also lets you add a slip-resistant coating, which matters around pool areas. If your concrete is structurally sound and only needs a colour refresh, a stain or sealer may be enough, but for long-term durability, resurfacing wins.
A professionally applied coating can last 5 to 10 years or more, depending on the system used and how well it is maintained. Epoxy coatings on garage floors typically last longer than basic acrylic sealers, especially when a protective topcoat is added. The key is surface preparation: if the concrete is properly cleaned, etched and primed, the coating adheres better and resists UV damage. Regular sweeping and occasional re-sealing will extend the life of any coating, particularly in outdoor areas exposed to sun and rain.
No, you should not paint directly over most existing sealers. Paint and epoxy need to bond with the concrete itself, and a sealer creates a barrier that prevents adhesion. If you try to coat over a sealed surface, the new layer will likely peel or flake within months. A professional concrete painter will first test the surface to see if a sealer is present, then remove it using a chemical stripper or mechanical grinding before applying any new coating. Skipping this step is one of the most common reasons DIY coatings fail.
They are strongly recommended for any outdoor concrete that gets wet, especially pool surrounds, driveways and patios. Standard smooth coatings become dangerously slippery when wet, increasing the risk of falls. A slip-resistant coating adds texture that grips even in heavy rain or splashes. Many non-slip systems also include UV resistance to stop fading and a moisture barrier to protect the concrete underneath. If you have children, elderly visitors or a pool, a slip-resistant finish is not optional; it is a safety essential.
Last Updated: September 19, 2026
Concrete sealing applies a protective coating that blocks water, UV rays, stains and chemicals from reaching the slab beneath. Perth's long dry summers, intense sunlight and heavy downpours age bare concrete fast.
Sealing slows concrete's two biggest killers: water ingress and surface erosion. Water soaks into porous concrete, expands as it heats, and breaks the surface apart. Sealing blocks that path.
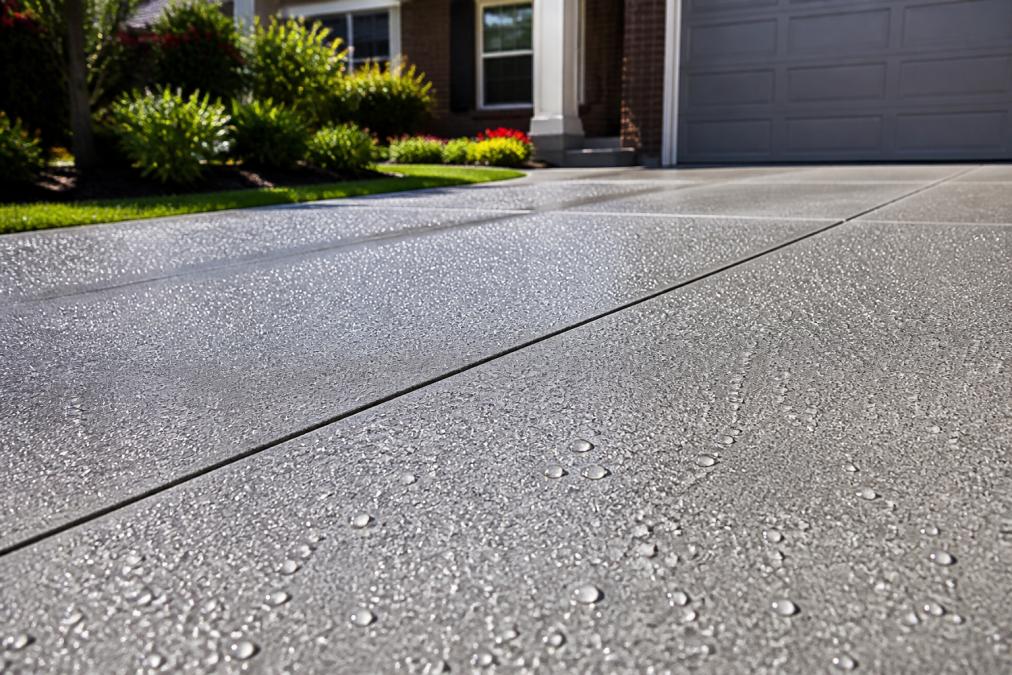
Perth gets more sunny days than almost any capital city in the country, and that sunlight breaks down bare concrete. UV degradation fades colour, chalks the surface and turns the top layer powdery. A sealer with UV blockers acts like sunscreen for your slab.
Bare concrete is porous, so oil, grease, wine and rust soak straight in. Once a stain reaches the substrate, scrubbing will not remove it. A penetrating sealer lines the pores and makes the surface hydrophobic, so spills sit on top.
Sealed concrete needs less work to keep clean: dirt, leaves and grime sit on the surface rather than bonding to it, so a hose-down or quick pressure clean does most of the job.
Wet concrete around pools, paths and patios is a genuine hazard. The right sealer adds a slip-resistant finish with better grip when wet, without making the surface rough.
| Surface area | Slip risk when wet | Best sealer approach |
|---|---|---|
| Pool surrounds | High | Slip-resistant topical sealer |
| Driveways | Medium | Penetrating sealer |
| Patios and paths | Medium | Matte sealer with grip additive |
| Garage floors | Low to medium | Epoxy with anti-slip aggregate |
A sealed, well-kept driveway changes how a home looks from the street: richer colour, an even surface, and a property that reads as well maintained. That first impression counts when selling.
Water is concrete's quietest enemy: it seeps into pores, carries dissolved salts, and causes efflorescence, the white powdery bloom on the surface, plus moisture ingress that weakens the slab over time.
There are two families of concrete sealer, and they work in completely different ways. Picking the wrong one is the most common reason a sealing job fails within a year.
| Feature | Penetrating sealer | Topical sealer |
|---|---|---|
| Chemistry | Silane, siloxane, silicate | Acrylic, polyurethane, epoxy |
| Where it sits | Inside the pores | Film on the surface |
| Look | Natural, matte, slight darkening | Glossy, satin or coloured |
| Breathability | High, moisture escapes | Low, can trap moisture |
| UV behaviour | Stable, does not chalk | Acrylics can yellow and chalk |
| Wear pattern | Wears evenly, no peeling | Scuffs, scratches, peels at edges |
| Salt-air performance | Excellent | Varies; cheap acrylics fail fast |
| Best for | Driveways, paths, exposed aggregate | Decorative patios, garage floors, showpiece areas |
| Maintenance | Reapply when water stops beading | Clean regularly; strip and recoat when worn |
You can seal concrete yourself, but the result depends almost entirely on surface preparation. Most failed DIY jobs skip cleaning and repair, and the sealer peels or fails within a year.
Safe Work Australia guidance on outdoor surface safety
Cost per square metre is the first thing most homeowners want to know, and the number most articles dodge. The honest answer is a range, driven by four things: surface area, condition, sealer type and access.
As a general guide, most residential sealing work falls into these bands per square metre:
| Job type | Typical band (per m²) | Notes |
|---|---|---|
| Reseal over sound, previously sealed concrete | Lowest band | Minimal prep, single coat |
| First seal on clean, sound bare concrete | Mid band | Pressure clean, dry, one or two coats |
| First seal with crack repair and stain treatment | Upper-mid band | Prep dominates the cost |
| Decorative or coloured finish with topical sealer | Upper band | Film-forming product, more care required |
| Epoxy garage coating system | Separate bracket | Not a sealer; includes grinding and multi-coat build |
When you get quotes, ask each provider to break the price into four parts: preparation, repairs, product (brand and type), and number of coats. A dramatically cheaper quote almost always means less prep, a thinner product or a single coat, the job that fails first.
Also ask:
A failed seal is more expensive than a correct one. If a cheap job peels within a year, you pay for stripping, surface repair and a second application, often more than the original professional quote. That is the real cost comparison.
Master Builders Australia guide to home improvement work
How long a concrete sealer lasts depends on the type, surface and local climate. Penetrating sealers generally last longer between coats than topical film-forming sealers, which wear and peel.
Several factors shorten the lifespan of any sealer:
CSIRO research on building materials and durability
The seven benefits stack up: longer life, UV protection, stain resistance, easier cleaning, better safety, stronger curb appeal and a moisture barrier. Together they turn a tired slab into a surface that looks good and lasts.
Resealing frequency depends on the sealer type and how much traffic the surface gets. Penetrating sealers typically need reapplying every 3 to 5 years, while topical sealers may need refreshing every 1 to 2 years. High-traffic driveways and pool surrounds wear faster, so check the surface annually for dullness, water absorption or colour fade. A simple water test, where you splash water on the concrete and see if it soaks in rather than beading, tells you when it is time to reseal.
Sealing does not stop structural cracking caused by ground movement or tree roots, but it does protect against surface-level cracking and spalling. By forming a moisture barrier, a sealer stops water from soaking into the concrete and expanding during temperature changes, which is a common cause of surface deterioration. For existing cracks, a professional resurfacing service can fill and repair them before sealing so the finished surface is smooth and protected.
Yes, sealing old concrete is often worth it, especially if the surface is structurally sound but looks tired or stained. Sealing locks in the existing surface, prevents further UV degradation and makes cleaning easier. It also improves slip resistance when the right product is used. If the concrete has deep cracks or major spalling, resurfacing before sealing delivers a better long-term result. Speak to a specialist to assess whether sealing alone will meet your needs.
You can seal concrete yourself if the surface is clean, dry and in good condition, and you use a quality product suited to the job. However, professional concrete sealing delivers more consistent coverage, better surface preparation and access to commercial-grade sealers that last longer. Professionals also know how to handle moisture issues, apply the right number of coats and avoid common mistakes like trapping moisture under the sealer. For driveways with stains, cracks or high-traffic use, hiring a professional is usually the more cost-effective choice.
Last Updated: September 19, 2026
The first step in repairing cracks in spray on concrete is determining whether you're dealing with a structural or cosmetic problem, as this changes your repair approach.
Structural cracks (typically wider than 3mm) indicate substrate movement and may leak water. Cosmetic cracks are hairline, surface-level, and don't compromise slab integrity.
Structural damage requires professional intervention. Homeowners often misidentify crack severity, alarming-looking cracks may be cosmetic, while hairline cracks can signal deeper problems.
Here's how to tell the difference:
If unsure, treat it as structural until proven otherwise, professional assessment costs far less than a failed repair.
The crack must be completely clean before applying filler or sealant, this determines whether your repair lasts months or years.
Dirt and debris prevent bonding. Remove loose material with a wire brush or compressed air; use a shop vacuum with brush attachment for wider cracks.
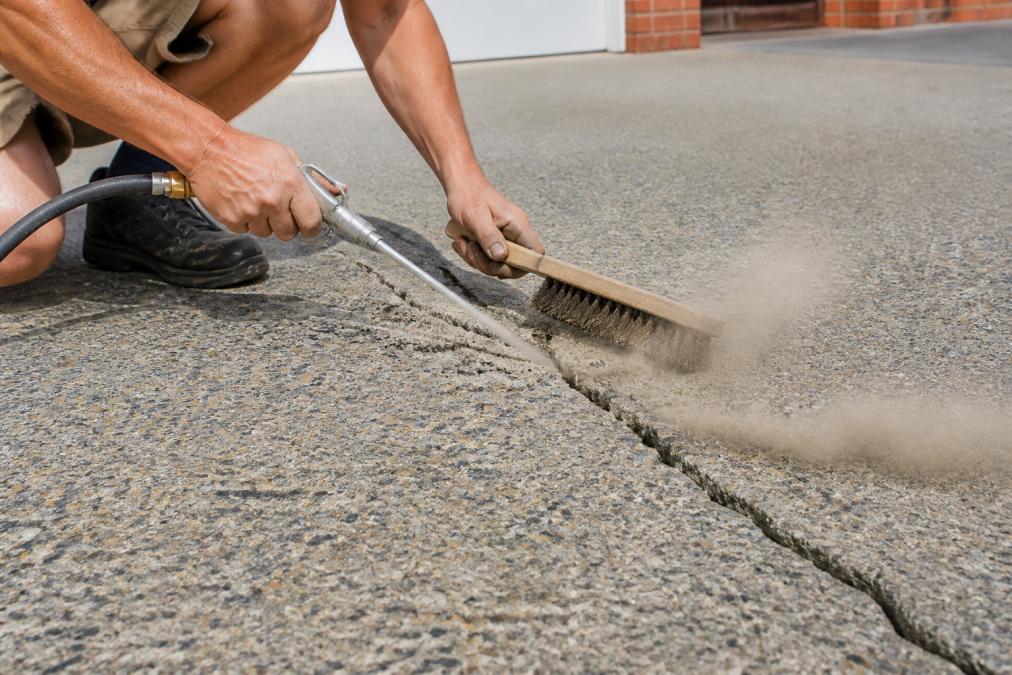
Assess moisture next, trapped moisture prevents proper filler setting. Allow wet cracks to dry completely (typically 24-48 hours depending on conditions).
For wider cracks (3mm+), use a concrete chisel to create a V-shape, which improves bonding surface area.
Once clean and dry, you're ready to move forward.
Choosing the right filler is critical, some perform poorly on decorative surfaces or cause hidden failures beneath spray-on layers.
Understanding spray-on compatibility
Spray-on concrete is a thin decorative layer (3-6mm) bonded to a base slab, where moisture, adhesion, and flexibility interact differently than in solid concrete.
The most common failure is delamination: moisture trapped under the spray-on coating causes blistering or separation. Rigid fillers that trap moisture cause failure within months.
Filler types and spray-on performance
Concrete slurry (cement, water, fine aggregate) is inexpensive and works well for structural cracks in standard concrete. However, slurry shrinks as it cures, leaving a gap. More critically, slurry is rigid and doesn't accommodate the minor flexing that spray-on surfaces experience. It also rarely matches the colour of spray-on concrete, making it unsuitable for visible surfaces. On spray-on systems, slurry often fails because it can't flex with the thin decorative layer.
Polyurethane caulk is the best choice for spray-on concrete repairs. It's flexible, accommodates minor movement without cracking, and bonds well to the porous spray-on substrate. Polyurethane also allows trapped moisture to escape gradually rather than building up pressure beneath the surface. It works particularly well for cracks wider than 3mm and in areas exposed to moisture, like pool surrounds or areas with poor drainage. The downside is cost (typically 2-3 times more expensive than slurry) and the difficulty of colour matching. However, the flexibility and moisture tolerance make it worth the investment for spray-on systems.
Epoxy-based fillers offer superior bonding and durability and cure hard without shrinkage. Epoxy works well for both structural and cosmetic repairs on standard concrete. However, epoxy is rigid when cured and can trap moisture beneath spray-on coatings, increasing delamination risk. Epoxy is best reserved for non-decorative concrete or for structural repairs where flexibility isn't a priority. If you use epoxy on spray-on concrete, ensure the crack is completely dry and consider applying a breathable sealer over the repair to allow moisture escape.
Rapid-setting patching compounds are convenient and widely available, but they often crack as they cure, particularly on spray-on surfaces where flexibility matters. Many contain Portland cement and aggregate, making them rigid and prone to shrinkage. Avoid these for spray-on concrete unless the crack is purely cosmetic and in a low-moisture area.
Moisture management before filling
Assess moisture before selecting filler. Use a moisture meter; if readings exceed 15%, allow 48-72 hours drying before filling.
For cracks in areas prone to standing water, fix drainage problems first or the repair will fail.
Colour and texture considerations
For visible repairs, prioritise tintable fillers. Polyurethane can be painted after curing; epoxy can be tinted with pigments; slurry is difficult to match.
Practical selection guide
Check product labels for spray-on or decorative concrete compatibility. If not mentioned, test on a hidden area first or choose a product with explicit endorsement.
Application technique is as critical as filler choice when repairing cracks in spray on concrete, poor technique is the most common reason repairs fail.
Apply a bonding agent to the crack with a brush, coating thoroughly. Wait per product instructions (usually 5-15 minutes).
Fill the crack with a trowel or putty knife, pressing firmly from end to end. Overfill slightly; for wider cracks, apply in layers.
Use a flexible putty knife or rounded-edge trowel to avoid damaging textured spray-on surfaces.
For cracks longer than 1 metre, work in 30cm sections to maintain consistent pressure before filler sets.
Allow full curing (typically 24-72 hours per label). Moisture and temperature affect curing speed.
Once cured, smoothing and colour matching determine whether the repair blends or stands out.
Smoothing the filled crack
Sand with medium-grit sandpaper (120-150 grit) to level the filler with surrounding concrete.
For textured surfaces, sand the filler to match the texture profile rather than creating a smooth patch.
Use a sanding block for even pressure. Vacuum dust before finishing.
Understanding spray-on colour variation
Spray-on colour varies due to multiple application passes, weathering, sealing, and fading, matching is genuinely difficult.
Photograph in daylight and shade to assess colour variation. If significant, aim to blend rather than perfectly match.
Practical colour-matching techniques
Step 1: Assess the existing colour and finish
Determine if sealed (darker, glossier) or unsealed (lighter, matte). Run your hand over the surface to check.
Note the colour undertone (warm or cool grey), matching undertone is as important as matching shade.
Step 2: Test concrete stain or paint on a hidden area
Hardware stores stock concrete stains and paints designed for spray-on surfaces in various greys, taupes, and earth tones.
Test stain or paint on a hidden area and allow full curing (24-48 hours) before assessing match, wet and dry colours differ.
If the test doesn't match, try a different shade or use spectrophotometer colour-matching services (often free or low-cost).
Step 3: Apply stain or paint to the repair and surrounding area
Apply stain or paint to the repair and a 30-50cm border around it to help the repair blend.
Apply two or three thin coats rather than one heavy coat for better coverage and colour match.
Use appropriate brushes or rollers per product instructions.
Step 4: Match the sheen (if the surface is sealed)
If the original surface is sealed and glossy, apply a matching sealer over the repair after paint cures to unify appearance and protect from moisture and UV.
If unsealed and matte, apply a matte sealer for protection.
Step 5: Texture replication (for heavily textured surfaces)
For pronounced textures (broom finish, aggregate exposure), colour matching alone won't be enough, texture must also match.
For minor texture differences, light sanding helps. For significant differences, apply spray-on concrete over the repair, a specialist task requiring professional equipment.
Accepting visible repairs
For highly visible cracks with complex texture or colour, accept that perfect matching may be impossible.
Sealing the repair and surrounding surface
The best repair is the one you never need. Prevention is far simpler than fixing damage after it occurs.
The decision between DIY and professional repair depends on the crack's size, location, and your comfort level.
DIY works for:
Professional repair is better for:
The best concrete crack filler depends on crack width and depth. For hairline cracks (under 3 mm), liquid concrete sealers or concrete caulk work well. For wider cracks (3-6 mm), use a concrete patching compound or mortar-based filler. For cracks deeper than 6 mm, injection-grade epoxy or polyurethane fillers provide superior bonding and structural integrity. Always choose a filler compatible with spray-on concrete substrates and check the manufacturer's guidance for moisture tolerance and curing times before application.
Colour matching requires testing filler products on a concealed area first. Many concrete patching compounds come in multiple shades; select the closest match to your existing spray-on surface. Once applied, the filler may appear slightly different until fully cured and sealed. Applying a concrete sealer over the repair helps blend the colour and protects the fix. If the existing surface has significant weathering or discolouration, consider sealing the entire area for uniform appearance rather than attempting to match a single repair.
Yes, hairline cracks should be repaired early, even though they appear minor. Small cracks allow moisture to penetrate the substrate, leading to expansion, delamination, and structural deterioration over time. In spray-on concrete, moisture ingress can compromise the bond between layers and accelerate damage. Sealing hairline cracks with a liquid concrete sealant or thin caulk prevents water entry and stops cracks from widening. Early intervention is far more cost-effective than addressing deep structural damage later.
Call a professional if cracks are deeper than 6 mm, show signs of structural movement, affect large areas, or if the surface has delamination or spalling. Professionals assess whether damage is cosmetic or structural, have access to industrial-grade fillers and equipment, and can colour-match and texture-finish repairs seamlessly. They also understand moisture management in spray-on systems and can apply protective coatings to prevent future cracking. If you're uncertain about the damage severity or repair method, professional evaluation protects your investment.
Last Updated: September 18, 2026
Concrete surface preparation for epoxy floor installation is the single biggest factor in whether your floor lasts or fails. Most guides treat prep as a cleaning job, but it is really a bonding and moisture-control job, and the moisture side is where most floors die.
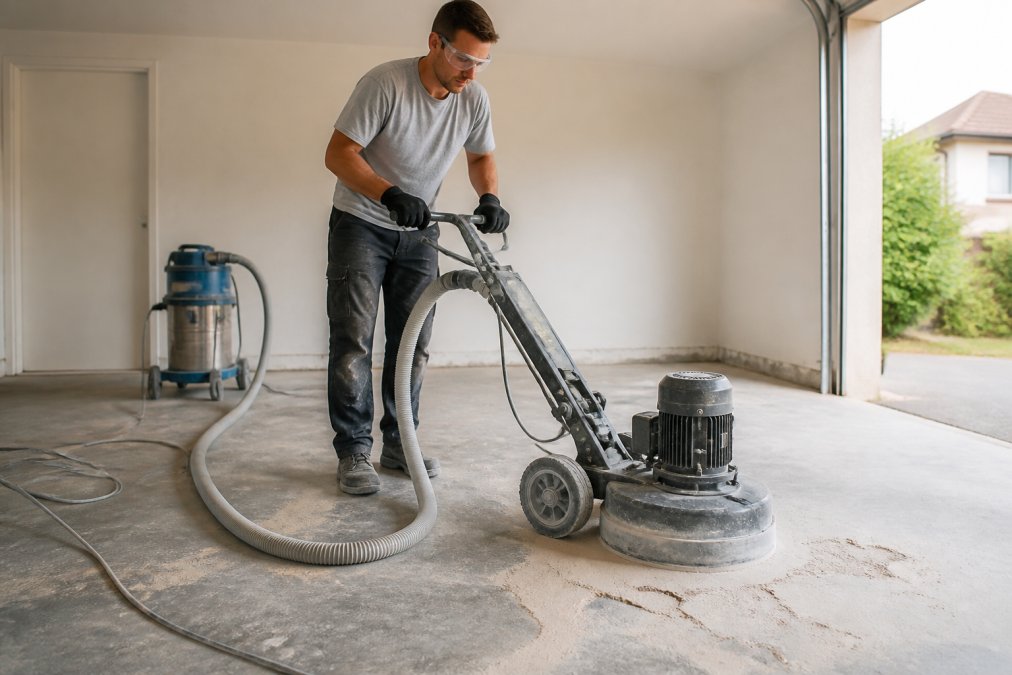
Moisture vapour transmission (MVT) is water vapour migrating up through a slab from the soil beneath. It is not the same as a damp surface: a slab can look bone dry and still push enough vapour up to lift a coating from below, causing epoxy to blister, peel, and delaminate, often within 12 months.
Most manufacturers publish a maximum MVT rate, commonly 3 to 5 lb/1,000 sq ft/24 hr for standard systems, lower for moisture-sensitive primers and topcoats. In-situ RH limits are typically 75-80%. Always check the product data sheet, as limits vary by system and coat thickness.
Once moisture is controlled, the surface must be opened so epoxy can mechanically key in. The benchmark is a Concrete Surface Profile (CSP) of around CSP 2 to CSP 3, a light-to-medium profile like coarse sandpaper. Diamond grinding is the most controllable way to hit it; acid etching works but is harder to keep even and leaves residue that must be neutralised and rinsed.
Cracks and holes need filling before coating. Epoxy filler is the right product, not a cosmetic patch.
The sequence matters:
Etching opens the concrete's pores so epoxy can bond, either chemically or mechanically. Diamond grinding is generally preferred for a more consistent and aggressive profile.
Watch for these signs the profile isn't right:
The right tools for epoxy floor application make the difference between a smooth finish and a streaky mess. You don't need everything here, but you need the essentials.
| Tool | Purpose | Why It Matters |
|---|---|---|
| Diamond grinder | Surface profiling | Opens pores for bonding |
| Squeegee | Spreading the mix | Even coverage without puddles |
| Spike shoes | Walking on wet epoxy | Prevents footprints in the coat |
| Roller with correct nap | Back-rolling | Smooths squeegee marks |
| Mixing paddle and drill | Blending resin and hardener | Consistent cure |
| Moisture meter | Testing the slab | Prevents coating failure |
| PPE and respirator | Safety | Protects against fumes and dust |
Mixing and applying epoxy is where most DIY jobs go wrong. The resin and hardener must be combined at the exact ratio on the label, no guessing.
Here's the sequence:
Epoxy flooring takes roughly 12 to 24 hours to become tack-free and walk-on ready, but full cure takes longer. Most systems need several days before you can park a car or move furniture back.
Timing depends on:
Failed epoxy floors almost always trace back to preparation. Here is how to spot the common problems and what to do about each.
| Problem | Likely Cause | Mechanism | Fix |
|---|---|---|---|
| Peeling or delamination | Moisture or poor profiling | Vapour pressure from below exceeds the coating's bond strength, or the epoxy has nothing to key into | Strip, moisture-test, re-profile to CSP 2-3, recoat |
| Bubbles and blisters | Trapped moisture or outgassing | Air or vapour expands under the curing film and pushes through before it hardens | Test slab, apply a moisture-tolerant primer, roll out with a spiked roller |
| Fish eyes | Oil, silicone, or release-agent contamination | Surface energy is too low for the epoxy to wet out, so it pulls away into craters | Degrease, grind back, re-clean with a solvent wipe |
| Soft or tacky patches | Wrong mixing ratio or incomplete mixing | Unreacted resin or hardener never cross-links, so the film stays plastic | Remove affected area and recoat with a correctly mixed batch |
| Uneven colour | Poor mixing or cold conditions | Pigment and hardener disperse unevenly when the mix is cold or under-blended | Recoat affected areas; work within the product's temperature range |
| Orange-peel texture | Roller nap too long, or coating applied too thick | Solvent or air cannot escape evenly, so the surface cures with a dimpled skin | Sand back and recoat with the correct nap and spread rate |
DIY looks cheaper on paper. It rarely is once you count everything.
DIY is a reasonable choice when:
Hire a professional when:
Epoxy resins and hardeners are hazardous substances. In Australia, the model Work Health and Safety Regulations and the Globally Harmonized System (GHS) for chemical labelling apply to how these products are supplied, labelled, and used in workplaces. For a DIYer, the practical implications are:
Epoxy floor installation rewards patience and punishes shortcuts. The steps that matter most, moisture testing and surface profiling, are the ones most guides skip.
Epoxy flooring typically cures in 24 to 72 hours for foot traffic, but full chemical cure takes 5 to 7 days. Factors like ambient temperature, relative humidity, and the specific epoxy formula affect curing time. In cooler or more humid conditions, allow extra time before placing heavy loads or exposing the floor to water.
Yes, diamond grinding is the preferred method for concrete surface preparation for epoxy. It creates a rough profile that helps the epoxy bond. If grinding isn't possible, acid etching with muriatic acid can work, but it's less consistent and requires careful neutralisation. Always test the surface for porosity and moisture first.
Epoxy can be applied over old concrete if it's structurally sound and free of contaminants. Repair cracks with epoxy filler, remove any existing sealer, and ensure the surface is clean and dry. Moisture testing is critical: if moisture vapor transmission is high, a moisture barrier primer may be needed to prevent bubbling or delamination.
DIY epoxy installation costs less but requires careful surface prep, correct mixing ratios, and proper application tools. Professional installation by a specialist like Spray Pave Pro ensures correct substrate preparation, moisture testing, and high-quality materials, reducing the risk of premature failure. Professionals also have commercial-grade equipment for grinding and mixing.
